Have you ever wondered how to make chocolate bowls with balloons? It might sound a little crazy at first, but this fun project is surprisingly easy and the results are show-stopping! These edible chocolate cups are made by dipping small balloons into melted chocolate, then letting them set into the perfect shape for filling with mousse, berries, ice cream, or whatever dessert your heart desires.
They're the kind of DIY treat that's fancy enough for a dinner party but simple enough to make on a lazy weekend afternoon. If you're entertaining guests or just looking for a creative dessert idea, chocolate bowls made with balloons are a sweet way to impress with minimal effort.
What Are Chocolate Bowls?
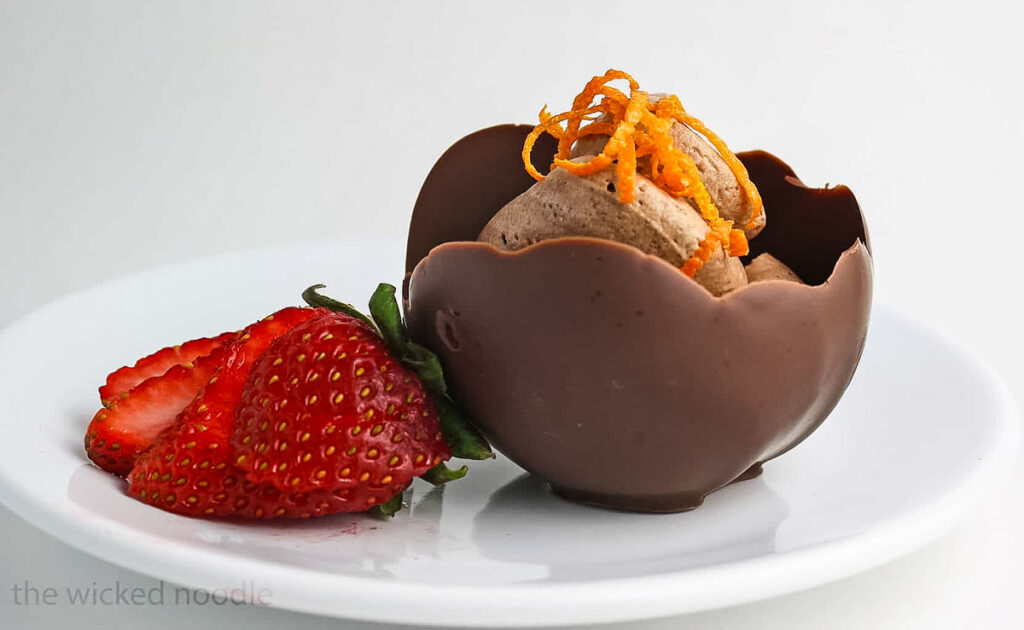
Chocolate bowls (also called chocolate cups or edible dessert bowls) are small, bowl-shaped shells made entirely of chocolate. They're typically formed by dipping the bottom of a balloon into melted chocolate, then allowing it to harden into shape before removing the balloon. The result is a beautifully glossy, sturdy chocolate vessel that's perfect for filling with mousse, ice cream, berries, whipped cream, or any sweet treat you love.
These fun and functional bowls are often made with semi-sweet or dark chocolate, but you can use milk or white chocolate too. They're an easy way to add a wow factor to dessert without needing any fancy tools, and they're as delicious as they are decorative!
Why Use Balloons to Make Chocolate Bowls?
Balloons are the easiest and most accessible tool for shaping chocolate bowls at home. Their rounded shape naturally mimics a bowl, and when the balloons are dipped into melted chocolate, they form a smooth, even shell as the chocolate cools and hardens.
Here's why making chocolate bowls with balloons works so well:
- Size & shape control: Small balloons allow you to control the size and depth of your chocolate bowls depending on how far you dip them.
- Nonstick surface: Once they're deflated properly, balloons release cleanly from the chocolate, leaving behind a smooth interior.
- Budget-friendly: Balloons are inexpensive, easy to find, and don't require any special equipment or molds.
- It's fun for all ages: Using balloons makes this process approachable, even for kids or beginner bakers. Just be sure the chocolate is completely cool to avoid popping!
- It's a fun, creative technique that feels a bit like kitchen magic, and the results are always a crowd-pleaser!
Ingredients and Tools You'll Need
This fun DIY dessert project requires just a few simple ingredients and tools, most of which you probably already have on hand! Have everything ready before you melt the chocolate so you can work quickly while it's at the ideal dipping consistency.
Ingredients
- High-quality chocolate: Semi-sweet, dark, milk, or even white chocolate will work. Look for baking bars or chocolate chips with cocoa butter for best results. You'll need about 6-8 oz to make 4-6 bowls. Ghirardelli is a good choice that's not too expensive.
- Flavor additions (optional): A drop of orange oil, peppermint extract, or espresso powder if you want to infuse the chocolate with extra flavor.
Tools & Supplies
- Small balloons: Choose unprinted, food-safe balloons (water balloons work great!). Avoid using balloons with ink or writing.
- Parchment paper or silicone baking mat: For setting the chocolate bowls.
- Baking sheet: To hold the dipped balloons as the chocolate sets (you can also just set them on parchment paper on the counter if you have the room).
- Microwave-safe bowl or double boiler: For gently melting the chocolate.
- Spoon or small spatula: To help spread the chocolate, if needed.
- Toothpick or pin: To slowly deflate the balloons without popping them.
- Gloves (optional): They help prevent fingerprints on the chocolate bowls.
How to Make Chocolate Bowls with Balloons
Making chocolate bowls with balloons is simple once you know a few key tips. Here's how to do it from start to finish:
- Prep the balloons: Wash and dry the outside of the balloons. Blow up each balloon just enough to form a small, round base (about the size of a teacup). Tie them off and make sure they're clean and dry (any moisture can cause the chocolate to seize).
- Melt the chocolate: Chop or measure your chocolate and place it in a microwave-safe bowl or double boiler. Microwave method: Heat in 30-second intervals, stirring well between each, until smooth. Double boiler method: Gently melt over simmering water, stirring until smooth. Important: Let the melted chocolate cool slightly before dipping-this is crucial. If the chocolate is too warm, the balloons may pop.
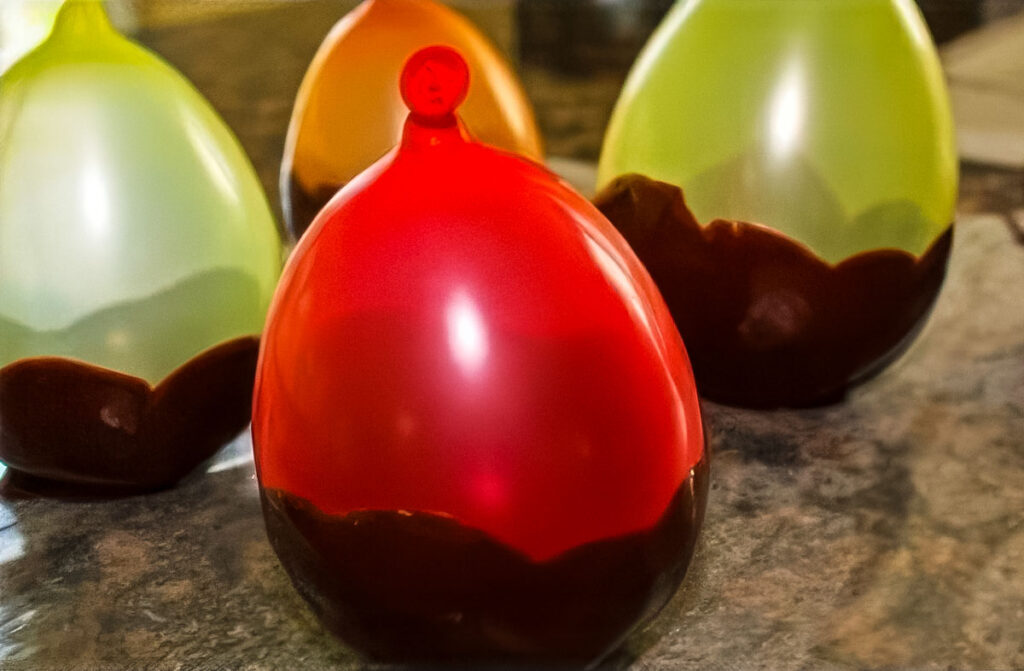
- Dip the balloons: Line a baking sheet with parchment paper or a silicone mat. Once the chocolate is cooled but still fluid, hold a balloon by the knot and dip the bottom into the chocolate. Gently swirl or tilt the balloon to coat it as high up as you'd like your bowl to go. Lift and let any excess chocolate drip off. Place the dipped balloon upright on the lined baking sheet. Repeat with the remaining balloons.
- Let the chocolate set: Leave the balloons at room temperature for 1-2 hours or until fully hardened. To speed things up, you can chill them in the refrigerator for about 20-30 minutes.
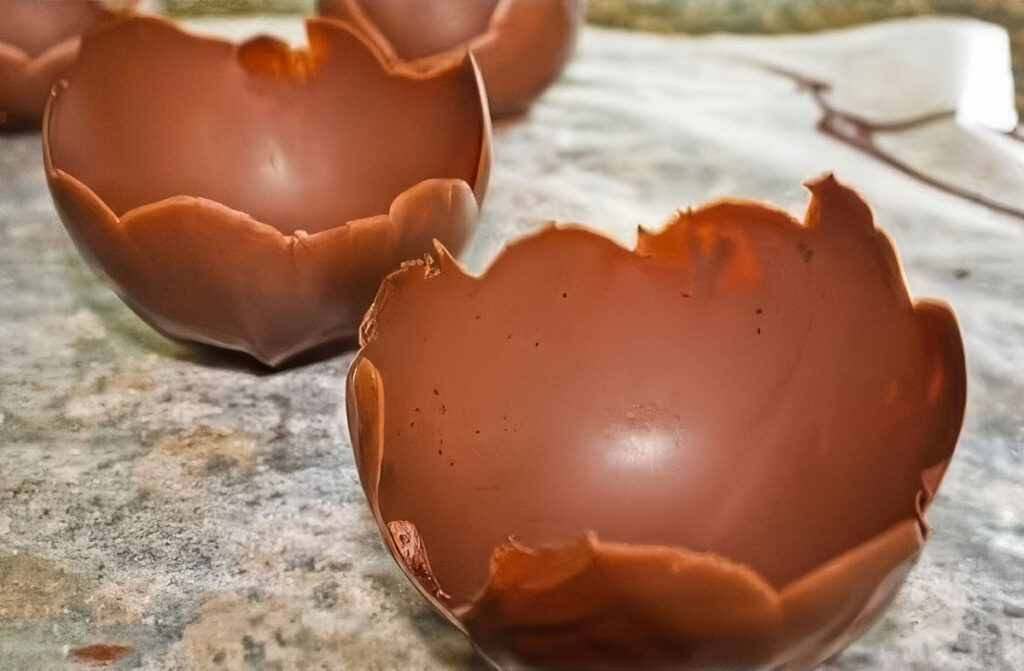
- Release the balloons: Once the chocolate is completely set and no longer shiny, use a pin or toothpick to gently poke a small hole near the knot. Let the air slowly escape (you want to avoid popping). As the balloon deflates, it should naturally pull away from the chocolate. Remove it carefully. If needed, trim the edge of the chocolate bowl slightly to even it out.
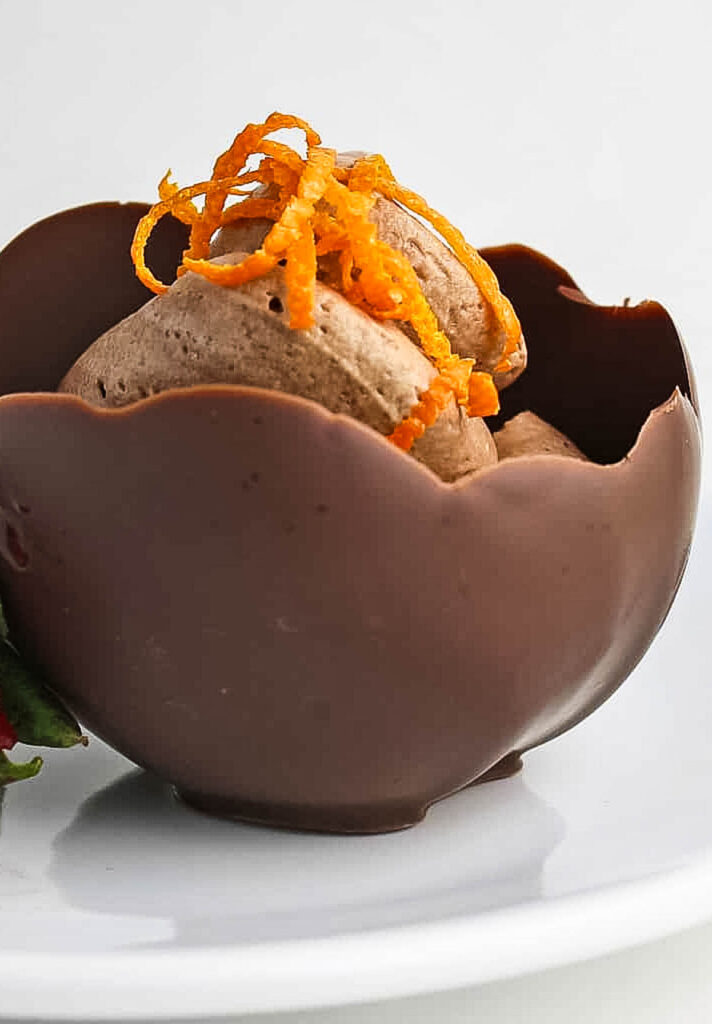
- Fill and serve: Your chocolate bowls are ready to fill! Add mousse, ice cream, berries, whipped cream, or your favorite dessert fillings. Tip: If the bottom of the bowl is uneven, you can very briefly warm it on a plate over hot water to flatten it for more stability.
What to Fill Chocolate Bowls With
Now that you've made your chocolate bowls with balloons, it's time for the fun part - filling them! These edible bowls are so fun and versatile and can be used for both elegant desserts and holiday treats. Here are some of our favorite filling ideas:
Creamy Desserts
- Chocolate mousse
- Tiramisu cream with ladyfinger crumbles
- Vanilla or chocolate pudding
- Mascarpone and Nutella swirl
- Cheesecake filling with crushed graham crackers
- Mini trifles with layers of cake, custard, and fruit
Fruits
- Strawberries and cream: Add small pieces of pound cake, too!
- Fresh berries with lemon curd: Pound cake would be delicious here, too.
- Banana slices and peanut butter mousse
- Chopped mango with coconut whipped cream
Cold & Frozen Treats
- Ice cream sundaes: Add sprinkles, caramel drizzle, and a cherry on top!
- Gelato or sorbet: Perfect for summer!
- Frozen yogurt with fruit and granola
- Turtle candy mix - caramel, pecans, and chocolate drizzle
Fun & Festive
- Holiday candies or chocolate bark chunks
- Add a few creamy chocolate truffles or coconut and rum dessert bites to each bowl
- Trail mix or snack mix for kids' parties
- Mini cookies or brownie bites
- Turtle candy mix - caramel, pecans, and chocolate drizzle
Tip: When filling your chocolate bowls, avoid overly hot fillings or liquids (this can melt or soften the chocolate). Serve shortly after filling, or refrigerate until ready.
Tips and Tricks
Making chocolate bowls with balloons is surprisingly simple, but a few smart tips will help you get flawless results every time. Here's what to keep in mind:
- Cool the chocolate enough: Don't skip this! Let melted chocolate cool until it's just warm to the touch (about 85-90°F). If it's too hot, your balloons may pop. Too cool, and it won't coat smoothly.
- Use small, ink-free balloons: Choose small water balloons or "party balloons" with no printed ink. The smooth surface helps prevent sticking and makes sure they release cleanly.
- Choose the right chocolate: Use high-quality semi-sweet, dark, or white chocolate for the best taste and structure. Chocolate chips work in a pinch but bars with cocoa butter will temper much better.
- Let them set properly: Leave the chocolate to harden at room temperature, or chill the bowls in the fridge for 20-30 minutes. Don't rush it! The chocolate should look dull and firm, not glossy, before deflating the balloons.
- Slowly deflate the balloons: Don't pop the balloons! Gently pierce near the knot and let the air out gradually to avoid cracking the bowls. If any balloon sticks, gently peel it away with clean, dry fingers.
- Use a nonstick surface: Place the dipped balloons on parchment paper or a silicone mat for easy removal.
- Even out the base: If the bottom of your bowl is uneven, quickly warm it on a heated plate to flatten the base.
- Store them properly: Keep empty bowls at cool room temperature or refrigerate them in an airtight container.
When and Where to Serve Chocolate Bowls
Chocolate bowls aren't just a dessert, they're an experience! Here are some ideas for where to serve these gorgeous chocolate bowls with balloons:
- Holiday Parties: Chocolate bowls are a hit at Christmas, Easter, and Valentine's Day. Fill them with peppermint mousse, strawberry cream, or themed candies for holiday-ready treats.
- Birthdays: Perfect for both kids and adults! Create a build-your-own dessert station where guests can fill their bowls with toppings like sprinkles, whipped cream, and candy.
- Dinner Parties & Date Nights: Impress your guests with individually portioned, gourmet-style desserts. Serve the chocolate bowls filled with mousse or berries and cream.
- Graduations, Showers & Celebrations: Chocolate bowls are a great addition to dessert tables at baby showers, bridal showers, graduations, and other milestone events. They look elegant and are easy to serve in large batches.
- Kids' Activities & Family Nights: Making chocolate bowls can be a fun family project on a rainy day or during school breaks. Let the kids decorate and fill their own for a creative treat that's as much fun to make as it is to eat.
- Potlucks & Gatherings: Chocolate bowls travel surprisingly well if packed carefully. Bring a tray to your next potluck filled with mousse or pudding.
If you love easy, no-bake treats that look impressive but take hardly any effort, you've got to try a few more of my favorites! Start with my no-bake chocolate fudge - just three ingredients and it practically makes itself. Or go classic with easy chocolate dipped strawberries and pretzel rods dipped in chocolate, both of which are perfect for gifting or on a holiday dessert try. For something especially simple, pretzel hugs with M&Ms are salty-sweet bites that come together in minutes. And for something extra fun (and adorable), make a batch of chocolate party spoons. They're great for stirring into hot cocoa or wrapping up as edible gifts!
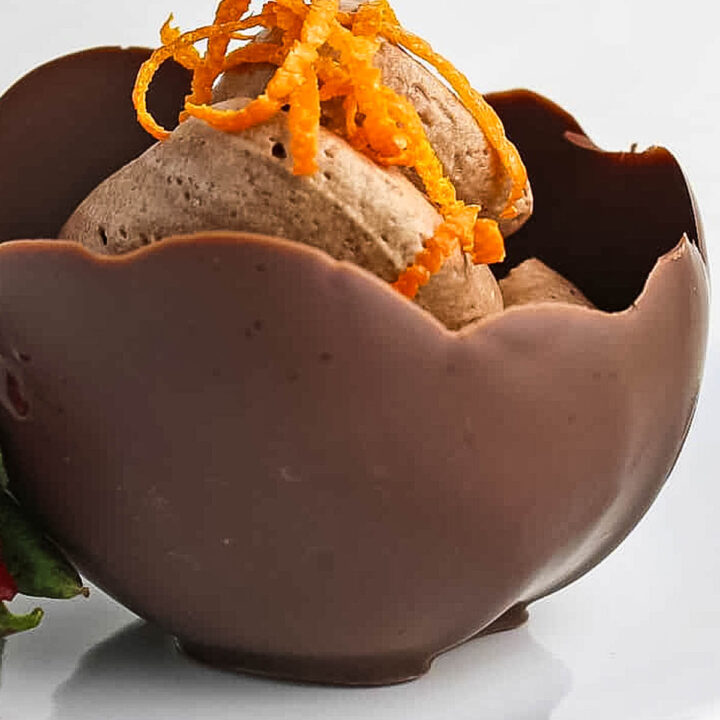
How to Make Chocolate Bowls with Balloons
Making chocolate bowls with balloons is so simple but so gorgeous!
Ingredients
- 8 oz high-quality chocolate
- 4-6 small balloons, washed and dried thoroughly
Instructions
- Prep the balloons: Wash and dry the outside of the balloons. Blow up each balloon just enough to form a small, round base (about the size of a teacup). Tie them off and make sure they’re clean and dry (any moisture can cause the chocolate to seize).
- Melt the chocolate: Chop or measure your chocolate and place it in a microwave-safe bowl or double boiler. Microwave method: Heat in 30-second intervals, stirring well between each, until smooth. Double boiler method: Gently melt over simmering water, stirring until smooth. Important: Let the melted chocolate cool slightly before dipping—this is crucial. If the chocolate is too warm, the balloons may pop.
- Dip the balloons: Line a baking sheet with parchment paper or a silicone mat. Once the chocolate is cooled but still fluid, hold a balloon by the knot and dip the bottom into the chocolate. Gently swirl or tilt the balloon to coat it as high up as you’d like your bowl to go. Lift and let any excess chocolate drip off. Place the dipped balloon upright on the lined baking sheet. Repeat with the remaining balloons.
- Let the chocolate set: Leave the balloons at room temperature for 1–2 hours or until fully hardened. To speed things up, you can chill them in the refrigerator for about 20–30 minutes.
- Release the balloons: Once the chocolate is completely set and no longer shiny, use a pin or toothpick to gently poke a small hole near the knot. Let the air slowly escape (you want to avoid popping). As the balloon deflates, it should naturally pull away from the chocolate. Remove it carefully. If needed, trim the edge of the chocolate bowl slightly to even it out.
- Fill and serve: Your chocolate bowls are ready to fill! Add mousse, ice cream, berries, whipped cream, or your favorite dessert fillings. Tip: If the bottom of the bowl is uneven, you can very briefly warm it on a plate over hot water to flatten it for more stability.
Notes
Fill the balloons with anything you like! See the post for a list of ideas, but a few quick ones are chocolate mousse, pudding, or little candies or M&Ms.
Nutrition Information:
Yield: 6 Serving Size: 1Amount Per Serving: Calories: 202Total Fat: 11gSaturated Fat: 7gTrans Fat: 0gUnsaturated Fat: 3gCholesterol: 9mgSodium: 30mgCarbohydrates: 22gFiber: 1gSugar: 19gProtein: 3g
This data was provided and calculated by Nutritionix.
- Easy Tater Tot Casserole - December 19, 2025
- Sausage Bean Soup (Stovetop or Instant Pot) - December 16, 2025
- Mediterranean Cottage Cheese Bowls - December 4, 2025
riley says
the chocolate bowls tasted delicious. i found a way to spend time with my g-ma. thank you
Kristy Bernardo says
That is wonderful, I'm so glad!
Francesca S. says
Oh wow!!!! What a great idea!! I never in my life would have thought that balloons could be used for that! Really impressive!!! Oh my kids are going to love this; can't wait to get in the kitchen. Thanks!!
Amy says
Do they have a laytex taste?? Just curious...
Kristy says
Hi Amy! Definitely not...I wouldn't want to eat anything that tastes like latex! It just tastes like yummy chocolate 🙂
Fivecannons says
This is the cutest!!! Love it!!
Kstaff27 says
Will these chocolate bowls keep in the deep freezer? Do they need to be wrapped up?
Kristy says
I've never tried to keep them in the freezer so I'm not certain about that. I would definitely wrap them if you try it, though. I'm making them at a kids cooking class I'm teaching next week; I'll try it then and update you!
Mini says
To make around 50 chocolate cups how many chocolate bars do you think I might require. Which brand would you recommend. In room temp do they remain intact (as I do not live in a place having cold temp)or should I keep them in refrigerator
the wicked noodle says
Hi Mini, It really depends on how big you make the cups. I would say at least one bar for 10 cups, but you might want to have a few extra bars on hand just in case some of your balloons break or your chocolate seizes. I typically just use the Ghiradelli brand but there are some great high-quality brands to be found online. The cups do well at room temperature as long as it's not too hot. Hope that helps 🙂
Cindy says
I just had a thought. If you like mousse check out my recipe here:
http://cinderskitchen.blogspot.com/2010/02/chocol...
It is also quick and delicious!
Cindy says
What a great idea! Yum!
ravenouscouple says
What a fantastic creation! We'll have to try this one day. Thanks for the inspiration.
the wicked noodle says
Thanks everyone! They were soooo fun to make! Paula, thanks for letting me be a guest on your fabulous blog!
gaga says
That is so cool!
Mindy says
I love this idea! I can't wait to make them!
Ciaochowlinda says
Clever idea. Just luscious looking.
Natasha - 5 Star Foo says
Wow, these chocolate cups are really gorgeous!
Paula - bell'al says
Thanks again Kristy for a fabulous guest post! I'm so honored you were my first guest! You're welcome to come back any time!
Deb says
OOOOOO...Kristy!!! These look & sound delish & super simple!! I can't wait to try them! Sounds like some good mother-daughters time in the kitchen!
Michelle says
Gorgeous presentation!!
jenn says
Wow!!! That looks so elegant. You've just given me an idea for a little birthday dessert surprise for my mom next month. Thanks.