The Wicked Noodle

  • All Recipes
  • Freezer Meals
  • Dinner Ideas
menu icon
go to homepage
  • All Recipes
  • Freezer Meals
  • Dinner Ideas
search icon
Homepage link
  • All Recipes
  • Freezer Meals
  • Dinner Ideas
×

The BEST Turkey Tetrazzini (with Parmesan-Panko Topping)

November 13, 2014 by Kristy Bernardo 81 Comments

turkey tetrazzini just out of the oven in a black baking dish and a wooden serving spoon scooping out the first serving

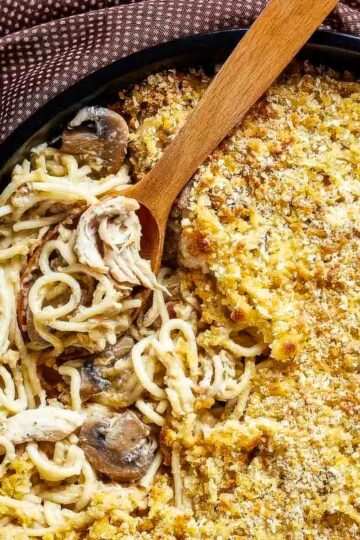
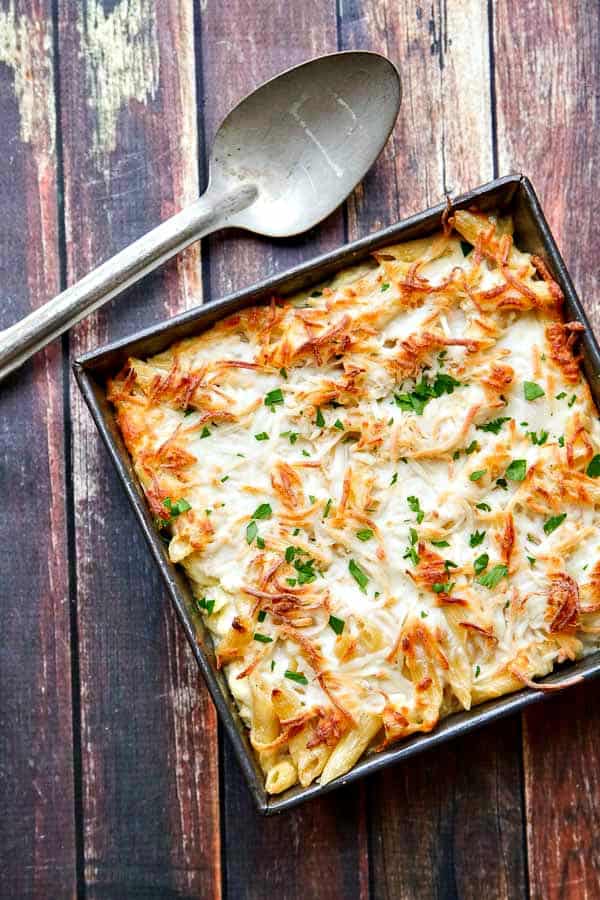
A creamy Turkey Tetrazzini recipe with mushrooms, peas, and a crunchy topping made with panko breadcrumbs and parmesan cheese. So good you'll be roasting two turkeys!

This easy Turkey Tetrazzini recipe is one of my very favorite ways to use up leftover Thanksgiving turkey meat. When leftovers can be transformed into an entirely new dish, I'm always on board. I'm also a sucker for a good topping, and the addition of grated parmesan is on point.

I love how customizable this recipe is, too. Add green chiles for some spice, use mushrooms or peas if you like or simply leave them out. Leftover green beans? Toss 'em in! No leftover turkey? Use a rotisserie chicken! It's all good (literally).

a closeup of turkey tetrazzini with a panko parmesan crust, just out of the oven in a white casserole dish and a serving spoon

I'm not exaggerating in the slightest when I say that I look forward to Thanksgiving leftovers every year just so I can make this turkey tetrazzini. I usually serve it with any vegetable sides we have leftover from Thanksgiving dinner (usually Green Beans Almondine and/or a carrot souffle). And for dessert we almost always have some pumpkin pie cake or pumpkin tres leches cake left (and often both, since I usually get roped into making two desserts since everyone has their favorite).

Ingredients

Many turkey tetrazzini recipes call for canned mushroom soup. This isn't one of them. It's so simple and quick to make a homemade sauce and it will taste so much better!

  • Pasta (spaghetti, linguine, or egg noodles all work well)
  • Unsalted butter
  • Onion
  • Garlic
  • All-purpose flour
  • Chicken stock or broth
  • Heavy cream
  • Leftover shredded turkey
  • Frozen peas
  • Salt & pepper
  • Panko breadcrumbs
  • Grated parmesan cheese
  • Fresh mushrooms (optional)
  • Chopped parsley, for garnishing (optional)

Instructions

  1. Preheat your oven to 400°F and grease a 13x9-inch baking dish or a 2-quart casserole dish.
  2. Cook the pasta just until al dente according to the package directions, then drain it really well. You don't want any water thinning your sauce, so let it sit in the colander for a few minutes while you make the sauce.
  3. Next you'll melt some butter in a large skillet over medium heat. Add the chopped onion and cook it until it's soft and translucent, about 5 minutes (stir it occasionally). Stir in the garlic and cook another minute, stirring it frequently so the garlic doesn't burn.
  4. Now it's time to make the sauce. Sprinkle the flour over the onions and garlic, stirring constantly for about 1-2 minutes to cook out the raw flour taste. Slowly whisk in the chicken broth a little at a time, then the heavy cream, whisking until smooth between each addition. Let it come to a gentle simmer and keep cooking until it's slightly thickened, about 5 minutes. Season with salt and a few grinds of black pepper.
  5. Add the shredded turkey, peas, and the cooked pasta to the skillet. Toss everything together until the noodles are evenly coated in the sauce. Taste and adjust the seasoning at this step! This dish really pops as long as you season it enough.
  6. Now melt some butter in a small bowl (I use the microwave in 15-second increments, then whisk it once there are only a few small solid pieces of butter left). Stir in the panko breadcrumbs and grated parmesan until it's evenly combined.
  7. Pour the pasta mixture into that baking dish you greased in step 1, and spread it out evenly. Sprinkle the breadcrumb topping over the top.
  8. Bake your turkey tetrazzini for 30 minutes, or until the casserole is hot and bubbling and the topping is golden brown. Let it rest for 5-10 minutes before serving so the sauce can thicken.
turkey tetrazzini without peas just out of the oven in a black baking dish and a wooden serving spoon scooping out the first serving

Be sure to pay special attention when seasoning - even after I've seasoned each component and baked it, I typically add a little more salt and a lot of freshly ground black pepper to my own plate - it really brings out the flavor.

The other day I was busy (and therefore absentminded) and forgot to add it. I was thinking, "hmmmm...what's missing from this?" when I remembered I'd forgotten the extra seasoning. It's amazing what a difference the freshly ground black pepper makes!

Tips

  • Don't overcook the pasta! Make sure to cook it just to al dente. It will continue to cook in the oven, and overcooked pasta can turn mushy.
  • Drain the pasta really well. Even a little excess water can thin the sauce and make the tetrazzini soupy. I like to let it sit in the colander for a few minutes while I finish the sauce.
  • Use freshly grated parmesan. It has a better flavor than the pre-grated kind, although that will certainly work if that's all you've got on hand.
  • Taste and season as you go. Taste the sauce before adding the pasta and again before baking. It's the best way to make sure the flavors are balanced and that it's seasoned properly.
  • Don't skip the panko-parmesan topping! It gets a little crispy and is such a nice contrast to the creamy sauce underneath.
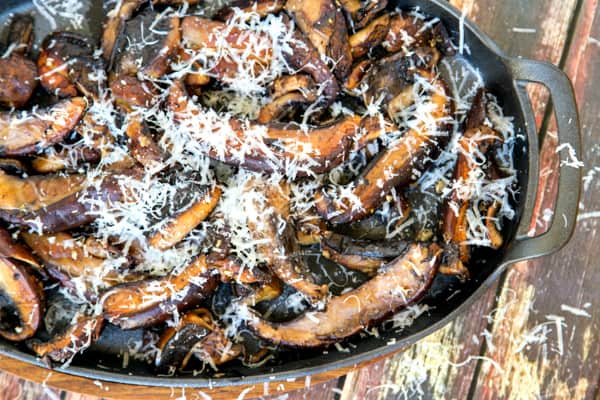
  • Try add-ins depending on what you've got. Sometimes I'll sauté fresh, sliced mushrooms with the onions if I've got some in the fridge. I've also added a can of green chiles to the sauce which was delicious! This recipe is forgiving and easy to customize based on what's in your fridge.
  • Let it rest before serving. Giving the casserole 5-10 minutes to settle helps the sauce thicken.
  • Double it up. If you have extra turkey, make two smaller casseroles. I like to make one for dinner and another to freeze for a busy night later.
turkey tetrazzini just out of the oven in a white casserole dish and a serving spoon scooping out the first serving

Storage and Make-Ahead

Refrigeration: Store leftovers in an airtight container in the refrigerator for up to 4 days. The sauce will thicken slightly as it cools, and it reheats well.
Reheating: Heat individual portions in the microwave, or reheat the entire casserole in the oven, covered with foil, at 350°F for about 20-25 minutes, until it's hot throughout.
Freezing: This dish freezes really well. You can freeze it before or after baking.
- Before baking: Follow the recipe instructions until just before baking. Place the tetrazzini in a freezer-safe dish, cover it tightly with foil, and freeze it for up to 3 months. Thaw in the refrigerator overnight before baking as directed in the recipe.
- After baking: Let it cool completely, then wrap it tightly and freeze. Reheat it directly from frozen in a 350°F oven for about 45 minutes, covered, until it's hot and bubbling.
Make-ahead: You can assemble the tetrazzini up to one day ahead, cover it tightly, and refrigerate. When you're ready to bake it, let it sit at room temperature for 20-30 minutes, then bake as directed in the recipe.
Meal prep: Divide into smaller baking dishes or oven-safe containers before freezing so you can thaw and reheat single servings for easy weeknight dinners. (Quick note: Just today (10/20/25) I ordered some Souper Cubes and this turkey tetrazzini will be perfect for them. I started following SimplySarahHart on TikTok after watching some of her freezer videos. I'll update once I've used them!)

a closeup of turkey tetrazzini without peas just out of the oven in a black baking dish and a wooden serving spoon scooping out the first serving

I'll usually double the recipe and make two dishes, then freeze one for dinner on a night when I know we'll be busy. The recipe makes a lot by itself so if you don't have as many mouths to feed, make the recipe as written but use two 8x8 pans and freeze one.

Frequently Asked Questions

Can I make turkey tetrazzini with chicken instead?

Rotisserie chicken works perfectly and makes this an easy year-round dinner, not just during the Thanksgiving holiday.

Can I use a different pasta shape?

Spaghetti, linguine, or egg noodles work best, but short pasta like penne or rotini works too. Just be sure to cook it just to al dente and drain it well.

What if I don't have heavy cream?

Half-and-half or a mix of milk and cream will work in a pinch. The sauce won't be quite as rich, but it will still be creamy and delicious.

Can I add vegetables besides peas and mushrooms?

Green beans, broccoli florets, or even chopped spinach all work well. I often add leftover vegetables from Thanksgiving (it's a great way to clean out the fridge)! Just be sure you don't add too many additional ingredients or it won't be saucy enough.

Why did my sauce turn out too thin?

Most likely, the pasta wasn't drained completely or the sauce didn't simmer long enough to thicken before baking. It should coat the back of a spoon before you mix in the turkey and pasta.

Why did my topping get too dark?

Every oven runs a bit differently. If the topping starts to brown too quickly, loosely cover the dish with foil for the last 10 minutes of baking.

Can I make it without the breadcrumb topping?

You can, but I strongly recommend keeping it. The contrast between the crunchy top and creamy pasta is what makes this dish soooo good!

How can I make it lighter?

Use milk instead of cream, reduce the butter in the topping and when sautéing the onions and garlic, and add extra vegetables. The flavor will still be good, just not quite as rich.

What should I serve with turkey tetrazzini?

I usually just go with a fresh green salad or roasted vegetables. Garlic bread is always a hit, too! See below for a few recommendations. ⬇️
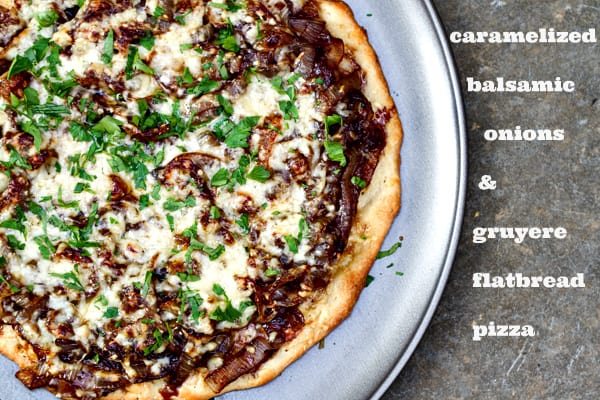
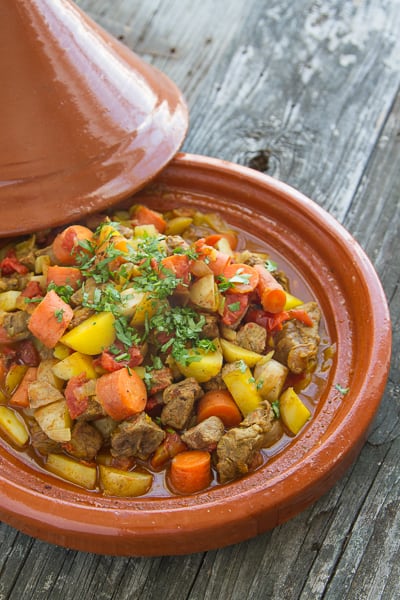
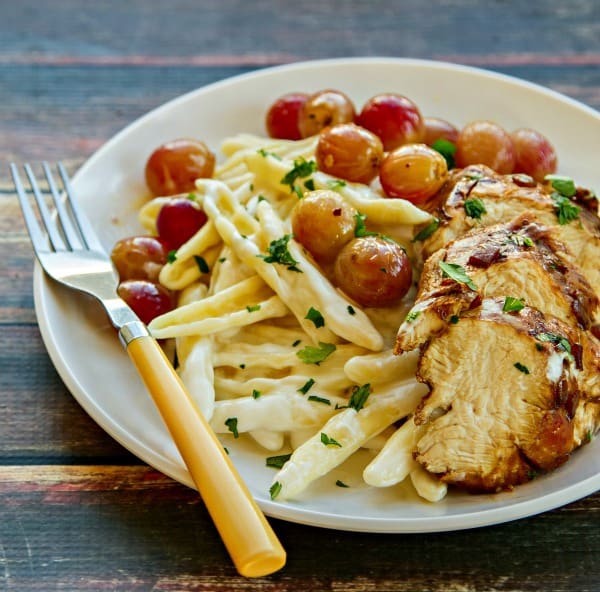
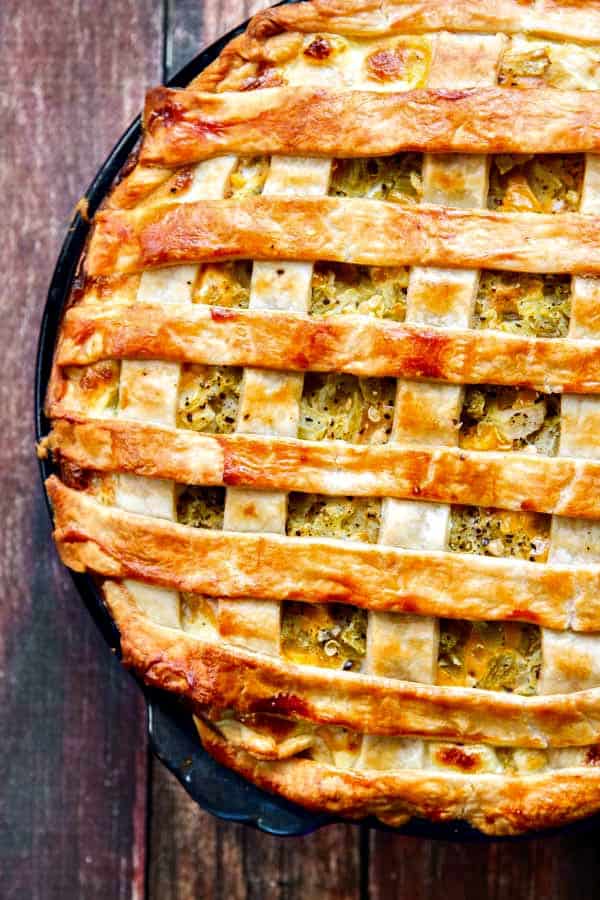
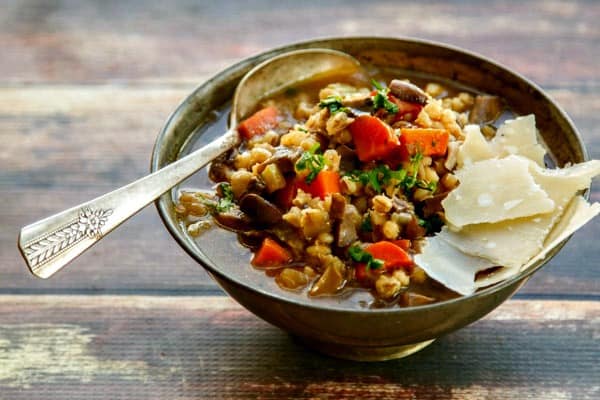
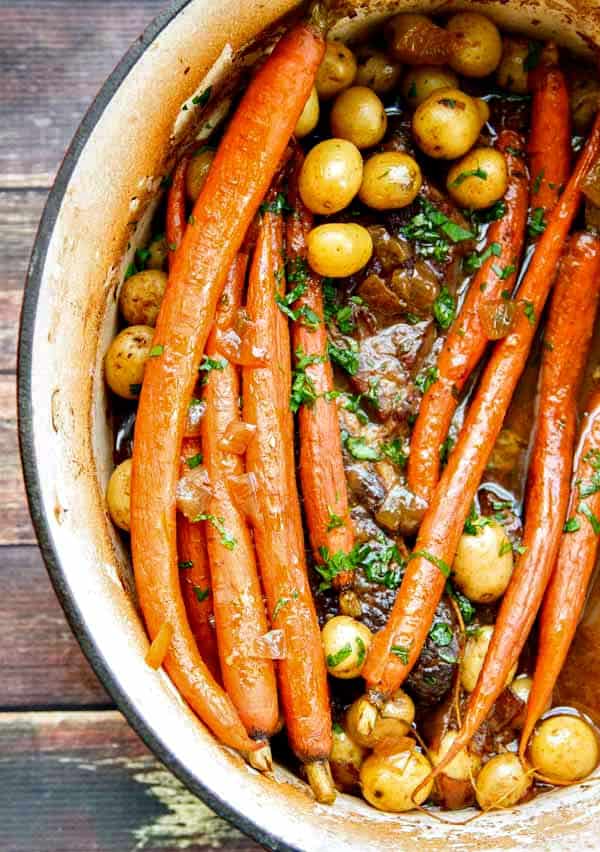
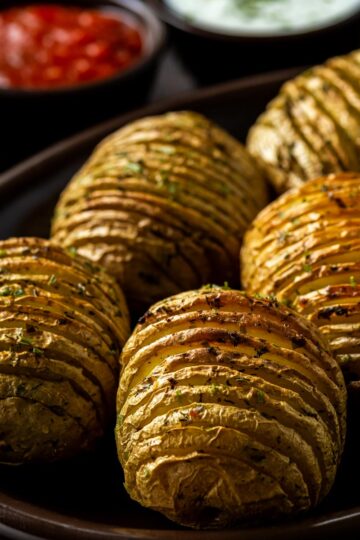
Pairings

These are the dishes we like to serve with turkey tetrazzini:

  • Stuffed Garlic Bread Recipe
    Easiest Stuffed Garlic Bread Recipe
  • Easy Smashed Brussels Sprouts Recipe
    Smashed Brussels Sprouts Recipe
  • cooked snap peas on a white plate set on a wood table
    Garlic Snap Peas Recipe
  • Sauteed Green Beans and Mushrooms
    Sauteed Green Beans and Mushrooms
turkey tetrazzini just out of the oven in a black baking dish and a wooden serving spoon scooping out the first serving

Turkey Tetrazzini with Parmesan-Panko Topping

Yield: 8-10 servings
Prep Time: 20 minutes
Cook Time: 30 minutes
Total Time: 50 minutes

This Turkey Tetrazzini has an incredible panko-parmesan topping and a creamy sauce that go together perfectly.

Ingredients

  • 1 pound spaghetti or linguine, cooked to al dente according to the package directions (egg noodles are also fine)
  • ½ cup unsalted butter, divided
  • ½ sweet onion, chopped
  • 2 garlic cloves, minced
  • ¼ cup all-purpose flour
  • 3 cups low-sodium chicken stock or broth
  • 2 cups heavy cream
  • 1 teaspoon coarse salt, divided (or to taste)
  • freshly ground black pepper
  • 2-4 cups shredded leftover turkey
  • 1 cup frozen peas
  • 1 cup panko breadcrumbs
  • ½ cup freshly grated parmesan

Instructions

  1. Preheat the oven to 400°F.
  2. Heat a large skillet over medium heat. Add ¼ cup butter and, once it's melted, add the onions. Cook until it's soft and translucent, about 5 minutes. Add the garlic and cook for one minute more. Sprinkle the flour over the onions, cooking for one to two minutes more, stirring occasionally.
  3. Whisk in the chicken broth and heavy cream. Bring it to a strong simmer, reduce the heat and cook until it's slightly thickened, stirring occasionally, about five minutes. Stir in ½ teaspoon salt.
  4. Stir in the turkey, cooked noodles, and the frozen peas (you may want to use a large mixing bowl for this). Add more salt and pepper to taste. Pour the mixture into a greased 2-quart casserole dish or 13x9 pan.
  5. Melt the remaining butter in a microwave-safe bowl. Add the breadcrumbs and parmesan, mix it thoroughly. Sprinkle the breadcrumb mixture over the top of casserole.
  6. Bake for 30 minutes or until it's hot and bubbling and the topping is lightly browned.

Notes

If adding mushrooms, add them with the onions and cook until their liquid has been released and evaporated. I usually add around 8-16 oz.

This recipe makes a lot, so you can make two 8x8 pans and freeze one for later if you like.

Nutrition Information:
Yield: 10 Serving Size: 1
Amount Per Serving: Calories: 645Total Fat: 37gSaturated Fat: 20gTrans Fat: 1gUnsaturated Fat: 14gCholesterol: 201mgSodium: 722mgCarbohydrates: 35gFiber: 2gSugar: 5gProtein: 41g

This data was provided and calculated by Nutritionix.

© Kristy Bernardo
Cuisine: Italian / Category: Dinner
The BEST Turkey Tetrazzini (with Parmesan-Panko Topping)

Goat Cheese Pasta with Balsamic Chicken & Roasted Grapes

November 12, 2014 by Kristy Bernardo 50 Comments

Balsamic Chicken with Goat Cheese Pasta & Roasted Grapes - Everyone needs an easy, upscale dish for entertaining or a special occasion. All the components of this delicious dish come together quickly and the flavor is out of this world!

Every cook should have an upscale dish they can pull out for special occasions. This easy goat cheese pasta with roasted grapes fits that bill perfectly!

Balsamic Chicken with Goat Cheese Pasta & Roasted Grapes - Everyone needs an easy, upscale dish for entertaining or a special occasion. All the components of this delicious dish come together quickly and the flavor is out of this world!

Every cook should have an easy, upscale dish that they can pull out for special occasions.

Something that won't break the bank yet has ingredients to impress; won't take up all your time in the kitchen, but presents so well everyone assumes it did.

This incredibly easy dish uses simple chicken breasts with a quick balsamic pan sauce as its anchor. A lightning fast goat cheese sauce coats Cicatelli pasta, then gets topped with the star ingredient - roasted grapes.

Often, during fall, we forget that grapes are still ripe and ready for mixing into our favorite fall recipes. They are, of course, wonderful for snacking too! Who doesn't love a sweet grape fruit salad or a chicken salad sandwich with crisp and crunchy grapes? They're even delicious kept in the freezer for a cool summer afternoon snack.

But they're rarely seen in hot, savory dishes like this Goat Cheese Pasta with Balsamic Chicken and Spicy Roasted Grapes. This dish would work on its own, but the roasted grapes really take it up a notch, making it an elegant, healthful and easy dish for entertaining.

It's a rare day when I don't have some grapes in my kitchen. You probably remember that I'm a fan of juicing and I looove adding healthy, fresh grape juice to keep my green juices on the sweet side. Fresh grapes are the source of the heart-healthy polyphenols found in red wine, including the widely researched resveratrol (which is found in grapes of all colors, not just the red ones).

Just one serving of grapes (¾ cup) contains just 90 calories, no fat, no cholesterol and virtually no sodium and is also an excellent source of Vitamin K (which may also help maintain bone health) - all reasons why I love adding it to my healthy morning juice regimen (not to mention my pasta dishes)!

Fresh grape juice is also fantastic in cocktails!

HOW TO STORE GRAPES?

Selection and Storage Suggestions

  • Grapes are fully ripe when they arrive at the supermarket.
  • Look for plump grapes with pliable green stems.
  • Keep grapes unwashed and refrigerated until ready to use, then rinse with cold water and serve or add to recipes.

Usage

  • Grapes are a healthy, portable snack ideal for eating anytime, anywhere. Snacking is the number-one use for fresh grapes.
  • Fresh California grapes add color, crunch, and taste to meals. Try them in salads, side dishes, entrees, and desserts.
  • Frozen grapes are a staple in many households. They are a good alternative when you are craving sweets or ice cream, and they make the perfect snack.
  • Fresh grapes are often covered with a natural bloom, which is a delicate white substance common to many soft fruits. The bloom protects the grape from moisture loss and decay. Bloom is sometimes mistakenly thought of as dust.
Balsamic Chicken with Goat Cheese Pasta & Roasted Grapes - Everyone needs an easy, upscale dish for entertaining or a special occasion. All the components of this delicious dish come together quickly and the flavor is out of this world!

If you've never roasted grapes before, you're in for a real treat! It takes just minutes and their flavor becomes even sweeter. Just toss them in a little olive oil, season lightly with salt then, for a little extra oomph, sprinkle on a few pinches of crushed red pepper flakes. It's a perfect spicy-sweet combination!

You can even leave them on the vine. I especially like to do that when serving grapes on a cheese tray; I often put out fresh, uncooked grapes then offer another bunch that've been roasted.

Balsamic Chicken with Goat Cheese Pasta & Roasted Grapes - Everyone needs an easy, upscale dish for entertaining or a special occasion. All the components of this delicious dish come together quickly and the flavor is out of this world!

Goat Cheese Pasta with Balsamic Chicken & Roasted Grapes

Yield: 4-6 servings
Prep Time: 10 minutes
Cook Time: 20 minutes
Total Time: 20 minutes

Keep this easy recipe on hand for your next dinner party!

Ingredients

  • 2 pounds fresh red California grapes
  • 2 tablespoons extra-virgin olive oil
  • 3-4 large pinches crushed red pepper flakes, a pinch is three fingers & a thumb!
  • 3-4 boneless, skinless chicken breasts
  • 1 large shallot, chopped
  • 1 cup balsamic vinegar
  • 1 pound Cicatelli pasta, Penne would be a good substitute
  • 1 15 ounce log goat cheese, softened
  • 1 cup reserved pasta water
  • fresh chopped parsley, for garnish

Instructions

  1. Preheat oven to 400F and a large skillet over medium-high heat.

For Chicken:

  1. Add oil and, when hot, add chicken. Cook for 4 minutes or so until nicely browned on one side. Flip chicken, cook another few minutes then cover to finish cooking through (reduce heat if necessary). Remove chicken from pan and keep warm.
  2. Add shallots to pan with a little extra oil if necessary. Scrape up browned bits on bottom of pan and cook shallots for a few minutes or until starting to soften. Add balsamic vinegar, turn up heat to medium-high and return chicken to pan. Cook until sauce is starting to thicken and chicken is heated through, about five minutes (sauce will continue to thicken as it cools).

For grapes:

  1. Place grapes on a sheet pan in a single layer. Drizzle with olive oil just to coat, sprinkle lightly with kosher salt then crushed red pepper flakes. Toss with your hands then roast for 5-8 minutes or until grapes are just starting to split. Remove from oven and set aside (grapes can be served at room temp).

For pasta:

  1. Cook pasta according to package directions.

For goat cheese sauce:

  1. Place softened goat cheese in a medium bowl and add ½ cup hot pasta water. Combine throughly until a sauce forms, adding additional pasta water until you reach desired consistency. Season to taste with kosher salt and freshly ground black pepper.

To assemble:

  1. Divide hot pasta among dinner plates. Top with goat cheese sauce. Add a few slices of chicken and top with extra balsamic sauce. Add roasted grapes, garnish with freshly chopped parsley and serve immediately.
Nutrition Information:
Yield: 6 Serving Size: 1
Amount Per Serving: Calories: 609Total Fat: 24gSaturated Fat: 12gTrans Fat: 0gUnsaturated Fat: 10gCholesterol: 101mgSodium: 400mgCarbohydrates: 52gFiber: 3gSugar: 19gProtein: 45g

This data was provided and calculated by Nutritionix.

© Kristy Bernardo
Cuisine: American / Category: Dinner
Goat Cheese Pasta with Balsamic Chicken & Roasted Grapes

The Secret to AMAZING Cheesy Broccoli Soup

November 5, 2014 by Kristy Bernardo 60 Comments

Cheesy Broccoli Soup is fast, easy and delicious - the trick to maximum flavor is roasting your broccoli!

Cheesy Broccoli Soup is fast, easy and delicious - the trick to maximum flavor is roasting your broccoli!

Cheesy Broccoli Soup is fast, easy and delicious - the trick to maximum flavor is roasting your broccoli!

Broccoli is one of those vegetables that took me a long time to love. I would eat it if it's on my plate and - with the right seasoning - even enjoy it. It wasn't until I discovered the magic of roasting vegetables at high temperatures that I began wanting to make it at home.

These days I can eat a big bowl of broccoli for dinner and be perfectly happy. Especially when a good dose of salt, black and crushed red peppers are involved. When I roasted the broccoli for this Cheesy Broccoli Soup I had to force myself to stop snacking on it or I wouldn't have had enough for the soup (it's those crispy little bits that get me)! If you love roasted broccoli, too - or if you haven't tried it this way - you may want to make a little extra. Trust me on this one.

Roasting the broccoli gives the soup a lot more flavor than if you just simmered it along with the potato and onion. If you're really pressed for time you could certainly do it that way, but once you roast you'll never go back.

Cheesy Broccoli Soup is fast, easy and delicious - the trick to maximum flavor is roasting your broccoli!

I make this Cheesy Broccoli Soup often, especially when I'm home working and need something quick and healthy for lunch. You may have noticed that I'm slightly addicted to soups these days (scroll down for more soup recipes); they're just so easy, quick and the leftovers are usually better the second and third time around. This broccoli soup recipe has just six ingredients, too - perfect for a lazy rainy or snowy day!

  • Wild Mushroom Brie Soup with Parmesan-Pepper Croutons
  • Chicken Tortilla Soup with Hatch Chiles
  • Lobster Bisque with Old Bay Oyster Crackers
  • Lentil Soup Recipe with Parmesan and Smoked Sausage
Cheesy Broccoli Soup is fast, easy and delicious - the trick to maximum flavor is roasting your broccoli!

Cheesy Broccoli Soup (Roast Your Broccoli!)

Yield: 8 servings
Prep Time: 10 minutes
Cook Time: 40 minutes
Total Time: 40 minutes

The extra step of roasting your broccoli adds so much depth of flavor you can't get otherwise!

Ingredients

  • 4 tablespoons olive oil, divided
  • 1 large head broccoli, cut into small to medium-sized florets
  • 1 medium sweet onion, chopped
  • 1 medium russet potato, diced
  • 1 14.5 ounce can low-sodium chicken broth
  • 1 pint heavy cream (or 2 cups of half & half or whole milk)
  • 2 cups shredded sharp cheddar cheese
  • coarse salt & freshly ground black pepper, to taste

Instructions

  1. Preheat oven to 400F.
  2. Drizzle broccoli florets with 2 tablespoons olive oil, season with kosher salt and toss well with your hands. Place in preheated oven and roast until browning well, about 20 minutes or so. Set aside.
  3. Meanwhile, heat remaining olive oil in a large soup pot. Add onions and saute until soft and translucent, about five minutes. Add potato and chicken broth. Simmer until potato is soft, about 15-20 minutes (depending on size of your potato pieces).
  4. Add cream and broccoli. Using an immersion blender, blend soup until thick and fairly smooth. Heat mixture just until very hot (do not boil). Stir in cheese until melted and incorporated fully. Season to taste with salt and pepper.
Nutrition Information:
Yield: 8 Serving Size: 1
Amount Per Serving: Calories: 550Total Fat: 48gSaturated Fat: 26gTrans Fat: 1gUnsaturated Fat: 18gCholesterol: 124mgSodium: 456mgCarbohydrates: 14gFiber: 2gSugar: 5gProtein: 18g

This data was provided and calculated by Nutritionix.

© Kristy Bernardo
Cuisine: American / Category: Soups and Stews
The Secret to AMAZING Cheesy Broccoli Soup

Chicken, Green Chile and Potato Pie

November 4, 2014 by Kristy Bernardo 77 Comments

Easy as Chicken, Green Chile and Potato Pie! A lost recipe that a reader requested get recreated - yep, it's that good!

This delicious recipe for Chicken, Green Chile and Potato Pie will become a family favorite!

Easy as Chicken, Green Chile and Potato Pie! A lost recipe that a reader requested get recreated - yep, it's that good!

Last month I received an email from Cassie, a reader:

A few months back I made your Chicken and Green Chile Potato Pie recipe.  It was fantastic!  I went to your site today to get the recipe so that I could make it again and it was gone. Is there a way I can get/find the recipe?

I'd lost a handful of recipes some time ago due to a technical glitch during a site redesign (something I did on my end). Most were easily recreated but there were a few I hadn't had the chance to get to. I love hearing from people who have tried and loved my recipes - it's what I love more than anything else about writing a food blog - so I really wanted to get this potato pie recipe up and running.

This simple savory pie comes together much quicker than you might think. Of course, I use a prepared pie crust and other easy ingredients like a rotisserie chicken (or I'll make chicken stock and use the meat from that if I'm not short on time), canned chiles (although nothing beats roasting your own) and even a bag of sliced Simply Potatoes if I'm really short on time (although slicing two potatoes only takes a couple of minutes).

It would make an AWESOME dish for Thanksgiving leftovers, too - turkey would definitely work here. I always seem to crave something with a bit of spice after Thanksgiving and this potato pie really fits the bill. Another favorite is cottage pie with parmesan potatoes!

Easy as Chicken, Green Chile and Potato Pie! A lost recipe that a reader requested get recreated - yep, it's that good!

I'm so grateful to Cassie for reminding me how much I love this easy recipe; I had forgotten it with all the other recipes swimming around in my head 🙂 I'm always open to requests so please feel free to leave me a comment or send an email anytime, even just with questions or to say hello! And try this Chicken, Green Chile and Potato Pie, would ya'? You'll be glad you did!

Easy as Chicken, Green Chile and Potato Pie! A lost recipe that a reader requested get recreated - yep, it's that good!

Chicken, Green Chile and Potato Pie

Yield: 6 servings
Prep Time: 15 minutes
Cook Time: 45 minutes
Additional Time: 15 minutes
Total Time: 1 hour 15 minutes

This easy savory pie recipe not only looks gorgeous but tastes amazing!

Ingredients

  • 1 package unbaked pie shells, 2 pie shells total
  • 5 eggs, four whole eggs and one yolk, reserve egg white from fifth egg
  • ¾ cups heavy cream
  • ½ cup whole milk
  • 2 poblano peppers, roasted, peeled and chopped (or 2 cans diced green chiles)
  • 1 t kosher salt
  • ½ t freshly ground black pepper
  • 2 russet potatoes, peeled and sliced very thin
  • 2-3 cups cooked, shredded chicken (rotisserie works great for this)
  • 2 cups shredded mexican-blend or cheddar cheese

Instructions

  1. Preheat oven to 425F.
  2. Beat eggs in a medium-sized mixing bowl. Whisk in cream and milk. Add green chiles, salt and pepper and stir well.
  3. Place one pie crust in the bottom and up the sides of a pie pan. Add potatoes in one flat layer, then chicken and cheese. Pour chile-egg mixture carefully over the top (the pie pan will be very full), taking care to ensure that the green chiles are spread evenly over the top.
  4. Top with second pie crust (a lattice style is easy and looks pretty) and brush with reserved egg white. Bake in preheated oven for 45 minutes or until egg and potatoes are cooked through (top with foil halfway through baking if crust gets too browned).
  5. Allow pie to cool for 15 minutes, then cut into pieces and serve.
Nutrition Information:
Yield: 6 Serving Size: 1
Amount Per Serving: Calories: 899Total Fat: 50gSaturated Fat: 23gTrans Fat: 1gUnsaturated Fat: 23gCholesterol: 518mgSodium: 858mgCarbohydrates: 49gFiber: 3gSugar: 14gProtein: 61g

This data was provided and calculated by Nutritionix.

© Kristy Bernardo
Cuisine: American / Category: Dinner
Chicken, Green Chile and Potato Pie

Rumaki (Bacon Wrapped Water Chestnuts)

November 3, 2014 by Kristy Bernardo 73 Comments

a closeup of rumaki (bacon wrapped water chestnuts)

Remember this fantastic appetizer from the 70's? Rumaki are made of water chestnuts that have been wrapped in bacon, then baked and coated with a sweet-spicy glaze. They're easy to make and always fly off the plate!

Bacon Wrapped Water Chestnuts were big back in the day. My mom made these countless times and even back then I was eating them by the dozen. They're addictive: crunchy water chestnut meets crispy bacon and a sweet, sticky sauce.

a white plate filled with rumaki (bacon wrapped water chestnuts) on a wood table

Any appetizer wrapped in bacon always gets my vote. Since these have a good bit of crunch to them, I like to pair them with something smooth and creamy (hot crab and artichoke dip or a smoked queso dip are both good choices).

The rumaki sauce is made with just ketchup and brown sugar with a few dashes of Worcestershire. Don't skip the Worcestershire, it adds that extra little something. I like to add a few dashes of Sriracha for some spice, too. You can never go wrong with a sweet & spicy combination.

Don't let the fact that these Bacon Wrapped Water Chestnuts are vintage scare you off. They make a great party appetizer and are perfect football food, but be sure to double or triple the recipe if you have guests over (they really do disappear quickly)!

a white plate filled with rumaki (bacon wrapped water chestnuts) on a wood table next to a white towel

Ingredients

  • Whole water chestnuts: They come in cans at most grocery stores, and can usually be found in the canned vegetable aisle.
  • Bacon: Don't use thick-sliced bacon for this recipe as it will take too long to crisp up.
  • Ketchup: Any brand will work, so just use your favorite.
  • Light brown sugar: The sugar will help the sauce to caramelize and get that sticky glaze.
  • Worcestershire sauce: All you need are a few dashes, but it adds a lot of flavor to the sauce, so don't skip it!
  • Sriracha or other hot sauce: Add more of this if you like a little spice. The spicy-sweet combination is so good!
  • Toothpicks: These need to be soaked in water for 30-60 minutes before assembling. I often forget to plan ahead and have made them many times without the soak. The toothpicks turn black but are otherwise fine and still hold together, so don't stress too much about this step if you're short on time.
a closeup of rumaki (bacon wrapped water chestnuts)

Instructions

  1. Set your oven to 375°F so it can preheat while you're getting the rumaki ready.
  2. Place a wire rack over a sheet pan and set it aside. The wire rack is important for the bacon to get crispy on all sides. You can also line the pan with parchment paper for easy cleanup.
  3. Grab a small mixing bowl and add the ketchup, brown sugar, Worcestershire sauce and Sriracha. Mix it until it's completely combined, then set it aside.
  4. Slice your bacon into thirds crosswise. Wrap one piece of bacon around a water chestnut and secure it with a toothpick (watch the video above to see this in action). Place each wrapped water chestnut onto the wire rack, and repeat this until bacon and water chestnuts are gone. (You might have a few tiny strips of bacon left, so when that happens, I usually just squeeze them onto the rack for a little extra treat.)
  5. Bake the rumaki in your preheated oven until the bacon is starting to get crispy (around 30 minutes or so). Remove them from oven and, using a basting brush, dab the sauce all over each one.
  6. Return them to oven and continue cooking them until bacon is crisp and sauce is sticky and thick, another 10-15 minutes.
  7. Serve them immediately, although they'll still taste great at room temperature. They'll go quickly!
a white plate filled with rumaki (bacon wrapped water chestnuts) on a wood table

Additional Notes

  • Rumaki are traditionally wrapped with both water chestnuts and a little chicken liver. It's delicious this way, so feel free to add some if you like. Just halve the water chestnuts so the bacon can still wrap around them easily.
  • Try soaking the water chestnuts in soy sauce for 15-30 minutes before wrapping them with the bacon.
  • Make sure to use all of the sauce by basting the Rumaki really well on all sides.
  • If you're serving these to a crowd, consider doubling or tripling the batch. Assemble them so they're ready for the oven, and when one batch is done, pop the next one in the oven. This way you'll have a new batch coming out every 45 minutes.
  • You can assemble bacon wrapped water chestnuts a day in advance. Keep them covered in the fridge and add an extra 5 minutes to the first bake since they'll be cold going in.
  • To get extra-crispy bacon: Use a slightly higher oven rack position or switch to convection for the final 5-10 minutes. Keep a close eye on them so the glaze doesn't burn.
  • If the glaze looks a little loose after mixing, let it sit for 10-15 minutes. The brown sugar dissolves and thickens slightly, which helps it cling better.
  • The fat will drip as the bacon cooks. If the sheet pan starts getting smoky (older ovens do this), slide it out, carefully wipe the pan beneath the rack, and return it to the oven.
  • You can bake them straight on parchment paper without the rack, but the bottoms won't get crispy. If you don't have a rack, flip them once halfway through.
  • If your water chestnuts are really large, you can cut them in half so the bacon fits better.
  • Don't use colored toothpicks! The color can bleed and doesn't look appetizing.
  • If you're transporting these, bake them completely at home, then just warm them on a foil-lined sheet at 350°F for 10 minutes once you arrive.
  • Leftovers (rare, but it happens): Store the leftovers in the fridge and reheat them in an air fryer for a few minutes.

Related Recipes

Looking for more appetizer ideas? Try these:

  • CRISPY Baked Lemon Pepper Chicken Wings! FOUR ingredients, so much FLAVOR! Double the batch, they go FAST!
    Crispy Baked Lemon Pepper Wings - 4 ingredients!
  • Bacon Wrapped Pickles on a plate with a bowl of dipping sauce.
    How to Make Bacon-Wrapped Pickles (Only 2 Ingredients!)
  • Bacon Wrapped Dates
    Bacon Wrapped Dates
  • Close-up of colorful nachos showing melted cheese, diced tomatoes, red onions, avocado chunks, black beans, and fresh herbs.
    How to Bake Nachos in the Oven (Crispy Every Time!)
a closeup of rumaki (bacon wrapped water chestnuts)

Bacon Wrapped Water Chestnuts (Rumaki)

Yield: 8 servings
Prep Time: 10 minutes
Cook Time: 45 minutes
Total Time: 55 minutes

This beloved snack from the 70's is as good today as it was then!

Ingredients

  • 2 8-ounce cans whole water chestnuts, drained and rinsed
  • 1 pound bacon (not thick-sliced)
  • ½ cup ketchup
  • ½ cup light brown sugar, packed
  • 2-3 dashes Worcestershire sauce
  • 2-3 dashes Sriracha or other hot sauce, or to taste (optional)
  • toothpicks, soaked in water for 30 minutes before using

Instructions

  1. Preheat oven to 375°F. Place a wire rack over a sheet pan and set aside. (You can also line the pan with parchment paper for easy cleanup).
  2. Mix together the ketchup, brown sugar, Worcestershire sauce and Sriracha in a small bowl. Set aside.
  3. Slice bacon into thirds crosswise. Wrap one piece of bacon around a water chestnut and secure with a toothpick. Place each wrapped water chestnut onto the wire rack. Repeat until bacon and water chestnuts are gone.
  4. Bake in preheated oven until bacon is starting to crisp (around 30 minutes or so). Remove from oven and, using a basting brush, dab sauce all over each appetizer. Return to oven and continue cooking until bacon is crisp and sauce is sticky and thick, another 10-15 minutes.
  5. Serve immediately. They'll go quickly!
Nutrition Information:
Yield: 8 Serving Size: 1
Amount Per Serving: Calories: 358Total Fat: 20gSaturated Fat: 7gUnsaturated Fat: 13gCholesterol: 56mgSodium: 1112mgCarbohydrates: 25gFiber: 1gSugar: 20gProtein: 20g

This data was provided and calculated by Nutritionix.

© Kristy Bernardo
Cuisine: American / Category: Appetizers
Rumaki (Bacon Wrapped Water Chestnuts)

Avgolemono Soup (Chicken Soup with Egg and Lemon)

October 30, 2014 by Kristy Bernardo 75 Comments

Avgolemono Soup is a creamy, comforting soup with tender chicken, orzo pasta and a bright lemon flavor. Delicious and incredibly easy!

Avgolemono Soup is a creamy, comforting soup with tender chicken, orzo pasta and a bright lemon flavor.

Avgolemono Soup is a creamy, comforting soup with tender chicken, orzo pasta and a bright lemon flavor.  Delicious and incredibly easy!

There's a fantastic Greek place in a strip mall near my home that serves some killer Greek food. The gyros are to die for and don't even get me started on the Taramosalata, a dip made of "caviar and blended with lemon and evoo" that has an incredible smooth, dreamy texture. It's served with soft, warm pita bread that has just a hint of an oily crunch on the ends. I've gone the dip sampler route but I always, always come back to the Taramosalata.

And then there's the Avgolemono Soup. It's yet another well-made dish at Opa's that comes out consistently perfect every time. A hot, steaming bowl of creamy, lemony goodness with chunks of chicken and soft orzo pasta, made complete with a few pieces of that warm, soft pita bread I mentioned.

The thing is, I never order it anymore.

[Read more...]

Broiled Salmon with Honey and Garlic

October 29, 2014 by Kristy Bernardo 73 Comments

Broiled Salmon with Honey and Garlic - just 5 ingredients and SO flavorful!

This easy Broiled Salmon recipe has just five ingredients, is on the table in less than 15 minutes and has incredible flavor!

Broiled Salmon with Honey and Garlic - just 5 ingredients and SO flavorful!

Broiled Salmon is one of those quick and easy recipes that I forget about all too often. I haven't been cooking as much fish these days although it used to be an at-least-once-a-week staple. I cook fairly healthy most of the time but lately, it's been all this Cheesy Baked Gnocchi and Carrot Cake! All good things that I will most certainly enjoy again...but for now, it's a delicious and healthy fish dish.

HOW TO BROIL SALMON?

Broiling salmon is one of the simplest and quickest ways to prepare it. You'll want to keep your fish about 5-6 inches below your broiler. Too close and it will char quickly and too far away will take too long to cook. The top should be slightly caramelized from the honey which will add to the flavor. The pan will get very sticky and some of the run-off will burn (that's okay and is expected) so be sure to always line your pan with foil when broiling salmon.

WHAT TEMPERATURE TO BROIL SALMON?

Once your pan is lined with foil and it's ready to go into the oven, turn your broiler to high and let it preheat. Broiling your salmon on high will give the best results for caramelization and it will be hot enough inside the oven to cook your fish all the way through. You will want to keep the door closed so that the salmon cooks through at the same time that the glaze cooks into the fish on top. Broiling on low will also work, it will just take longer to get to your finished dish.

This broiled salmon recipe came about when I was picking some Lemon Thyme from my herb garden. Have you ever smelled Lemon Thyme?? It has such a strong lemon scent, I just can't help but stick my entire face into my plant and breathe it in. If they sold a Lemon Thyme perfume I would most definitely wear it! I haven't cooked much with it over the summer though and felt I needed to use some before it freezes and I lose all of my fresh backyard herbs. Lemon goes so well with fish, garlic goes with everything and honey was the obvious choice to go with both.

Isn't it a pretty plant??

fresh lemon thyme

I normally roast or grill my fish but I wanted some direct heat over the top to help the honey caramelize quickly. The mixture will melt and drip away from the salmon but that's okay; a good amount will stick and what doesn't you'll just spoon back on once it's done. It will thicken back up after just a couple of minutes out of the oven so I spoon it back over the fish twice; once immediately out of the oven and again 3 minutes or so later. If you keep your oven door closed while broiling it really helps to cook the fish quickly, too. I love that this easy broiled salmon comes together in just 10 minutes!

Honey and Thyme

I like to mix everything in one measuring cup. I measure out the honey, add the lemon thyme leaves, a couple of tablespoons of oil and lots of garlic, then mix it all together in the measuring cup. Ten minutes later (give or take), dinner is done!

Broiled Salmon with Honey and Garlic - just 5 ingredients and SO flavorful!

Broiled Salmon with Honey and Garlic

Yield: 4
Prep Time: 5 minutes
Cook Time: 15 minutes
Total Time: 20 minutes

A simple broiled salmon recipe with loads of flavor!

Ingredients

  • 1 2-pound salmon filet
  • 4 garlic cloves, minced
  • ⅓ cup honey
  • 1 tablespoon lemon thyme leaves, plus more sprigs for garnish
  • 3 tablespoons vegetable oil, divided
  • kosher salt & freshly ground black pepper

Instructions

  1. Preheat broiler to high, setting your top rack 5-6 inches under the heat source.
  2. Place salmon on a baking sheet lined with foil. Drizzle with 1 tablespoon oil then season liberally with salt and freshly ground black pepper (go heavy on the pepper if you like).
  3. Place on rack under preheated broiler for five minutes (keep door closed).
  4. Meanwhile, mix together minced garlic, honey, thyme leaves and 2 tablespoons oil.
  5. Remove salmon from oven and drizzle honey mixture over salmon, using a heatproof brush to spread over entire salmon. Place back in oven for another 5-10 minutes or until salmon is cooked through (cooking time depends on the thickness of your salmon).
  6. Remove from oven and spoon over any melted honey mixture back onto salmon. As it cools, the honey mixture will thicken so continue spooning over at least once or twice during the first five minutes it's out of the oven. Slice into four servings and serve with a few lemon thyme sprigs on each piece.
Nutrition Information:

Amount Per Serving: Calories: 504Saturated Fat: 10gCholesterol: 124mgSodium: 101mgCarbohydrates: 24gSugar: 23gProtein: 45g
© Kristy Bernardo
Cuisine: American / Category: Dinner
Broiled Salmon with Honey and Garlic

Mushroom Barley Soup with Shaved Parmesan

October 22, 2014 by Kristy Bernardo 49 Comments

This easy Mushroom Barley Soup with Shaved Parmesan is not only healthy but tastes AMAZING! So hearty and filling, too!

This easy Mushroom Barley Soup uses three types of mushrooms, a bit of sherry and shaved Parmesan to up the flavor ante. Less than 10 ingredients, too!

This easy Mushroom Barley Soup with Shaved Parmesan is not only healthy but tastes AMAZING! So hearty and filling, too!

This Mushroom Barley Soup will make you glad to be alive.

It's so healthy that it just might help you live longer, too.

The mushrooms in this easy soup add such amazing flavor and have a great texture - you'll never even miss the beef. Although you could certainly add some if you're so inclined. It's actually the perfect soup to just toss in whatever's left from that steak you had at dinner the other night. You know, the one you couldn't finish because you were too busy devouring these potatoes. Or these potatoes. Or THESE potatoes!

But I didn't add my leftover steak and I didn't miss it one tiny bit. Mushroom Barley Soup is thick and hearty, it'll fill you up with just one bowl and stick with you for awhile. I used three kinds of mushrooms - white button, shitake and baby portobellos - which really ups the flavor ante. At first serving, the soup is thick but still has plenty of broth. However, after sitting overnight, most of the liquid will have been soaked up, making it less of a soup and more of a side dish. You could leave it like this - it's delicious! - or just add more beef broth until it's back at the consistency you enjoy.

This easy Mushroom Barley Soup with Shaved Parmesan is not only healthy but tastes AMAZING! So hearty and filling, too!

The shaved Parmesan is killer in this Mushroom Barley Soup, too. I chose to shave it instead of grate it because I like the way it breaks up in the soup and you get little tiny chunks of cheesy, salty goodness. Grated would certainly work well, too, go with what you've got. I use Parmigiano-Reggiano which is what I recommend if you can get it. It's pricy but the flavor makes it all worth it. If you have some and it has a good rind on it, toss the rind into the soup while it's simmering - an easy way to get more flavor out of something you'd just toss in the trash! I save my Parmigiano-Reggiano rinds and keep them in the freezer; I've never met a soup that couldn't use one 🙂

More delicious soup recipes:

  • Lentil Soup Recipe with Parmesan & Smoked Sausage
  • Pasta Fazool | Pasta e Fagioli
  • Navy Bean Soup with Bacon
  • Mulligatawny Soup
  • Chicken Tortilla Soup with Hatch Chiles
This easy Mushroom Barley Soup with Shaved Parmesan is not only healthy but tastes AMAZING! So hearty and filling, too!

Mushroom Barley Soup with Shaved Parmesan

Yield: 8
Prep Time: 15 minutes
Cook Time: 1 hour 10 minutes
Total Time: 1 hour 25 minutes

This easy soup has less than 10 ingredients yet a rich, deep flavor.

Ingredients

  • 2 tablespoons extra-virgin olive oil
  • 2 medium yellow onions, chopped
  • 2 celery stalks, chopped
  • 2 carrots, chopped
  • 2 cloves garlic, minced
  • 3-4 cups chopped mushrooms, a mix of button, shitake and portobellas
  • 6 cups reduced-sodium beef broth, more to add the next day if too much liquid gets soaked up
  • 2 tablespoons dry sherry
  • 1 cup barley
  • kosher salt & freshly ground black pepper
  • shredded parmesan, for topping

Instructions

  1. Heat olive oil in a dutch oven or large pot over medium heat. Add onions, celery and carrots, saute until onions are soft, about five minutes. Add garlic, saute two minutes more.
  2. Add mushrooms and cook until mushrooms have released their liquid, continue cooking until most of the liquid has evaporated, stirring occasionally.
  3. Add beef broth, sherry and barley. Bring to a gentle boil then reduce heat and keep at a simmer, cooking another hour.
  4. Season to taste with kosher salt & freshly ground black pepper. Top with shredded parmesan and serve.
Nutrition Information:

Amount Per Serving: Calories: 175Sodium: 360mgCarbohydrates: 27gFiber: 7gSugar: 4gProtein: 8g
© Kristy
Cuisine: American / Category: Soups and Stews
Mushroom Barley Soup with Shaved Parmesan

Cheesy Baked Potato Gnocchi Recipe

October 14, 2014 by Kristy Bernardo 60 Comments

This Cheesy Baked Potato Gnocchi Recipe is easy to make and has a ton of hot, cheesy flavor. A great weeknight meal recipe!

This Cheesy Baked Potato Gnocchi Recipe is easy to make and has a ton of hot, cheesy flavor. A great weeknight meal recipe!

This Cheesy Baked Potato Gnocchi Recipe is easy to make and has a ton of hot, cheesy flavor. A great weeknight meal recipe!

So Cheesy Baked Potato Gnocchi happened today, one of those accidental recipes. I spent the day working and realized that I was starving after the time for breakfast and lunch had both passed. Open pantry door, see nothing of interest, go to the refrigerator, nothing there either, then back to pantry...I know you've been there.

I'm just thankful that gnocchi is shelf-stable and that I keep it on hand at all times, just for emergencies such as this.

My go-to gnocchi recipe is typically to quickly cook the gnocchi then toss with garlic, Parmesan and olive oil but I was in the mood for something different. It was so darn cold and rainy here today and I knew that nothing less than something steaming hot and comforting would do. Even though I was busy with a deadline I knew I had to come up with a "real" gnocchi recipe.

This Cheesy Baked Potato Gnocchi Recipe is easy to make and has a ton of hot, cheesy flavor. A great weeknight meal recipe!

This gnocchi recipe is basically homemade macaroni and cheese with gnocchi instead of noodles. Which, dare I say, I prefer? It's unAmerican, I know. But I'd also choose a brat over a hot dog and flourless chocolate cake instead of apple pie so the damage is already done.

I have another homemade gnocchi recipe that I make from time to time, although the packaged version seems almost as good so I usually go that route. It's just so easy and good - not many shelf-stable products can claim that.

Here you'll just make a quick roux, add some cream and cheese then toss it in the oven. The payout is huge, too...it's creamy and soft and gooey and flavorful, just like a cold, rainy day dish should be.

This Cheesy Baked Potato Gnocchi Recipe is easy to make and has a ton of hot, cheesy flavor. A great weeknight meal recipe!

Cheesy Baked Potato Gnocchi Recipe

Yield: 4-6 servings
Prep Time: 5 minutes
Cook Time: 35 minutes
Total Time: 40 minutes

Soft, pillowy gnocchi all hot and cheesy!

Ingredients

  • 2 lb gnocchi
  • ¼ cup butter
  • 2 garlic cloves, minced
  • 3-4 tablespoons all-purpose flour
  • 1 5 oz can evaporated milk
  • 1 ½ cups half & half
  • 3 cups shredded cheese, divided (cheddar or a milder Mexican blend)
  • coarse salt & freshly ground black pepper

Instructions

  1. Preheat oven to 375F.
  2. Prepare gnocchi according to package directions.
  3. Meanwhile, melt butter in a medium skillet. Add garlic cloves and saute over medium heat for 1-2 minutes (do not brown garlic, turn heat down if necessary). Whisk in flour until thick, cook for another 1-2 minutes, whisking constantly. Slowly add evaporated milk, then half & half, whisking constantly, until no lumps remain and mixture is thickened and bubbling. Stir in 2 cups shredded cheese until incorporated.
  4. Place cooked gnocchi in a baking dish. Add cheese mixture and combine thoroughly. Sprinkle remaining cup of shredded cheese over the top. Bake for 30 minutes or until cheese is bubbly and lightly browned.
Nutrition Information:
Yield: 6 Serving Size: 1
Amount Per Serving: Calories: 730Total Fat: 37gSaturated Fat: 21gTrans Fat: 1gUnsaturated Fat: 12gCholesterol: 149mgSodium: 565mgCarbohydrates: 73gFiber: 3gSugar: 6gProtein: 26g

This data was provided and calculated by Nutritionix.

© Kristy Bernardo
Cuisine: Italian / Category: Dinner
Cheesy Baked Potato Gnocchi Recipe

Chuck Roast with Balsamic and Dijon - The BEST Pot Roast!

October 10, 2014 by Kristy Bernardo 221 Comments

pot roast just out of the oven with carrots and potatoes on a wooden table

Pot roast is one of life's pleasures that we get in exchange for having to say goodbye to summer.

It's what makes winter worth every shovel of snow.

There's just something magical about a chuck roast, isn't there? When the weather cools down and comfort food cravings kick in, this is the meal I start dreaming about. This chuck roast recipe is everything a cozy dinner should be: rich, savory, and so ridiculously tender it practically falls apart. But what really sets it apart is a tangy splash of balsamic vinegar and a few spoonfuls of Dijon mustard, which give this classic pot roast a somewhat subtle but incredibly flavorful twist.

You can make this chuck roast recipe in the oven, slow cooker, or the Instant Pot. It's one of those dishes that tastes like you spent all day on it! It's been saved over 118,000 times on Pinterest alone, and has received consistently rave reviews!

Overhead view of a Dutch oven filled with tender chuck roast, whole carrots, and baby potatoes

Why You'll Love This Chuck Roast Recipe

  • It's fork-tender and full of flavor: Chuck roast is naturally tough, but after a long, slow cook it becomes melt-in-your-mouth tender, and the balsamic and Dijon give it a rich flavor that's hard to beat.
  • It works in the oven, slow cooker, or Instant Pot: However you prefer to cook it, this recipe has you covered. I usually braise it in the oven, but it's just as fabulous in the Instant Pot or crockpot.
  • No fancy ingredients required: You probably have most of what you need already. Just a few pantry staples like beef broth, onions, vinegar, and mustard, plus the roast and veggies. There are only 8 ingredients total (plus a little oil, salt and pepper)!
  • It's a full meal in one pot: With hearty carrots and baby potatoes, it's truly a one-and-done kind of dish. Add a hunk of crusty bread and call it dinner.
  • It's perfect for leftovers: Pot roast is one of those rare meals that's even better the next day. Make pot roast sandwiches, tacos, or just reheat and enjoy it as-is!
  • It's gotten loads of great reviews: Jen from Pinterest said "This is a staple in our winter recipe box! It's so good! Perfect for snowed in days or lazy weekends. And the leftovers are ahhhmazing!" Alexandra said "I am not generally a roast maker or eater but dang this was good and everyone liked it". Or Jennifer: "Awesome meal!!! This is my go to pot roast recipe. The whole family loved it!!!"

What Is Chuck Roast?

Chuck roast is a cut of beef that comes from the shoulder area of the cow. It's a hardworking muscle, which means it starts out pretty tough, but that's exactly what makes it perfect for slow cooking. Give it a few hours and it breaks down into the most tender, flavorful roast imaginable.

It's also budget-friendly compared to other cuts. You'll usually see it labeled as chuck roast, shoulder roast, or sometimes just pot roast at the store. Boneless or bone-in both work, but bone-in will add a little extra flavor. Just go with whatever you can find - it'll be delicious either way!

It's classic choice for pot roast because it transforms into fall-apart beef with just the right amount of marbling. The end result is juicy, tender meat that practically melts into the sauce. And when it's paired with balsamic and Dijon like in this recipe, it's next-level comfort food.

Ingredients You'll Need

Here's what you'll need to make this fall-apart tender chuck roast:

  • 2-3 tablespoons vegetable, canola, or avocado oil: You'll need a cooking oil with a high smoke point for searing the roast. You could get by with olive oil, just make sure to turn down the heat so it doesn't smoke and burn. It will take a bit longer for the roast to get nicely browned, too.
  • 4 pounds chuck roast: Look for good marbling; boneless or bone-in both work great.
  • Kosher salt and freshly ground black pepper: Be generous! The roast needs quite a bit of seasoning to make sure it's properly seasoned.
  • 1 medium to large yellow onion, chopped: A good pot roast recipe must include onions!
  • ⅓ cup balsamic vinegar: The "secret" ingredient. It reduces down into a delicious syrup that adds a ton of flavor!
  • 2-3 tablespoons Dijon mustard: Dijon mustard is such a great pairing with balsamic. The combination of these two ingredients is what makes this pot roast recipe really incredible!
  • 5 sprigs fresh thyme: You don't even need to remove the leaves, just toss them in!
  • 2 cups reduced-sodium beef broth: This is the base for the sauce. I recommend reduced-sodium broth so you can control the amount of salt in the recipe.
  • 2 bunches small carrots, tops trimmed: The cute ones with stems make for a pretty presentation, but regular baby carrots work too.
  • 1 pound very small baby potatoes (white or red): If you use the really tiny baby potatoes, you can just toss them into the pot without cutting them. For regular-sized, cut them into halves or quarters first, just make sure they're all roughly the same size.
  • Optional: A splash of red wine or a few cloves of garlic can be added if you want to amp up the flavor even more. I usually skip this but sometimes you just want to switch things up!
Close-up of braised carrots and baby potatoes with fresh herbs in a rich balsamic-Dijon gravy for a pot roast recipe

Step-by-Step Instructions (Oven, Slow Cooker, Instant Pot)

This chuck roast recipe is super flexible! You can braise it in the oven (my favorite method), slow cook it all day, or use the Instant Pot to get it done fast. No matter which way you go, you'll end up with a rich, flavorful roast that practically melts in your mouth!

Oven-Braised Method

  1. Preheat your oven to 300°F.
  2. Sear the roast: Heat the oil in a large Dutch oven over high heat. Season your chuck roast generously with salt and pepper, then sear it on all sides until it's deeply browned (a few minutes per side). Remove it and set it aside.
  3. Sauté the onions: Reduce the heat to medium, add the chopped onion, and cook until it's soft, about 5 minutes.
  4. Deglaze and flavor: Pour in the balsamic vinegar and bring it to a boil. Let it reduce for about 4-5 minutes until it's thick and syrupy, stirring occasionally and scraping up any browned bits from the bottom of the pot. Stir in the Dijon mustard.
  5. Add the rest of the ingredients: Nestle the roast back into the pot. Add the thyme sprigs and pour in the beef broth.
  6. Braise it low and slow: Cover the pot and transfer it to the oven. Let it cook for about 3 hours.
  7. Add the veggies: Toss in your carrots and baby potatoes. Continue cooking for another 30-60 minutes, until the veggies are fork-tender the meat is falling apart.

Slow Cooker Method

  1. Follow the steps above through Step 4 (searing the roast and sautéing the onions).
  2. Transfer everything to your slow cooker, including the roast, onions, balsamic-Dijon mixture, thyme, and broth.
  3. Cook on LOW for 8 hours, adding the carrots and potatoes halfway through.

Instant Pot Method

  1. Use the Sauté function to sear the roast on all sides. Remove it and cook the onions in the drippings.
  2. Add the balsamic vinegar and Dijon, reduce slightly, then pour in the beef broth and scrape the bottom well (this is important for avoiding the dreaded burn notice).
  3. Place the roast back in, add the thyme, and seal the lid.
  4. Cook on HIGH pressure for 50 minutes, then let the pressure release naturally (about 15-20 minutes).
  5. Add the veggies and cook on HIGH pressure for an additional 4-5 minutes, followed by a quick release.

I adore this chuck roast recipe, but I have a few other favorites you might want to try! For an impressive holiday centerpiece, try the standing rib roast with a garlic-pepper rub or the prime rib with herb crust - both are guaranteed to wow your guests! Another great choice are the red wine braised short ribs or classic French beef stew for something warm and cozy yet impressive. If you've got a special occasion (or just want to treat yourself), the Tomahawk steak recipe is a showstopper. And if you're looking for a similar one-pot recipe, try this comforting dumpling beef stew.

Angled shot of a red Dutch oven filled with chuck roast, carrots, and potatoes on a rustic wooden table

Serving Suggestions

There's something about a hearty chuck roast that just begs for a cozy table and a big serving spoon (and a fire going if at all possible)! Here are the ways that we enjoy serving this delicious pot roast recipe:

Spoon it over mashed potatoes: If you skip adding potatoes to the pot, make some creamy mashed potatoes and put the roast and sauce right over the top. It's a bit of extra work but also really delicious!
Serve it with some crusty bread: Something hearty like a sourdough loaf or French baguette is perfect for soaking up all that flavorful liquid. Make sure to have softened butter at the table!
Pair it with a salad or green vegetable: Keep it simple with roasted green beans, sautéed spinach, or even just a side salad.
Make it a sandwich: Shred any leftovers and pile them high on a crusty roll with melted provolone or Swiss. Add a little horseradish sauce or Dijon mustard.
Serve it family-style: Bring the whole Dutch oven to the table and let everyone dig in. It's rustic, beautiful, and a fun and easy way to eat dinner!

Variations and Substitutions

One of the best things about a good chuck roast recipe? It's super flexible. Here are some tasty twists and easy swaps to make this recipe your own:

  • Meat Substitutes: Beef brisket or bottom round roast both work well if you don't have a chuck roast. Just note that they may not be quite as tender, but they'll still be flavorful if braised properly.
  • Vegetable Variations: Add parsnips, turnips, or rutabaga, or swap in sweet potatoes for a bit more sweetness. Mushrooms would also be amazing!
  • Flavor Additions: Add a splash of dry red wine with the broth for an even richer sauce. Stir in a spoonful of tomato paste with the onions. You can also toss in a few crushed garlic cloves or a sprig of rosemary.
  • Sauce Customization: Dijon is, by far, the best choice of mustard, but whole grain or even stone ground mustard will work.

This chuck roast recipe is written to be forgiving and fuss-free. As long as you've got a good cut of beef and take the time to braise it properly, you're in for something delicious!

Tight close-up of glazed carrots and potatoes nestled in savory pot roast drippings as part of a chuck roast recipe

Make-Ahead, Storage & Reheating Tips

One of the best things about chuck roast (besides how insanely flavorful it is) is how well it keeps. Here's how to make the most of leftovers (if you're lucky enough to have any!).

Make-Ahead

  • Pot roast is one of those magical dishes that tastes even more amazing the next day after the flavors have had time to meld. You can make it a day ahead, refrigerate it in the same pot or transfer to an airtight container, then reheat it when you're ready to serve.

Storage

  • Fridge: Store any leftovers in an airtight container (or keep it right in the Dutch oven with a lid) for up to 4 days.
  • Freezer: Chuck roast freezes beautifully! Let it cool completely, then portion it into freezer-safe bags or containers. It will keep well for up to 3 months. Just make sure to freeze it with some of the juices to prevent it from drying out.

Reheating

  • Oven: Reheat covered at 325°F until it's warmed through (about 30 minutes).
    Stovetop: Simmer gently over low heat, adding a splash of broth if needed to loosen the sauce.
  • Slow Cooker: A great option if you're reheating a larger amount. Warm it on low for 2-4 hours.
  • Microwave: For individual servings, microwave in 1-minute intervals at 50% power to avoid drying it out. Make sure to reheat it with some of the sauce.

Frequently Asked Questions

Is chuck roast the same as pot roast?

Not exactly. "Pot roast" refers to the dish, while "chuck roast" is a cut of meat. That said, chuck roast is one of the most common cuts used to make pot roast thanks to its rich marbling and melt-in-your-mouth texture when braised.

Is chuck roast the same as rump roast?

Both can be used for pot roast, but they come from different parts of the cow. Chuck roast is from the shoulder area and has more connective tissue and fat, which makes it super tender and flavorful when slow-cooked. Rump roast is leaner, comes from the rear, and can be a bit drier if overcooked.

Is chuck roast the same as round roast?

They're very different cuts of meat. Round roast comes from the back leg while chuck roast is from the shoulder. Round roast is leaner and benefits from slicing thin across the grain, whereas chuck roast is fattier and perfect for braising.

Are chuck roasts tough?

They start out tough, but that's part of what makes them perfect for low-and-slow cooking. The connective tissues break down during braising, making the meat fork-tender and incredibly flavorful!

Can chuck roast be shredded?

Once it's cooked long enough, chuck roast shreds beautifully. Just use two forks to pull it apart. It's great for sandwiches, tacos, or mixing it back into its juices.

What kind of wine pairs well with chuck roast?

A bold red wine like cabernet sauvignon, zinfandel, or syrah stands up well to the rich flavors of this chuck roast recipe.

Can I make this pot roast in a slow cooker or Instant Pot?

This recipe is easily adaptable to both. For the slow cooker, cook on low for 8 hours (adding the veggies halfway through). For the Instant Pot, cook on high pressure for 50 minutes, then allow a natural release. See the recipe card below for more detailed instructions.

What are the best vegetables to serve with pot roast?

Classic carrots and potatoes are always a great choice, but feel free to switch it up with parsnips, turnips, pearl onions, mushrooms, or even sweet potatoes. You can also serve it over mashed potatoes!


Overhead view of a Dutch oven filled with tender chuck roast, whole carrots, and baby potatoes

Chuck Roast with Balsamic and Dijon

Yield: 8 servings
Prep Time: 15 minutes
Cook Time: 4 hours
Total Time: 4 hours 15 minutes

This unique balsamic pot roast can be braised in the oven, Crock pot or Instant Pot. Perfect for a Sunday Pot Roast or weeknight dinner.

Ingredients

  • 2-3 tablespoons vegetable or canola oil
  • 4 pounds Chuck Roast
  • 1 medium to large yellow onion, chopped
  • ⅓ cup balsamic vinegar
  • 2-3 tablespoons Dijon mustard
  • 5 sprigs fresh thyme
  • 2 cups reduced-sodium beef broth
  • 2 bunches small carrots, with tops (cut off tops leaving a small stub)
  • 1 pound very small baby potatoes, white or red
  • kosher salt & freshly ground black pepper

Instructions

  1. Preheat oven to 300F.
  2. Heat the oil in a large dutch oven over high heat. Season the chuck roast well with salt and pepper, then add it to the pot and brown it well on all sides (a few minutes a side). Remove the roast and set it aside.
  3. Add the chopped onion to the drippings in the pot and reduce the heat to medium. Saute the onions until they're soft, about 5 minutes. Add the balsamic vinegar, increase heat to medium-high and boil until it's reduced and slightly syrupy, about 4-5 more minutes. Turn off the heat and stir in the Dijon mustard.
  4. Set the roast on top of the onions in the pot. Pour in the beef broth and add the thyme sprigs.
  5. Cover and place it in the oven for about 3 hours.
  6. Add the carrots and potatoes to the pot and return it to the oven. Continue cooking until the carrots, potatoes, and meat are all very tender, 30-60 minutes more.
  7. Season it well, then serve it and enjoy!

Slow Cooker Method

  1. Follow the steps above through Step 4.
  2. Transfer everything to your slow cooker, including the roast, onions, balsamic-Dijon mixture, thyme, and broth.
  3. Cook on LOW for 8 hours, adding the carrots and potatoes halfway through.

Instant Pot Method

  1. Use the Sauté function to sear the roast on all sides. Remove it and cook the onions in the drippings.
  2. Add the balsamic vinegar and Dijon, reduce slightly, then pour in the beef broth and scrape the bottom well (this is important for avoiding the dreaded burn notice).
  3. Place the roast back in, add the thyme, and seal the lid.
  4. Cook on HIGH pressure for 50 minutes, then let the pressure release naturally (about 15–20 minutes).
  5. Add the veggies and cook on HIGH pressure for an additional 4–5 minutes, followed by a quick release.
Nutrition Information:
Yield: 8 Serving Size: 1
Amount Per Serving: Calories: 630Total Fat: 37gSaturated Fat: 15gTrans Fat: 2gUnsaturated Fat: 20gCholesterol: 188mgSodium: 501mgCarbohydrates: 17gNet Carbohydrates: 15gFiber: 2gSugar: 3gProtein: 59g

This data was provided and calculated by Nutritionix.

© Kristy Bernardo
Cuisine: American / Category: Dinner
Chuck Roast with Balsamic and Dijon - The BEST Pot Roast!

Hasselback Potatoes with Chipotle Sour Cream, Bacon & Chives

October 7, 2014 by Kristy Bernardo 38 Comments

a plate of hasselback potatoes with two small dishes of dipping sauces in the background

Hasselback Potatoes are one the the easiest potato recipes yet also one of the most delicious. They're great in the oven or on the grill!

a top-down shot of a hasselback potato topped with bacon, cheese, chipotle sour cream, and chopped chives

This is one of my favorite side dishes because it's simple, everyone loves it, and it's a step up from the classic baked potato without much effort. They make a great side dish for boneless prime rib or tomahawk steaks, or even just a fun side to a Nashville hot chicken sandwich.

What are Hasselback Potatoes?

Hasselback potatoes are not a specific variety of potato but rather a unique cutting technique used to prepare them, resulting in a visually appealing and flavorful side dish. They are made by thinly slicing the potatoes while leaving the bottom intact, which creates an accordion style appearance. The accordion potatoes are then typically seasoned with butter, salt, pepper, and other spices. The accordion-style slicing allows for crispy edges, and a visually appealing presentation.

Hasselback potatoes are named after the restaurant where they were first introduced in the 1940s, called Hasselbacken, located in Stockholm, Sweden.

a plate of hasselback potatoes

Ingredients

The ingredients below are for loaded hasselback potatoes, but you can skip the cheese, sour cream, adobo sauce, bacon, and chives and enjoy them plain. This is how we prefer them, and no doubt you will, too!

  • russet potatoes
  • unsalted butter, melted
  • vegetable or canola oil
  • a good, coarse salt
  • shredded sharp cheddar cheese
  • sour cream
  • adobo sauce, from a can of chipotle peppers: this is mixed into the sour cream to give it a spicy, smoky flavor. You can skip this if you prefer.
  • crumbled bacon
  • chopped chives

The complete ingredients list with amounts is in the recipe card below!

Instructions

  1. The first thing you'll need to do is clean the potatoes, then cut them crosswise. You want the cuts as deep as possible without cutting them all the way through. The best way to do this is to use a wooden spoon, and we've provided more detailed instructions in its own section below. You'll cut all the potatoes and place them all in a baking dish.
  2. Next you'll mix together the butter and oil (the oil will increase the smoke point of the butter, preventing it from burning in the oven). You'll slowly pour ½ of butter mixture over potatoes, getting it between the slices. Then just season the potatoes with a good pinch or two of coarse salt.
  3. Now you'll just roast potatoes until they're soft all the way through, about an hour to an hour and 20 minutes, depending on the size of your potatoes. You'll add the remaining butter/oil mixture halfway through the cooking time. When they're cooked completely, remove from the oven and sprinkle the shredded cheese over the top, pushing some down between the slices. Pop them back in oven for another five minutes or until the cheese is melted.
  4. While they're back in the oven, mix together the sour cream and adobo sauce. Top the potatoes with chipotle sour cream, crumbled bacon and chives. Then enjoy every bite because these babies are DELICIOUS!
a closeup of a hasselback potato topped with bacon, cheese, chipotle sour cream, and chopped chives

How to Cut Hasselback Potatoes

You want to prep your potatoes Hasselback-style by slicing each potato crosswise at ⅛-inch intervals, cutting to within ¼ inch of the bottom.

Don't cut all the way down to the bottom, as the intent is to make the potato into a sort of accordion after it's been cut. Having all the slices still connected at the bottom of the potato accomplishes this nicely.

If this is your first time making Hasselback Potatoes, the most important thing you'll need to know is to lie the handle of a wooden spoon lengthwise up against the potato when slicing them. This will prevent you from cutting all the way through the potato and will keep them intact.

The potatoes will separate a bit while cooking - a good thing because this will allow you to get some cheese down into the crevices. I used a chipotle sour cream on mine but regular will do just fine. And be sure to season these bad boys well - it makes all the difference!

Topping Ideas

Classic

  • Melted butter and sea salt
  • Garlic butter and chives
  • Olive oil, rosemary, and flaky salt
  • Parmesan and cracked black pepper
  • Sour cream and scallions
  • Browned butter and thyme

Seasonings

  • Everything bagel seasoning
  • Cajun or Creole seasoning
  • Smoked paprika and garlic salt
  • Taco seasoning with queso
  • Ranch seasoning powder
  • Za'atar or harissa

Cheesy

  • Cheddar and bacon bits
  • Gruyère and caramelized onions
  • Mozzarella and pesto drizzle
  • Fontina and garlic butter
  • Blue cheese and crispy prosciutto
  • Asiago and rosemary
  • Pepper jack and jalapeños
  • Brie and honey drizzle

Add a protein to make it a meal

  • Bacon crumbles and cheddar
  • Crumbled sausage and roasted red peppers
  • Shredded BBQ chicken and ranch dressing
  • Steak bites and chimichurri
  • Pulled pork and BBQ sauce
  • Chorizo and queso fresco
  • Pancetta and truffle oil
  • Shredded chicken, buffalo sauce, blue cheese

Vegetarian

  • Roasted mushrooms and thyme
  • Sautéed mushrooms & blue cheese
  • Sautéed spinach and garlic
  • Crispy shallots and parsley
  • Grilled corn and cotija cheese
  • Sundried tomatoes and basil
  • Roasted red peppers and feta
  • Broccoli florets and melted cheddar
  • Black beans, corn, avocado, chipotle sour cream
  • Olives, feta, roasted peppers, tzatziki
  • Scrambled eggs, cheddar, and green onions

Sauces

  • Garlic aioli
  • Sour cream with dill or horseradish
  • Greek yogurt and lemon zest
  • Chipotle mayo or sriracha mayo
  • Truffle aioli or truffle cream
  • Herbed cream cheese
  • Ranch or blue cheese dressing
Gorgeous and easy baked potatoes loaded with chipotle sour cream, crispy bacon and chives! Hasselback potatoes are so easy to make with a buttery, soft inside, gooey cheese and all the fixins!

Hasselback Potatoes with Chipotle Sour Cream, Bacon & Chives

Yield: 4 servings
Prep Time: 10 minutes
Cook Time: 1 hour 25 minutes
Total Time: 1 hour 35 minutes

Crispy Hasselback potatoes with all the best toppings. They're a simple side dish that everyone will love!

Ingredients

  • 4 russet potatoes, cleaned
  • ⅓ cup butter, melted
  • 2 tablespoons vegetable or canola oil
  • a few large pinches of coarse salt
  • ½ cup shredded sharp cheddar cheese
  • ½ cup sour cream
  • 2 tablespoons adobo sauce, from a can of chipotle peppers
  • ½ cup crumbled bacon
  • a few tablespoons chopped chives

Instructions

  1. Preheat the oven to 400F.
  2. Place a wooden spoon a cutting board. Place one potato right next to the spoon and, using the spoon as a guide, make slices across the width of the potato, stopping at the wooden spoon so you don't cut all the way through. Repeat with remaining potatoes and place in a baking dish.
  3. Mix together butter and oil (the oil will increase the smoke point of the butter, preventing it from burning in the oven, for this reason don't use olive oil). Slowly pour ½ of butter mixture over potatoes, taking care to get some between the slices. Season well with kosher salt.
  4. Roast potatoes until cooked through and soft all the way through, about an hour to an hour and 20 minutes, depending on the size of your potatoes, adding remaining butter/oil mixture halfway through cooking time. When cooked completely, remove from oven and sprinkle cheese over the top, pushing some down between the slices. Place back in oven for another five minutes or until cheese is melted.
  5. Stir together sour cream and adobo sauce. Top potatoes with chipotle sour cream, crumbled bacon and chives.
Nutrition Information:
Yield: 4 Serving Size: 1
Amount Per Serving: Calories: 569Total Fat: 38gSaturated Fat: 20gTrans Fat: 1gUnsaturated Fat: 15gCholesterol: 95mgSodium: 689mgCarbohydrates: 42gFiber: 5gSugar: 4gProtein: 16g

This data was provided and calculated by Nutritionix.

© Kristy Bernardo
Cuisine: American / Category: Sides
Hasselback Potatoes with Chipotle Sour Cream, Bacon & Chives

Parmesan Garlic Butter Biscuits

October 1, 2014 by Kristy Bernardo 20 Comments

These easy Parmesan Garlic Biscuits start with canned Pillsbury Grands for a quick garlic biscuit recipe that will be a family favorite! #recipes #biscuits #bread #sidedish #dinner

This biscuit recipe is so easy to make and goes with everything from pasta to soup to salads. Roll biscuit dough in garlic butter and parmesan, then bake!

This Parmesan Garlic Biscuit recipe is so easy to make and goes with everything from pasta to soup to salads!

Everyone needs a good biscuit recipe. I have one that I've made a few times, from scratch, and they're worth every ounce of effort.

This is not that recipe.

No, this easy biscuit recipe couldn't be quicker to prepare. To make this biscuit recipe, open the can of Pillsbury Grands Biscuits, divide the biscuits, roll 'em into balls then douse with garlic butter and Parmesan cheese. Bake until hot, nicely browned, fluffy and ready for you to melt them in your mouth.

Heck, if you'd started making them at the start of this post, you'd be done already 🙂

Parmesan Garlic Biscuit recipe with Grands biscuits

Canned Biscuit Choice

I've made these more times than I can count and I typically use a can of the 16.3 oz refrigerated Pillsbury Grands Flaky Layers Original Biscuits. However, feel free to use any Grands biscuits style that you prefer or another brand such as Annie's Flaky Biscuits.

How to Make in Advance, Store & Reheat

Make in Advance: Completely prepare these up to a day ahead of time, then cover and store them fridge until ready to bake.

Store: Once the biscuits are cool, cover them in the baking dish or place them in a sealable bag or container and store in the refrigerator for up to 1 week.

Reheat: To reheat, place the biscuits in the oven at 350°F and heat for 5 minutes or until completely warmed through.

You're going to want to keep this canned biscuit recipe for that really busy weeknight when you need something quick to accompany that soup, stew, pasta sauce or braised beef this winter. Dipped in gravy, marinara sauce or into a fabulous soup - these warm, soft biscuits will make your dinner happy.

These easy Parmesan Garlic Biscuits start with canned Pillsbury Grands for a quick garlic biscuit recipe that will be a family favorite! #recipes #biscuits #bread #sidedish #dinner

Parmesan Garlic Butter Biscuits

Yield: 8 biscuits
Prep Time: 5 minutes
Cook Time: 20 minutes
Total Time: 25 minutes

Pillsbury biscuits rolled in butter, garlic and parmesan, then baked!

Ingredients

  • 1 (16.3 oz) can Pillsbury Grands Biscuits
  • ½ cup butter, melted
  • 2 cloves garlic, minced
  • ¼ cup grated parmesan

Instructions

  1. Preheat oven to 350°F.
  2. Remove biscuits from package. Pull each biscuit in half vertically then roll each half into a ball. Finish with remaining biscuits and set them aside.
  3. Combine melted butter and garlic.
  4. Spray an pie plate, 8x8 baking dish or similar size with cooking spray. Pour half of garlic butter mixture into bottom of baking dish.
  5. Place biscuit dough over garlic butter in baking dish so they are close together but not touching. Sprinkle biscuits with parmesan cheese.
  6. Bake for 15 minutes then spoon remaining butter mixture over each biscuit. Bake for 5 more minutes or until browned on top and cooked through. Serve immediately.
Nutrition Information:
Yield: 8 Serving Size: 1
Amount Per Serving: Calories: 138Total Fat: 13gSaturated Fat: 8gTrans Fat: 1gUnsaturated Fat: 4gCholesterol: 33mgSodium: 219mgCarbohydrates: 4gFiber: 0gSugar: 1gProtein: 2g

This data was provided and calculated by Nutritionix.

© Kristy Bernardo
Cuisine: American / Category: Sides
Parmesan Garlic Butter Biscuits

Here are a few more fun recipes I came across that use prepared biscuits - they all look fantastic! Check out my Monkey Bread, too - perfect for a breakfast treat!

  • Bubble Up Enchilada Bake
  • Chipotle Chicken Sandwiches

Chicken Alfredo Pasta Bake

September 24, 2014 by Kristy Bernardo 54 Comments

You already know that Alfredo sauce is creamy, cheesy and rich. Try it in this luscious Chicken Alfredo Pasta Bake for a delicious meal!

You already know that Alfredo sauce is creamy, cheesy and rich. Try it in this luscious Chicken Alfredo Pasta Bake for a delicious meal!

You already know that Alfredo sauce is creamy, cheesy and rich. Try it in this luscious Chicken Alfredo Pasta Bake for a delicious meal!

Every time I make Alfredo sauce I wonder why I don't do it more often. It's so darn easy and quick, not to mention it's sooo creamy and rich. Oh yeah, and filled with calories and fat and all those things we're supposed to be limiting in our diets. Riiight...now I remember 🙂

Still, Alfredo sauce is a fantastic comfort food and I have a hard time staying away from delicious foods that are delicious, comforting AND easy & fast to make. This chicken Alfredo pasta bake is one of my favorites. Chicken Alfredo used be a dish that I ordered in good Italian restaurants back before I learned to cook. Now I make it in my own kitchen and save the more difficult or time-consuming dishes for eating out.

You already know that Alfredo sauce is creamy, cheesy and rich. Try it in this luscious Chicken Alfredo Pasta Bake for a delicious meal!

The Alfredo sauce in this Chicken Alfredo Pasta Bake can be made for any dish that calls for Alfredo sauce. It's my tried and true recipe that I've been using for several years now. Regardless of how you use the sauce, be sure to season it well with salt. Alfredo sauce can be pretty bland and good seasoning is the key to giving it flavor. I like a hefty dose of freshly ground black pepper, too, but that's just personal preference.

If you do make the Alfredo sauce then I hope you'll give this Chicken Alfredo a chance, too. It's one of those super fast recipes that's great on a weeknight (I'll even cook the pasta in advance sometimes if I know I'll be making it, just be sure to drizzle the cooked pasta with a little olive oil so it doesn't stick, then bring to room temp before assembling the pasta bake). Leftovers are good but do reheat gently as the sauce can "break" - it'll still be good though, it's just better if the butter doesn't separate.

Before I sign off for the day, an apology to my readers who have been wondering why I haven't been posting my usual five a week for the past few weeks. A loss in in the family, a move to a new house and back-to-school made for a pretty tough and busy month. But I'm happy to report that I am LOVING my new house (it's so bright and cheery!) and am honestly thrilled to be back into recipe creation mode again. I'm still in living-out-of-boxes mode but each day I'm unpacking a little more. So cheers to that and a wish that you're doing fantastically well, too!

You already know that Alfredo sauce is creamy, cheesy and rich. Try it in this luscious Chicken Alfredo Pasta Bake for a delicious meal!

Chicken Alfredo Pasta Bake

Yield: 6 servings
Prep Time: 10 minutes
Cook Time: 35 minutes
Total Time: 45 minutes

You already know that Alfredo sauce is creamy, cheesy and rich. Try it in this luscious Chicken Alfredo Pasta Bake for a delicious meal!

Ingredients

Alfredo Sauce

  • ¾ cup butter
  • 1 ½ cups heavy cream
  • 3 cups freshly grated Parmesan
  • coarse salt & freshly ground black pepper (to taste)

Pasta Bake

  • 1 lb penne pasta
  • 1 cup sour cream
  • 2 large eggs
  • 1 15- ounce container ricotta cheese
  • ¼ cup grated Parmesan cheese
  • 3 cups shredded cooked chicken
  • 2 cups mozzarella cheese
  • chopped parsley (for garnishing (optional))

Instructions

  1. Preheat the oven to 350F.
  2. Cook the pasta according to the package directions.
  3. Meanwhile, place the butter and heavy cream in a saucepan and heat until the butter is melted and the mixture is very warm. Slowly stir in the parmesan until it's completely smooth. Season to taste with salt and pepper.
  4. Stir the sour cream into the prepared Alfredo sauce. Add the cooked pasta and set aside.
  5. Lightly beat the eggs in a small bowl. Stir in the ricotta cheese and parmesan, mix thoroughly. Stir in the shredded chicken and set aside.
  6. Spray a 13×9 baking dish with cooking spray. Put half of pasta mixture on bottom of baking dish. Spoon the ricotta mixture over and top with remaining pasta mixture. Sprinkle with mozzarella cheese.
  7. Bake for 25 minutes or until bubbling hot and cheese is golden brown. Sprinkle with the chopped parsley.
Nutrition Information:
Yield: 6 Serving Size: 1
Amount Per Serving: Calories: 1211Total Fat: 92gSaturated Fat: 52gTrans Fat: 2gUnsaturated Fat: 31gCholesterol: 374mgSodium: 1613mgCarbohydrates: 39gFiber: 1gSugar: 4gProtein: 57g

This data was provided and calculated by Nutritionix.

© Kristy Bernardo
Cuisine: Italian / Category: Dinner
Chicken Alfredo Pasta Bake

Comforting Chicken Tortilla Soup with Roasted Hatch Chiles

September 5, 2014 by Kristy Bernardo 47 Comments

a bowl of chicken tortilla soup with hatch chiles that's topped with crispy tortilla strips, sour cream, and chopped fresh cilantro next to two spoons

This Chicken Tortilla Soup is anything but ordinary. Made with roasted Hatch chiles, charred tomatoes, and tender shredded chicken, it's layered with deep, smoky flavor and finished with all your favorite toppings. Choose between a rich, hearty soup thickened with corn tortillas or a lighter, brothy version, this recipe gives you both options. And it's ready in under an hour!

a closeup of a bowl of chicken tortilla soup with hatch chiles that's topped with crispy tortilla strips, sour cream, and chopped fresh cilantro

What is Tortilla Soup?

Chicken tortilla soup is a traditional Mexican dish made with a tomato-based broth, shredded chicken, and a variety of toppings: usually crispy tortilla strips, avocado, crema, and cilantro. This version gets a flavor boost from flame-roasted Hatch chiles, cumin, and broiled tomatoes that are blended into a rich, savory base.

If you've got questions about Hatch chiles, we've got you covered with answers and a roundup of our all-time favorite Hatch chile dishes.

Ingredients

For the Soup:

  • 4 large summer tomatoes
  • ¼ cup extra-virgin olive oil, divided
  • ½ white onion, chopped
  • 2 garlic cloves, minced
  • 1 teaspoon ground cumin
  • 1 (32 oz) box reduced-sodium chicken broth
  • 4 Hatch chiles, roasted, stemmed, seeded, and diced
  • 4 cups cooked, shredded chicken (about 1 rotisserie chicken)

Optional Add-Ins:

  • 4-5 corn tortillas, torn into strips (for a thicker texture)

Toppings:

  • Chopped fresh cilantro
  • Crushed tortilla chips
  • Sliced avocado
  • Sour cream
  • Shredded cheese
  • Lime wedges

Step-by-Step Instructions

  1. Broil the tomatoes: Slice in half, place cut-side down on a baking sheet, drizzle with oil, and broil until skins blacken (about 5 minutes).
  2. Sauté aromatics: In a large pot or Dutch oven, heat olive oil. Sauté onion until softened, then add garlic and cumin.
  3. Blend the base: Add tomatoes and their juices, then pour in chicken broth. Simmer for 10-15 minutes, then puree with an immersion blender until smooth.
  4. Simmer the soup: Add shredded chicken and Hatch chiles. Simmer for 10-15 minutes.
  5. Optional thickening: For a heartier texture, add corn tortillas and simmer for up to 1 hour until they dissolve into the broth.
  6. Finish and serve: Stir in chopped cilantro, taste and adjust seasoning, then ladle into bowls and top as desired.
a bowl of chicken tortilla soup with hatch chiles that's topped with crispy tortilla strips, sour cream, and chopped fresh cilantro next to two spoons plus a small dish of cilantro and another of crispy tortilla strips

Expert Tips

  • Use freshly roasted Hatch chiles for best flavor (or frozen if out of season)
  • Char your tomatoes - it makes all the difference in the broth!
  • This soup gets better with time, so making it ahead of time is not only doable but recommended if possible.
  • Make your own tortilla chips by cutting corn tortillas into small rectangles, spraying them lightly with cooking spray, then baking them for approximately 15 minutes at 375F, stirring halfway through (single layer on a baking sheet). Store-bought tortilla chips will also work or just omit them if you prefer.

Variations & Substitutions

  • Vegetarian: Use vegetable broth and swap the chicken for black beans and/or diced, roasted sweet potatoes
  • Thick vs. Brothy: Add corn tortillas for a thicker base, or skip for a lighter texture
  • No Hatch chiles? Substitute Anaheim or poblano peppers
  • Spicy: Add a minced chipotle in adobo (or just a few tablespoons of the sauce from a can of chipotle peppers in adobo sauce) or use hot Hatch chiles

Storage & Freezing Instructions

  • Store: Refrigerate leftovers for up to 4 days
  • Freeze: Freeze in an airtight container (without toppings) for up to 3 months
  • Reheat: Thaw and warm gently on the stovetop, stirring often
a bowl of chicken tortilla soup with hatch chiles that's topped with crispy tortilla strips, sour cream, and chopped fresh cilantro next to two spoons

Frequently Asked Questions

Can I make this ahead of time?
Yes! This soup actually tastes better the next day. Just store it without the toppings.

Can I use canned tomatoes instead of fresh?
Absolutely. Use fire-roasted canned tomatoes to help add some charred flavor.

What are Hatch chiles, and can I substitute?
Hatch chiles are grown in New Mexico and offer a unique, slightly sweet heat. If you can't find them, substitute Anaheim or poblano peppers.

What's the difference between adding tortillas or not?
Torn corn tortillas will disintegrate to help thicken the soup and give it a traditional body. Leaving them out creates a lighter, brothier version.

What to Serve with Chicken Tortilla Soup

Chicken Tortilla Soup is hearty enough to enjoy on its own, but pairing it with the right sides or toppings can turn it into a truly satisfying meal. Here are a few delicious ideas:

  • Mexican-Style Rice: A scoop of flavorful rice on the side, or even stirred into the soup, makes it extra filling.
  • Sweet Corn Cake or Creamed Corn: These sweet, creamy sides balance the soup's smoky spice and are always a hit.
  • Crusty Bread: Bread is perfect for dipping!
  • Cheesy Quesadillas: they're our favorite pairing with chicken tortilla soup and feels similar to a grilled cheese and tomato soup.
  • Simple Green Salad: A salad is a nice contrast to the soup's bold flavor.

If you're loving the bold, smoky flavor of Hatch chiles, you're in for a treat! Try our roasted Hatch chile queso dip for your next party, or cozy up with a bowl of corn and Hatch chile soup. This enchilada sauce with Hatch chiles is rich, bold, and spicy and is a must for next-level enchiladas. And don't miss this creamy Hatch chile tomato soup, perfect for dipping grilled cheese.

a closeup of a bowl of chicken tortilla soup with hatch chiles that's topped with crispy tortilla strips, sour cream, and chopped fresh cilantro

Chicken Tortilla Soup with Hatch Chiles

Yield: 6 servings
Prep Time: 10 minutes
Cook Time: 45 minutes
Total Time: 55 minutes

If you prefer a thicker soup, add corn tortillas to the soup (see recipe below).

Hatch chiles are the preferred chile for this recipe, but you can substitute anaheim or poblano.

Ingredients

  • 4 large summer tomatoes
  • ¼ cup extra-virgin olive oil, divided
  • ½ white onion, chopped
  • 2 garlic cloves, minced
  • 1 teaspoon cumin
  • 1 32- ounce box reduced-sodium chicken broth
  • 4 hatch chiles, roasted, stemmed and seeded, then diced
  • 4 cups shredded chicken, or as much as one whole rotisserie chicken
  • 4-5 corn tortillas, torn into large strips (optional; see step 4 below)
  • ¼ cup cilantro, chopped
  • toppings: sour cream, crushed tortilla chips, chopped cilantro, avocado

Instructions

  1. Preheat broiler. Slice tomatoes in half then place cut side down onto a baking sheet. Drizzle with 2 tablespoons of the olive oil, season with salt. Broil for about 5 minutes or until the skins are starting to blacken.
  2. Preheat a dutch oven over medium heat. Add remaining olive oil then add onions, cooking for about five minutes or until starting to soften. Add garlic and cumin, cook for another minute or two, stirring frequently.
  3. Add tomatoes and their juices to pan. Pour in chicken broth and stir well. Allow to simmer for 10-15 minutes, then blend the mixture well with a hand blender (alternatively you can pour the mixture into a blender in batches then pour back into the pot). Stir in the shredded chicken and roasted chiles.
  4. For the quick version: Allow it to simmer for another 10-15 minutes. For the longer version: Add the corn tortillas at this point and allow it to simmer for about 1 hour, or until the tortillas have disintegrated and "melt" into the soup.
  5. Stir in the chopped cilantro and ladle the soup into bowls. Add toppings as desired and serve immediately.

Notes

Note: Nutrition facts do not account for toppings and do include the corn tortillas.

Nutrition Information:
Yield: 6 Serving Size: 1
Amount Per Serving: Calories: 414Total Fat: 23gSaturated Fat: 4gTrans Fat: 0gUnsaturated Fat: 17gCholesterol: 86mgSodium: 496mgCarbohydrates: 21gFiber: 6gSugar: 6gProtein: 32g

This data was provided and calculated by Nutritionix.

© Kristy Bernardo
Cuisine: Southwestern / Category: Soups and Stews
Comforting Chicken Tortilla Soup with Roasted Hatch Chiles

Quick & Easy Hatch Chile Enchilada Sauce

September 4, 2014 by Kristy Bernardo 85 Comments

An easy, delicious green chile enchilada sauce recipe! Can use hatch, poblano, anaheim or even jarred green chiles if you really want to speed things up. You will never buy jarred again!

If you love Hatch chiles as much as I do, you're going to love this Hatch Chile Enchilada Sauce. It's smoky, savory, and just the right amount of spicy - basically everything you want in a homemade enchilada sauce! I like to make a double batch and freeze some for quick dinners later (enchiladas, smothered burritos, or even just as a sauce for tacos). You can use fresh, frozen, or even canned Hatch chiles, so it's doable year-round. Once you try it, I promise you'll never want to go back to the store-bought stuff!

Bowl of homemade Hatch Chile Enchilada Sauce with visible chile specks, garnished with oregano and charred peppers, surrounded by fresh herbs.

Why You'll Love This Hatch Chile Enchilada Sauce

  • It's packed with real Hatch chile flavor. If you've ever tasted roasted Hatch chiles, you know there's nothing quite like them. Smoky, slightly sweet, just a little spicy, and this sauce lets them shine.
  • So much better than store-bought. No preservatives, no mystery ingredients. Just incredible, homemade flavor that you can't get from a jar!
  • Make it mild or spicy. Use mild Hatch chiles for a family-friendly sauce, or use hotter chiles if you like things with a little extra kick. It's not easy to tell before roasting, so if you want to control the spice, pick up a pack of frozen chiles and look for the heat level on the label.
  • Versatile and freezer-friendly. This enchilada sauce works with chicken, beef, veggies, and even breakfast burritos. And it freezes beautifully, so you can always have some on hand.
  • It's easy! Just sauté, simmer, then blend, and you've got a restaurant-worthy sauce in under 30 minutes.

Ingredients You'll Need

Here's what goes into making this flavorful Hatch Chile Enchilada Sauce:

  • 2 tablespoons extra-virgin olive oil
  • 1 medium white onion, chopped
  • 3 large garlic cloves, minced
  • ½ teaspoon ground cumin
  • 3 tablespoons all-purpose flour (helps thicken the sauce)
  • 1 (14.5-ounce) can low-sodium chicken broth (substitute vegetable broth to make it vegetarian)
  • 4 large Hatch chiles, roasted, stemmed, and deseeded (you can also use poblano or Anaheim chiles if Hatch isn't available, but the flavor won't be quite the same)
  • 1 small jalapeño, chopped (optional) - Want more heat? Leave the seeds in for extra spice!
  • 1 tablespoon fresh hot and spicy oregano (or regular oregano)
Creamy green Hatch Chile Enchilada Sauce in a bowl on a woven mat, topped with charred chiles and a sprig of oregano.

Step-by-Step Instructions

This hatch chile enchilada sauce comes together in just a few easy steps:

  1. Sauté the aromatics: Heat the olive oil in a skillet over medium heat. Add the chopped onion and garlic, then sauté for 4-5 minutes, until softened and translucent.
  2. Add the spices and flour: Stir in the ground cumin and cook for about 1 minute, just until fragrant. Sprinkle the flour over the onion mixture and stir well. Let it cook for another 1-2 minutes, stirring frequently (this removes the raw flour taste).
  3. Whisk in the broth: Slowly pour in the chicken broth while whisking constantly to avoid clumps. Simmer for about 5 minutes, until the mixture thickens slightly and is hot all the way through.
  4. Blend until smooth: Carefully transfer the mixture to a high-powered blender. Add the roasted Hatch chiles, oregano, and jalapeño (if using). Blend it on high until the sauce is completely smooth.
  5. Season to taste: Taste the sauce, then season it with coarse salt and freshly ground black pepper. Add more jalapeño if you want extra heat, or stir in a splash of broth if you prefer a thinner consistency.
  6. Use or store: Use immediately over enchiladas, tacos, burritos, or smothered eggs, or let it cool and store it for later (see storage tips below!).

Storage, Freezing & Reheating

  • Storage: Refrigerate in airtight container for up to 5 days
  • Freezing: Store in freezer-safe containers or resealable plastic freezer bags; freeze up to 3 months
  • Reheating: Thaw overnight in the refrigerator, then reheat on medium-low heat on the stove or in the microwave
Side view of green enchilada sauce made with Hatch chiles, garnished with roasted peppers and fresh oregano in a rustic metal bowl.

Frequently Asked Questions

  • What are Hatch chiles, and where can I find them? Hatch chiles are a type of green chile grown in Hatch Valley, New Mexico. They're known for their smoky, slightly sweet flavor and can range from mild to extra hot. Look for them fresh in late summer, or buy them frozen, canned, or jarred year-round at many grocery stores or online (we're partial to Young Guns since we've actually toured their Hatch chile fields). We have a guide that answers frequently asked questions about hatch chiles as well as a Hatch chile recipe roundup with over 60 recipes!
  • Can I make this hatch chile enchilada sauce with other types of chiles? Yes! If you don't have Hatch chiles, you can substitute poblano or Anaheim. You'll still get great flavor, though the sauce won't have that classic Hatch flavor.
  • Is this enchilada sauce spicy? It's naturally mild to medium, depending on the heat level of your Hatch chiles. Add the jalapeño with seeds for extra heat, or omit it entirely for a milder version.
  • Is this sauce gluten-free? As written, it contains all-purpose flour for thickening. To make it gluten-free, you can use a gluten-free flour blend or cornstarch (use about 1 tablespoon cornstarch mixed with a few tablespoons of cold broth, then add to the hot mixture and simmer until thickened).

If you're loving the bold, smoky flavor of Hatch chiles, you're in for a treat! Warm up with our chicken tortilla soup with Hatch chiles or cozy up to a bowl of Spicy Tomato Soup with Hatch Chiles. If you're craving something creamy and cheesy, don't miss our roasted Hatch chile queso dip, perfect for dipping or topping your tacos. And for something fresh and summery, the summer corn and chile soup is a must-try!

An easy, delicious green chile enchilada sauce recipe! Can use hatch, poblano, anaheim or even jarred green chiles if you really want to speed things up. You will never buy jarred again!

Hatch Green Chile Enchilada Sauce Recipe

Yield: 8
Prep Time: 15 minutes
Cook Time: 15 minutes
Total Time: 30 minutes

Homemade enchilada sauce is the key to amazing Mexican food. This hatch chile version will have you swooning over your own cooking!

Ingredients

  • 2 tablespoons extra-virgin olive oil
  • 1 medium white onion, chopped
  • 3 large garlic cloves, minced
  • ½ teaspoon ground cumin
  • 3 tablespoons flour
  • 1 14.5 ounce can low-sodium chicken broth
  • 4 large hatch chiles, roasted, stemmed and deseeded (or poblano or anaheim)
  • 1 small jalapeno, chopped (optional if you want some spice, leave seeds in for extra spicy)
  • 1 tablespoon fresh hot and spicy oregano, or regular oregano
  • 2-3 large pinches kosher salt, to taste
  • freshly ground black pepper

Instructions

  1. Preheat skillet over medium heat. Add oil, then onions and garlic. Sauté for 4-5 minutes or until starting to soften and translucent. Add cumin; sauté for a minute or so. Sprinkle flour over onion mixture, cook and stir for a minute or two. Slowly stir in chicken broth until no flour clumps remain. Cook, stirring occasionally, for another five minutes or so until mixture is hot and thickened.
  2. Add chiles, oregano, sauce from skillet and jalapeno (if using; consider adding a small amount of pepper until you reach desired heat level) to a high-powered blender (such as a Vitamix). Process on high until smooth. Season well with salt and pepper.
Nutrition Information:

Amount Per Serving: Calories: 59Sodium: 422mgCarbohydrates: 6gFiber: 1gSugar: 1g
© Kristy Bernardo
Cuisine: Mexican / Category: Sauces
Quick & Easy Hatch Chile Enchilada Sauce

Key Lime Pie with a Granola Crust

September 3, 2014 by Kristy Bernardo 71 Comments

an individual key lime pie made with a granola crust, topped with whipped cream and fresh lime zest

This Key Lime Pie uses a granola crust in place of graham crackers for a delicious crust that pairs perfectly with the key lime.

One of my favorite breakfasts is granola. It's one of those rare, versatile breakfasts that never gets boring. Toss a spoonful on some yogurt, enjoy it in a bowl with milk or even just grab some on the way out the door if you're short on time.

I use granola in many different ways. One of my favorites is adding it to pancake batter! It adds a wonderful texture and flavor. I'll even put it on top of my pancakes although the kids prefer it cooked right in the batter. Both ways are very tasty though!

an individual key lime pie made with a granola crust, topped with whipped cream and fresh lime zest

I thought I'd pretty much peaked at my granola usage, but one night I had a serious sweet craving and didn't have much in the house. I thought about making cookies but the effort seemed like too much, not to mention I'm trying to cut down on the amount of sugar I'm eating.

I realized that it would make an awesome granola pie crust instead of using graham crackers. So I tossed some granola into my blender, added some melted butter and in no time at all I had a delicious granola crust! I decided to make a Granola Key Lime Pie which, I have to say, was a fantastic choice. The granola crust and the key lime goes wonderfully together.

an individual key lime pie made with a granola crust, topped with whipped cream and fresh lime zest

Key Lime Pie with a Granola Crust

Yield: 4-6 servings
Prep Time: 10 minutes
Cook Time: 25 minutes
Total Time: 35 minutes

A granola crust goes perfectly with this creamy, sweet and slightly tart key lime pie.

Ingredients

  • 2 cups granola
  • ¼ cup butter (melted)
  • pinch salt
  • 1 can sweetened condensed milk
  • 4 egg yolks
  • ½ cup key lime juice
  • whipped cream and lime zest, for topping (optional)

Instructions

  1. Preheat the oven to 350F.
  2. Place the granola into a blender or food processor and pulse until it's almost in crumbs. Drizzle in the butter and salt and pulse a few times until it's all incorporated.
  3. Press the granola mixture into the bottom of a pie plate or 4 small, individual baking dishes. Bake for 7-10 minutes until crust is beginning to brown. Set the granola crust aside to cool.
  4. Meanwhile, blend the sweetened condensed milk, egg yolks and key lime juice until well blended. Pour over the cooled crust and bake for 15 minutes for a whole pie, 10 minutes if in individual dishes. Allow it to cool then refrigerate for at least a few hours to set.
  5. Top with freshly whipped cream and lime zest, if desired.
Nutrition Information:
Yield: 6 Serving Size: 1
Amount Per Serving: Calories: 332Total Fat: 21gSaturated Fat: 8gTrans Fat: 0gUnsaturated Fat: 12gCholesterol: 146mgSodium: 107mgCarbohydrates: 28gFiber: 4gSugar: 12gProtein: 8g

This data was provided and calculated by Nutritionix.

© Kristy Bernardo
Cuisine: American / Category: Desserts
Key Lime Pie with a Granola Crust

Bread and Tomato au Gratin Recipe with Bacon & Blue Cheese

August 19, 2014 by Kristy Bernardo 60 Comments

Crispy bread, soft summer tomatoes with parmesan, bacon & blue cheese combine to make this au gratin recipe the only au gratin you will ever want!

Crispy bread, soft summer tomatoes with parmesan, bacon & blue cheese combine to make this au gratin recipe the only one you will ever want!

Crispy bread, soft summer tomatoes with parmesan, bacon & blue cheese combine to make this au gratin recipe the only au gratin you will ever want!

I'm starting to see fall recipes trickling in. Blogs that I follow, magazines on stands, even as I'm shopping and trying to decide what to make. School is rapidly approaching which always signals the end of summer even if the weather doesn't agree. I'm not quite ready to ditch the peaches, tomatoes and fresh corn, however. No, there's plenty of time for hot stews and pumpkin flavors. I'm holding on to summer until the last tomato is picked.

My parents delivered more tomatoes to me, as did a former neighbor who stopped by for a quick visit. Some of the tomatoes were yellow and red cherry tomatoes, most of which were enjoyed as I'd walk by and grab a handful. I did manage to salvage enough to make this au gratin dish that I'd been dreaming up for the past few weeks or so.

Crispy bread, soft summer tomatoes with parmesan, bacon & blue cheese combine to make this au gratin recipe the only au gratin you will ever want!

I wanted an au gratin recipe that showcased the tomatoes without a lot of cream and cheese. I absolutely loved the Smoky Summer Corn and Tomato Au Gratin recipe I posted last week but I'd had my fill (I ate almost all of it myself for lunches throughout the week). This au gratin recipe needed to have completely different flavors as well as a different texture which could only come from whole cherry tomatoes.

The crispy bites of bread in this au gratin combined with the warm, soft tomatoes is absolutely to die for. I waited to add the blue cheese and bacon until the very end so the bacon would stay nice and crispy.

Crispy bread, soft summer tomatoes with parmesan, bacon & blue cheese combine to make this au gratin recipe the only au gratin you will ever want!

Definitely garnish your au gratin with a sprinkling of freshly chopped parsley, it makes a huge difference in presentation. The second photo above doesn't have the parsley and it doesn't really "pop" without it. Not that it doesn't still look delicious, especially in person! I had no problem eating them, parsley or no parsley. It just always amazes me that those little touches make such a big difference.

Crispy bread, soft summer tomatoes with parmesan, bacon & blue cheese combine to make this au gratin recipe the only au gratin you will ever want!

Bread and Tomato au Gratin with Bacon & Blue Cheese

Yield: 4 servings
Prep Time: 10 minutes
Cook Time: 35 minutes
Total Time: 45 minutes

This is a bit like a BLT but with creamy blue cheese and baked together in gratin or pie dishes.!

Ingredients

  • ½ pound bacon, cooked and crumbled
  • ⅓ baguette, cut into small bite-sized pieces (about 6 inches from a long, thin french baguette)
  • 2 pints cherry tomatoes
  • ⅓ cup extra-virgin olive oil
  • 2 garlic cloves, thinly sliced
  • ¼ cup shredded parmesan cheese
  • ½ teaspoon kosher salt
  • ¼ teaspoon freshly ground pepper
  • 1 cup crumbled blue cheese or gorgonzola
  • ¼ cup chopped parsley, for garnishing

Instructions

  1. Preheat oven to 375° F.
  2. Spray a pie dish or individual gratin dishes with cooking spray.
  3. Place the bread cubes with the tomatoes, garlic, parmesan, salt & pepper in a bowl. Add olive oil and toss until thoroughly combined. Place in baking dish, cover and bake for 20 minutes.
  4. Remove gratins from oven and top with blue cheese and bacon. Continue baking uncovered for another 10-15 minutes or until bread is golden brown and cheese is melted and bubbly.
  5. Garnish with chopped parsley. Serve warm or at room temperature.
Nutrition Information:
Yield: 4 Serving Size: 1
Amount Per Serving: Calories: 691Total Fat: 52gSaturated Fat: 18gTrans Fat: 0gUnsaturated Fat: 32gCholesterol: 90mgSodium: 1836mgCarbohydrates: 23gFiber: 3gSugar: 5gProtein: 34g

This data was provided and calculated by Nutritionix.

© Kristy Bernardo
Cuisine: French / Category: Main Dish
Bread and Tomato au Gratin Recipe with Bacon & Blue Cheese

Turkey Meatloaf with a Chipotle Glaze

August 15, 2014 by Kristy Bernardo 57 Comments

This Turkey Meatloaf Recipe combines ground turkey breast, Italian sauage and diced roasted veggies then it's topped with a chipotle glaze. Amazing flavor!

This Turkey Meatloaf Recipe combines ground turkey, Italian sausage and diced roasted veggies, then it's topped with a chipotle glaze.

Turkey Meatloaf with a Chipotle Glaze

Turkey meatloaf has always been one of those dishes that I want to love, try so hard to love, but just never quite do actually fall in love.

It's that platonic dependable friend that you know would be perfect as more because he's likable, solid, a great listener. But that extra "oomph" is always missing, which is why you'll never move past a good friendship into something more.

That is definitely me and turkey meatloaf.

I've made more meatloaf recipes than I care to recall. Beef, turkey, chicken.. I've tried them all. Most have been good, a few even great. But there's just something always missing for me and I never return to the same meatloaf recipe twice.

Until this turkey meatloaf recipe.

Turkey Meatloaf with a Chipotle Glaze

I am finally, completely and unequivocally, madly in love. And all it took was ground turkey, Italian sausage, a few roasted veggies, and a spicy chipotle glaze to bring it all together.

The veggies in this turkey meatloaf recipe are there for both flavor and to add moisture. Zucchini, red bell pepper and carrot are my veggies of choice but you can use whatever your favorites are.

Corn, for example, would be delicious. The Italian sausage adds so much flavor and really helps to keep the meatloaf moist as well. I like to use turkey Italian sausage but regular will work just fine.

This Turkey Meatloaf Recipe combines ground turkey breast, Italian sauage and diced roasted veggies then it's topped with a chipotle glaze. Amazing flavor!

I like to make this turkey meatloaf recipe into little bites using a mini-muffin pan. I just heap them up into a big pile in each tin, they hold together quite well.

Regular muffin tins work well, too, or you can always go old school and use a large loaf pan and call it a day. It's certainly easier, it just takes longer to bake (but that means your house will smell better, longer).

I usually serve smashed potatoes with this dish, but Baked Hasselback Potatoes, Baked Potato Wedges or Cheesy Chive & Bacon Mashed Potatoes are great, too. The chipotle glaze from this turkey meatloaf recipe is really good drizzled over the top of any of those dishes! And if you're looking for a cheesy meatloaf recipe, try this gouda stuffed meatloaf.

Turkey Meatloaf with a Chipotle Glaze
Turkey Meatloaf

Turkey Meatloaf with a Chipotle Glaze

Yield: 6 servings
Prep Time: 10 minutes
Cook Time: 1 hour 7 minutes
Additional Time: 10 minutes
Total Time: 1 hour 27 minutes

This Turkey Meatloaf Recipe combines ground turkey, Italian sausage and diced roasted veggies, then it’s topped with a chipotle glaze.

Ingredients

  • 1 zucchini, diced
  • ½ red bell pepper, diced
  • 1 carrot, diced
  • ½ red onion, diced
  • 2 garlic cloves,diced
  • 2 tablespoon extra-virgin olive oil
  • ¾ cup ketchup
  • 3 tablespoon adobo sauce (from a can of chipotle peppers)
  • 1 lb ground turkey
  • 1 lb turkey Italian sausage (casings removed)
  • 2 eggs
  • ½ cup panko breadcrumbs
  • ½ teaspoon ground cumin
  • 1 teaspoon kosher salt
  • ½ teaspoon freshly ground black pepper

Instructions

  1. Preheat oven to 450F.
  2. Place zucchini, bell pepper, carrot, onion and garlic on a baking sheet. Drizzle olive oil over (just enough to coat), sprinkle with kosher salt and gently toss with your hands. Spread into one layer then roast in the hot oven for 7 minutes. Remove from oven and allow to cool.
  3. Mix together ketchup and adobo sauce in a small dish and set aside.
  4. Place the remaining ingredients into a large bowl. Add diced vegetables. Using your hands, mix thoroughly just until combined.
  5. Place meat mixture into a large loaf pan or divide into muffin tins or mini-muffin tins. Brush top of meat with chipotle glaze.
  6. Roast meatloaf until cooked thoroughly (approximately 15 minutes for mini-muffins, 25 minutes for regular-sized muffins and 45-60 minutes for large muffin loaf).
  7. Remove from oven and allow to rest for 10 minutes before serving.

Notes

It's important to cut your veggies very small so they incorporate into the meat mixture.

Nutrition Information:
Yield: 6 Serving Size: 1
Amount Per Serving: Calories: 498Total Fat: 28gSaturated Fat: 6gTrans Fat: 1gUnsaturated Fat: 18gCholesterol: 212mgSodium: 1359mgCarbohydrates: 19gFiber: 2gSugar: 9gProtein: 42g

This data was provided and calculated by Nutritionix.

© Kristy Bernardo
Cuisine: American / Category: Dinner
Turkey Meatloaf with a Chipotle Glaze

Raspberry Peach Cobbler with Crunchy Pecan Topping

August 14, 2014 by Kristy Bernardo 59 Comments

This Peach Cobbler Recipe has just enough sweetness without taking away the flavor of the summer fruit. A crunchy top makes it the best peach cobbler recipe!

This Peach Cobbler Recipe has just enough sweetness without taking away the flavor of the summer fruit. A crunchy top makes it the best peach cobbler you've had!

This Peach Cobbler Recipe has just enough sweetness without taking away the flavor of the summer fruit. A crunchy top makes it the best peach cobbler recipe!

Let's see, so far this week we've enjoyed a fantastic chopped salad recipe with shrimp, a comforting loaded potato soup and a smoky corn and tomato au gratin. I believe a nice summer dessert should go next on our menu and this peach cobbler recipe is just the dish.

Although peaches aren't included in the abundant summer produce that my folks are supplying me, I still seem to have more than I can use. How can you bypass the peach stands with all those fresh summer peaches just begging to be turned into something extraordinary? Or even just eaten out of hand because it's summer and that's what summer is all about? One of my favorite memories as a kid was when my mom would come home from the store each week with a huge case of fresh peaches. My friend Mary, who lived just up the road, would ride her bike over as fast as she could. We would sit on my back steps and eat peach after peach after peach. Man, what I wouldn't give for a warm summer afternoon where I had nothing more important to do than eat as many peaches as I felt like 🙂 [Read more...]

Chopped Salad Recipe with Cumin Shrimp and Cilantro Lime Dressing

August 12, 2014 by Kristy Bernardo 76 Comments

This Chopped Salad Recipe is filled with all good things and packed with flavor! Topped with Cumin Lime Shrimp and tossed with a Cilantro Lime Dressing that is light and flavorful but can be made spicy with a little jalapeno. A delicious way to eat healthy!

This Chopped Salad Recipe is filled with healthy goodness - black beans, kale, chopped bell peppers and jicama with fresh summer corn. Healthy & DELICIOUS!

This Chopped Salad Recipe is filled with all good things and packed with flavor! Topped with Cumin Lime Shrimp and tossed with a Cilantro Lime Dressing that is light and flavorful but can be made spicy with a little jalapeno. A delicious way to eat healthy!

Does this chopped salad recipe look eerily similar to this chopped salad recipe?

That chopped salad has a thick Coconut-Curry Dressing along with peanuts, carrots and mango. The kale and bell peppers are the same but this Mexican-style version has fresh corn, jicama, black beans and radishes along with flavorful cumin shrimp and a tasty cilantro-lime dressing. While they look similar, I assure you that the flavors are not even close to the same.

I just can't seem to stop myself from creating new chopped salad recipes. It's an addiction and I can. not. stop.

This Chopped Salad Recipe is filled with all good things and packed with flavor! Topped with Cumin Lime Shrimp and tossed with a Cilantro Lime Dressing that is light and flavorful but can be made spicy with a little jalapeno. A delicious way to eat healthy!

We've talked about how I'm not a big lettuce salad eater. I've always been about the other things that go on the top - the lettuce is just a filler for me. I love the crunch and flavor of vegetables, meats and cheeses. Kale is my one exception lately although I still add a minimal amount. I want a meal, not a fluffy filler that will have me hungry in an hour.

My parents came over for dinner one night last week and my Dad is big on chopped salad recipes like this, too. I wanted something filling but light, healthy but super tasty. Mom doesn't care for spicy though so I left out the jalapenos I normally would have piled on (which, incidentally, would be great here). I also made a cheese fondue for the kids and some Baked Coconut Shrimp - mom's favorite. Recipes coming soon, of course.

But the star of this party was definitely this chopped salad recipe that no one could seem to get enough of. Even after all the appetizers, second rounds were had by all. The dressing itself is flavorful but light. The shrimp have a lot of flavor and could easily be eaten on their own.

This Chopped Salad Recipe is filled with all good things and packed with flavor! Topped with Cumin Lime Shrimp and tossed with a Cilantro Lime Dressing that is light and flavorful but can be made spicy with a little jalapeno. A delicious way to eat healthy!

There's a lot of versatility to this chopped salad recipe, as well. Shredded chicken would be a wonderful substitute for the cumin shrimp and you could throw in just about any vegetable that you like. A nice cheese would be great, too - feta, queso fresco or even a diced jack would be delicious.

Chopped Salad Recipe with Cumin Shrimp and Cilantro Lime Dressing

Chopped Salad Recipe with Cumin Shrimp and Cilantro Lime Dressing


For the Cumin Lime Shrimp

  • 1 lb shrimp (peeled and deveined)
  • ½ cup fresh lime juice
  • ¼ cup extra-virgin olive oil
  • 1 ½ teaspoons ground cumin
  • large pinch kosher salt

For the Dressing

  • ½ cup fresh lime juice
  • ½ cup extra-virgin olive oil
  • ¼ cup honey
  • ⅓ cup cilantro
  • 2 garlic cloves

For the Salad

  • 1 red bell pepper (chopped)
  • 1 yellow bell pepper (chopped)
  • 2 cups chopped jicama
  • 1 can black beans (rinsed, drained and patted dry)
  • 2 cups chopped kale
  • 1 cucumber (seeded and chopped)
  • 3 ears corn (kernels removed)
  • 2 radishes (thinly sliced)
  • 1 avocado (diced)
  • ¼ cup chopped cilantro
  1. Mix together lime juice, olive oil, cumin and salt in a resealable plastic bag. Add shrimp and toss around in bag to coat. Refrigerate one hour, turning bag once halfway through.
  2. Add all dressing ingredients to a Vitamix or other high-powered blender. Blend completely then pour into a serving dish. Set aside.
  3. Assemble salad by placing all ingredients into a large bowl. Cover with plastic wrap until ready to dress.
  4. Preheat oven to 400. Remove shrimp from marinade, drain well. Place shrimp on baking sheet and roast for approximately 5-8 minutes or until shrimp are cooked through (depends on size of shrimp). Remove immediately from baking sheet so they don't continue cooking. Allow to come to room temperature.
  5. Top the salad with the shrimp then drizzle salad dressing over. Sprinkle with chopped cilantro, toss and serve.
 

Try the delicious shrimp recipes next!

  • 4-minute Spicy Garlic Shrimp
  • Blackened Shrimp & Crispy Chilled Cucumbers
  • Garlic Butter Shrimp Scampi
  • Gambas al Ajillo (Shrimp in Garlic Sauce)
  • Grilled Shrimp with Garlic & Beer
  • Parmesan Shrimp

Loaded Potato Soup Recipe - No Peeling, Baking, or Draining!

August 11, 2014 by Kristy Bernardo 130 Comments

a bowl of loaded potato soup with a beige towel and a sprig of parsley

This flavor-packed Loaded Potato Soup is the perfect comfort food. And the best part is there's no peeling, baking, or even draining required! It's made with red potatoes (skins on!), melted cheese, and plenty of bacon, plus it's rustic, hearty, and incredibly easy to make. When it's chilly outside and you just need a bowl of something warm and satisfying, this recipe has you covered.

Bowl of loaded potato soup filled with chunks of potato, melted cheese, green onions, and bacon crumbles on a light background.

Why You'll Love This Recipe

  • There's no peeling, baking, or draining required: This loaded potato soup recipe uses red potatoes, so there's no need to peel them. Their thin skins add a nice texture (and bonus nutrients), and skipping that step saves a lot of time. Some loaded potato soup recipes have you baking the potatoes first or boiling them in water, then draining them and adding them back to the pot. For this recipe, you'll simmer the potatoes right in chicken stock and mash them straight in the pot. Easy, flavorful, and much less cleanup!
  • It uses simple, pantry-friendly ingredients: You don't need anything fancy here. A few red potatoes, some broth, cheese, milk, bacon, and maybe an onion or two, and you're in business. It's the kind of meal you can whip up without a special trip to the store.
  • It's fast and easy: This isn't one of those all-day soups. It comes together quickly on the stovetop, making it perfect for weeknights when you're short on time but still craving something cozy and satisfying.
  • It's creamy, cheesy comfort in a bowl: Loaded potato soup is the definition of comfort food. It's thick and creamy, with plenty of melted cheddar and a smoky finish from the bacon. Every spoonful is warm, hearty, and just plain delicious!
  • It's totally customizable: This recipe is more of a blueprint because it's really easy to make it your own. If you want to add some heat, toss in some jalapeños or adobo sauce. If you need to use up leftovers, stir in some chopped ham, shredded chicken, or even roasted veggies. Then top it with your favorites: sour cream, green onions, blue cheese, or more bacon (always more bacon!). The possibilities are endless.
  • It's gotten rave reviews: Stephanie said "This is my go to recipe for potato soup. Utterly delicious and filling. So easy to make." And Laura said "This soup is so gooood! I just made it and I can't stop eating. 😀 It's so creamy and yummy, and the bacon gives it a delicious taste. I'm so glad I found this recipe through Pinterest!"
Side view of a bowl of loaded potato soup with visible potato chunks, melted cheese, bacon, and jalapeños, set on a rustic table.

Loaded Potato Soup Ingredients

  • ½ pound bacon, sliced into large pieces
  • ½ medium sweet onion, chopped
  • 3 tablespoons flour
  • 4 cups (32 oz) low-sodium chicken broth
  • 3 pounds red potatoes, quartered (no need to peel!)
  • 1 ½ cups shredded cheddar cheese
  • 2 cups whole milk (or almond milk)
  • Kosher salt and freshly ground black pepper, to taste
  • Optional Toppings: extra shredded cheddar cheese, sour cream, chopped green onions or chives, crumbled bacon, minced fresh jalapeños, a drizzle of adobo sauce
Bowl of thick and creamy potato soup topped with melted cheese, crispy bacon pieces, and fresh herbs on a rustic green plate.

Step-by-Step Instructions

  1. Cook the bacon: In a large stockpot over medium-high heat, cook the bacon until it's crisp. Remove it with a slotted spoon and drain it on paper towels, leaving the drippings in the pot.
  2. Sauté the onions: Reduce the heat to medium, then add the chopped onions to the bacon grease. Cook until they're translucent, about 5 minutes.
  3. Make the roux: Sprinkle the flour over the onions. Stir constantly for 1 minute to cook out the raw flour taste.
  4. Add the broth and potatoes: Slowly whisk in the chicken broth until it's smooth. Add the quartered potatoes and bring it to a boil. Reduce it to a simmer and cook for 15-30 minutes, until the potatoes are very soft.
  5. Mash the potatoes: Use a potato masher directly in the pot to mash the potatoes. Leave some chunks for texture.
  6. Add the cheese and milk: Stir in the shredded cheese until it's melted and smooth. Add the milk and return the soup to a simmer. Cook it for about another 10 minutes until it's very hot.
  7. Add toppings and serve: Ladle the soup into bowls and add your favorite toppings.
Bowl of loaded potato soup on a wooden table, topped generously with cheddar cheese, bacon bits, and chopped green onions, with spoons nearby.

If you're a chowder fan like I am, you need to check out these favorites. This quick new england clam chowder is a fast, flavorful classic that tastes like it simmered all day, but it's on the table in no time. For something a little heartier, try the hearty fish and shrimp chowder, packed with seafood in a rich, creamy broth. And for a lighter option that still hits the spot, don't miss the no-cream corn chowder - you won't believe the secret ingredient! Each one is cozy, delicious, and perfect for soup season.

Variations

  • Spicy: If you're a spice lover, try stirring in a spoonful of adobo sauce from a can of chipotle peppers or mince up one of the peppers for even more heat. You can also add diced jalapeños or a dash or two of cayenne. This is a great way to balance out the richness of the soup with a little fiery depth. Here's a recipe for spicy potato soup with chipotle and fresh corn!
  • Meaty: This soup is already hearty, but you can make it even more filling by tossing in some chopped leftover ham, shredded rotisserie chicken, or chopped steak. It's a smart way to repurpose leftovers and turn this into a full-blown dinner that'll stick to your ribs!
  • Vegetarian: To make this soup vegetarian, simply skip the bacon and swap the chicken broth for vegetable broth. To take in a step further, top it with roasted vegetables like broccoli, cauliflower, or mushrooms!
  • Extra Creamy: This soup is already really creamy, but if you want to take it up a notch, stir in a splash of heavy cream or a big dollop of sour cream right before serving. It gives the soup an even silkier texture and boosts its richness in the best way possible. A swirl of cream on top also makes for a pretty presentation if you're serving guests.

Quick Tips

  • Red or white potatoes work best with this method, but russets are fine as long as you peel them first.
  • Use leftover baked potatoes for a shortcut!
  • Mash just enough of the potatoes to thicken the soup while keeping some texture.
  • Simmer but don't boil it after adding the cheese and milk to prevent curdling.
  • Prep the toppings in advance so they're ready to go when the soup is done.
Close-up of creamy loaded potato soup in a white bowl with crispy bacon, shredded cheddar cheese, and sliced green onions on top.

Frequently Asked Questions

  • Can I use a different type of potato? While I love the rustic flavor and texture of red potatoes (and not having to peel them is a huge bonus), you can absolutely use russet potatoes or Yukon gold if that's what you have on hand. Just be sure to peel russets first since their skin can be a bit tough in soup. Yukon golds have a buttery flavor and thin skin, so peeling is optional.
  • Can I make this loaded potato soup vegetarian? Yes, just skip the bacon and use vegetable broth instead of chicken broth. To keep that "loaded" feel, you can still top it with shredded cheese, green onions, and a dollop of sour cream. You could even add some sautéed mushrooms or roasted corn for more veggies!
  • Is this recipe gluten-free? As written, the recipe includes flour to help thicken the soup. To make it gluten-free, you can substitute the flour with a gluten-free flour blend or use cornstarch (mix 1 tablespoon cornstarch with 2 tablespoons cold water and stir it in after the potatoes are mashed).
  • Can I make this ahead of time? This soup stores really well in the refrigerator for 3-4 days. In fact, the flavor gets even better the next day! Reheat it gently on the stove or in the microwave, adding a little more milk or broth if it's too thick.
  • Can I freeze loaded potato soup? Technically yes, but I don't really recommend it. The potatoes can get grainy or mushy after thawing, and the dairy may separate slightly. If you must freeze it, do so before adding the milk and cheese, then stir those in after reheating.
  • How do I make the soup thicker? The mashed potatoes do a great job of naturally thickening the soup. But if you want it even thicker, try letting it simmer uncovered a bit longer after mashing. Or make it a day in advance as it thickens up significantly after a night in the fridge.
  • Can I make this in the Instant Pot? I love using my Instant Pot for this soup, especially in the warmer months when I don't want to heat up the kitchen. You'll follow most of the same steps, but sauté the bacon and onion using the "Sauté" function, then pressure cook the potatoes in broth for 8 minutes before mashing and adding the cheese and milk. (There's a full Instant Pot version here if you'd like step-by-step instructions.)
  • Is loaded potato soup healthy? It's definitely on the indulgent side, especially with ingredients like bacon, cheese, and whole milk, but it can absolutely be part of a balanced meal. Red potatoes add fiber, vitamins, and minerals, and leaving the skins on boosts the nutritional value. If you're looking to lighten it up a bit, you can use reduced-fat cheese, swap in turkey bacon, or use almond or reduced-fat milk instead of whole milk. You can also add some chopped fresh vegetables to the soup for even more nutrition.
  • What goes with loaded potato soup? This soup is hearty enough to stand on its own, but it's also great paired with a few simple sides. A crusty loaf of bread (think sourdough or a warm baguette) is a must and perfect for dunking. I like to serve a crisp green salad or roasted veggies like broccoli or Brussels sprouts. If you're serving it as part of a bigger meal, grilled chicken or a light sandwich for lunch can round things out nicely!
Bowl of loaded potato soup on a wooden table, topped generously with cheddar cheese, bacon bits, and chopped green onions, with spoons nearby.

Loaded Potato Soup

Yield: 8 servings
Prep Time: 10 minutes
Cook Time: 50 minutes
Total Time: 1 hour

No boiling or baking your potatoes ahead of time! This loaded potato soup is simple with loads of flavor.

Ingredients

  • ½ pound bacon, sliced into large pieces
  • ½ medium-sized sweet onion, chopped
  • 3 tablespoons flour
  • 1 32- ounce container low-sodium chicken broth, 4 cups
  • 3 pounds red potatoes, quartered or halved depending on size
  • 1 ½ cups shredded cheddar cheese
  • 2 cups whole milk, almond milk works, too
  • kosher salt and freshly ground black pepper
  • toppings: shredded cheddar cheese, sour cream, chopped green onion, crumbled bacon, minced fresh jalapeno, a drizzle of adobo sauce

Instructions

  1. Heat a stockpot over med-high heat. Add bacon and cook until crisp, remove with a slotted spoon onto a plate lined with paper towels, leaving bacon grease in stockpot.
  2. Reduce heat to medium, add onions. Cook until soft and translucent, about 5 minutes. Sprinkle flour over onions and cook, stirring constantly, about a minute (this will remove the "raw" flour taste).
  3. Slowly pour in chicken stock, whisking constantly until smooth. Add potatoes, bring to a boil then simmer until potatoes are very soft (15-30 minutes, depending on size of potatoes).
  4. Using a potato masher or something similar, crush potatoes to thicken soup, leaving some chunks but allowing some to "melt" into the soup. Stir in cheese until melted and smooth. Add milk, bring back to a simmer and cook for an additional 10 minutes until very hot.
  5. Ladle soup into bowls and top each as desired.

Notes

Note: Nutritional information does not account for toppings.

Nutrition Information:
Yield: 8 Serving Size: 1
Amount Per Serving: Calories: 461Total Fat: 22gSaturated Fat: 9gTrans Fat: 0gUnsaturated Fat: 11gCholesterol: 58mgSodium: 819mgCarbohydrates: 42gNet Carbohydrates: 38gFiber: 4gSugar: 6gProtein: 24g

This data was provided and calculated by Nutritionix.

© Kristy Bernardo
Cuisine: American / Category: Soups and Stews
Loaded Potato Soup Recipe - No Peeling, Baking, or Draining!

Chocolate Mousse with Drunken Cherries

August 8, 2014 by Kristy Bernardo 75 Comments

This Chocolate Mousse Recipe is rich and decadent plus it's a snap to make! It's wonderful on its own or top with our delicious drunken cherries.

This Chocolate Mousse is rich and decadent plus it's a snap to make! It's wonderful on its own or top with delicious drunken cherries.

This Chocolate Mousse Recipe is rich and decadent plus it's a snap to make! It's wonderful on its own or top with our delicious drunken cherries.

If you're a chocolate mousse lover then this chocolate mousse recipe is for you.

I've made many a chocolate mousse recipe over the years and I've made tweaks as I go. I never wrote a recipe down, instead just tasted as I went, varying the amount of chocolate and whipped cream to suit my mood.

It wasn't until I went cherry-picking a few weeks ago that I stepped it up a notch. This chocolate mousse recipe is so good that it probably jumped up three or four notches, actually.

The drunken cherries take it from a really good treat to something you could should serve the next time you need an easy dessert that will impress as well. [Read more...]

Roasted Red Pepper Soup with Fresh Crab

August 6, 2014 by Kristy Bernardo 62 Comments

This Roasted Red Pepper Soup with Crab is an elegant soup with fantastic flavor! A Vitamix soup but could also be made on the stove with a hand blender.

This Roasted Red Pepper Soup with Fresh Crab is an elegant soup with fantastic flavor! A Vitamix soup but can also be made on the stove using a hand blender.

This Roasted Red Pepper Soup with Crab is an elegant soup with fantastic flavor! A Vitamix soup but could also be made on the stove with a hand blender.

And here I am, making yet another Vitamix soup in my kitchen.

This particular Vitamix soup doesn't use my tofu trick, however. No, this recipe is a bit more indulgent and uses half and half or heavy cream to achieve that rich, silky texture.

Roasted Red Pepper Soup has been a favorite of mine for years. It's an easy recipe to keep around since the convenience of jarred roasted red peppers makes cooking it a snap. Buy your roasted red peppers at Costco in their ginormous jar and you can make it for super cheap, too. I do enjoy roasting my own peppers as well and the flavor can't be beaten. Oh time, why are you always a factor in everything we do? 🙂

This Roasted Red Pepper Soup with Crab is an elegant soup with fantastic flavor! A Vitamix soup but could also be made on the stove with a hand blender.

This easy Vitamix soup is elegant enough that it makes a perfect dinner party or holiday dinner starter. It can also be made ahead of time then refrigerated until ready to reheat and serve. Reheating can be done in a pan on the stove over medium-low heat.

I won't claim that it's healthy like my Roasted Butternut Squash, Creamy Tomato with Gorgonzola Croutons or my Creamy Summer Corn & Potato Chowder Vitamix soups - but sometimes those healthy tricks don't work right with certain foods and recipes. Personally I don't like sacrificing flavor just to make a dish healthy so I'll go with the heavy cream and butter when I have to. You'll know the compromise is worth it when you take your very first spoonful!

More delicious soup recipes:

  • Lentil Soup Recipe with Parmesan & Smoked Sausage
  • Lobster Bisque with Old Bay Oyster Crackers
  • Roasted Cauliflower Soup
  • Loaded Potato Soup Recipe - Creamy Cheese & Bacon
  • Chicken Tortilla Soup with Hatch Chiles

Vitamix Soup | Roasted Red Pepper Soup with Fresh Crab

Roasted Red Pepper Soup with Fresh Crab

Don't be tempted to skip the crab. It helps balance the flavors and the soup really shines with it.

  • ⅓ cup chopped onion
  • 1 tablespoon extra-virgin olive oil
  • 1 cup chicken broth
  • 1 cup half and half or heavy cream
  • 2 red roasted red bell peppers (I sometimes roast my own or just use two from a jar if I'm short on time)
  • 2 teaspoons lemon juice
  • pinch cayenne pepper
  • ½ teaspoon salt
  • 1 tablespoon all-purpose flour
  • 1 16 ounce container fresh crab meat
  1. Remove crab from refrigerator and let sit at room temperature while you prepare soup (this way it won't be too cold to add to the soup).
  2. Preheat a skillet over medium heat. Add olive oil and onions, saute until onions are soft and translucent, about 5 minutes.
  3. Place onions and all ingredients (except crab) in blender. Start on Variable 1, quickly go to 10, then to high. Blend for 5-7 minutes or until very hot and steaming. Add salt, taste and season more if needed.
  4. Pour soup into four bowls. Divide crab mixture between bowls and gently drop into the middle of each bowl. Garnish with freshly chopped parsley, if desired.

Bacon Blue Cheese Bread

July 25, 2014 by Kristy Bernardo 30 Comments

soft, crusty, buttery bread with blue cheese and bacon tucked into each slice - perfect with a hot soup! | thewickednoodle.com

Bacon and blue cheese is a fantastic flavor combination! Try this bacon blue cheese bread for a delicious appetizer or as an accompaniment to soup or pasta.

soft, crusty, buttery bread with blue cheese and bacon tucked into each slice - perfect with a hot soup! | thewickednoodle.com

There's been a summer cold being passed around these parts and last week I came down with it. This meant that there was only one possible option in the kitchen: a good, hot soup.

This also meant that there was only one possible option for what to go with it: a good, hot, crusty, cheesy bread.

Bacon Blue Cheese Bread, of course.

I am such a sucker for the bacon and blue cheese flavor combination. And it goes so well with so many things: blue cheese stuffed pork loin wrapped in bacon, a wedge salad, or blue cheese burger totchos.

It just so happens to make a fantastic bacon blue cheese bread, too.

Normally when I make a pull-apart bread I'll use a round loaf, if only because it's easier for me to find a loaf of bread with a good, hard crust in that shape. But when I find one that's oblong with a harder crust, I'll take it. I find that it's easier to slice and stuff.

soft, crusty, buttery bread with blue cheese and bacon tucked into each slice - perfect with a hot soup! | thewickednoodle.com

I also love to do this with individual hard rolls. It makes it much easier to serve to guests so you don't have everyone eating from the same big loaf. Of course, you can always just slice it into individual pieces.

To make stuffing this bread really easy I like to slice my bacon into thirds before cooking. Don't bother cooking it in batches of one layer, just toss it all in your pan if there's not room and stir it up as more fat renders.

You wouldn't want to do that with whole slices but smaller pieces work (or if I'm making a dish where I need crumbled bacon I'll slice the bacon into small pieces first, so much easier)! Thirds work best here because they're easiest to slide into the buttery, blue cheesy crevices.

soft, crusty, buttery bread with blue cheese and bacon tucked into each slice - perfect with a hot soup! | thewickednoodle.com

I made my bacon blue cheese bread to go with rustic potato soup and oh, my, was it fantastic!! It would go perfectly with tomato soup, too. In any case, it made me *almost* cured. Either that or all that extra rest I forced myself into (but I'm pretty sure it was the bread!

soft, crusty, buttery bread with blue cheese and bacon tucked into each slice - perfect with a hot soup! | thewickednoodle.com

Bacon Blue Cheese Bread

Yield: 8 servings
Prep Time: 10 minutes
Cook Time: 20 minutes
Total Time: 30 minutes

Bacon and blue cheese is a fantastic flavor combination! Try this bacon blue cheese bread for a delicious appetizer or as an accompaniment to soup or pasta.

Ingredients

  • 1 large round or oval-shaped loaf of French bread (or Italian, Sourdough, etc., just make sure it’s got a hard-ish crust)
  • 6 slices bacon (cut into thirds and cooked until crisp)
  • ½ cup butter
  • 4 ounces crumbled blue cheese
  • ¼ teaspoon kosher salt
  • freshly ground black pepper
  • 1 cup shredded cheddar and jack cheese (combo)
  • chopped parsley (optional)

Instructions

  1. Preheat oven to 375F. Spray a sheet of foil with cooking spray and set loaf on top.
  2. Slice ½-inch grid lines into the bread, crosswise in both directions, stopping just before the bottom of the bread (don’t cut all the way through).
  3. Melt the butter just until there are a few butter chunks left that are not melted, then remove from heat and stir to finish melting entirely (this will prevent the butter from being too hot and making the blue cheese melt).
  4. Mix together the melted butter, blue cheese, salt and pepper.
  5. Gently spoon the butter mixture in all of the crevices, making sure it gets in every part of the loaf. Wrap the loaf up in the foil and place directly on the oven rack and bake for 15 minutes.
  6. Remove from oven, open the foil and place cooked bacon slices into crevices. Sprinkle the shredded cheese on top of the bread. Leaving the foil open, return bread to oven and bake until the cheese is melted and lightly browned.
  7. Garnish with chopped parsley, if desired. Serve immediately.
Nutrition Information:
Yield: 8 Serving Size: 1
Amount Per Serving: Calories: 424Total Fat: 26gSaturated Fat: 15gTrans Fat: 1gUnsaturated Fat: 9gCholesterol: 67mgSodium: 941mgCarbohydrates: 32gNet Carbohydrates: 31gFiber: 1gSugar: 3gProtein: 16g

This data was provided and calculated by Nutritionix.

© Kristy Bernardo
Cuisine: American / Category: Sides
Bacon Blue Cheese Bread

Buffalo Chicken & Potato Skillet

July 21, 2014 by Kristy Bernardo 85 Comments

buffalo chicken & potato skillet - a one-pan dish!

This Buffalo Chicken & Potato Skillet is a fun variation to buffalo wings or even a buffalo wing dip. Crispy potatoes topped with shredded chicken, wing sauce, blue cheese, celery & a drizzle of dressing - perfect for an easy dinner or a Super Bowl appetizer!

buffalo chicken & potato skillet - a one-pan dish!

I already know what's going on inside your head. You saw the picture of yet another one-pan potato skillet dish and you're now wondering if I've lost my freaking mind. To which, of course, the answer is obviously "yes".

But I'm not sorry and there's nothing I can do about it. I've gotten on the cook-my-potatoes-Jacques-Pepin-style train and add lots of awesome ingredients to them to make one yummy, cohesive dish. Bacon, Egg & Potato Breakfast Skillet, Steak & Potato Chimichurri with Fresh Summer Vegetables and now this Buffalo Chicken & Potato Skillet.

I've gone cast iron skillet meal mad.

I'm just having such fun with the method and it's so easy to add loads of great toppings and see where it goes. In this case, it's shredded chicken tossed with a flavorful buffalo wing sauce, creamy blue cheese, chopped celery for a little crunch (and heat relief) as well as a drizzle of sour cream.

Sour cream is just what I had on hand but ranch or blue cheese dressing would be awesome, too. It's just one big pan of buffalo-wing-goodness...only with crispy potatoes, too!

buffalo chicken & potato skillet - a one-pan dish!

This method of cooking potatoes - where the potatoes are allowed time to cook in the pan until all the liquid evaporates then to brown and crisp in a little fat (such as butter) is just so tasty and easy and perfect.

The funny thing is that I've been making these potatoes for a few years now but only recently started adding more ingredients.

You can see in that second photo that I doused it in buffalo sauce - that's how I like it and how I suggest you serve yours, too. But you can also just toss the shredded chicken in the sauce and have everyone decide how much extra sauce they want themselves.

This Buffalo Chicken & Potato Skillet dish is AWESOME though - seriously, we were all devouring it while making little grunts and nods. You can imagine how it might taste, I'm sure, as there aren't any ingredients in there that you haven't tasted a zillion times before.

But you've never tasted it with crispy little nuggets of potatoes, have you? If not, then today is the absolute perfect time to start!

Buffalo Chicken & Potato Skillet

Buffalo Chicken & Potato Skillet

Yield: 8 servings
Prep Time: 10 minutes
Cook Time: 20 minutes
Total Time: 30 minutes

Crispy potatoes topped with shredded chicken, wing sauce, blue cheese, celery & a drizzle of dressing – perfect for an easy dinner or a Super Bowl appetizer!

Ingredients

  • 2 pounds baby potatoes (the tiniest you can find)
  • 1-2 cups reduced-sodium chicken stock or broth
  • 3 T unsalted butter
  • 1 rotisserie chicken (meat shredded and the rest discarded)
  • 1 16- ounce bottle buffalo wing sauce
  • ½ cup crumbled blue cheese
  • 1 celery stalk (diced)
  • ½ cup ranch dressing (can also use blue cheese dressing or thinned sour cream)

Instructions

  1. Place one layer of baby potatoes in a 12-inch cast-iron skillet, fitting slightly snugly. Pour chicken stock over potatoes just until halfway up their sides. Bring to a boil over medium-high heat. Reduce heat to medium, cover skillet and cook for 5 minutes.
  2. Remove the cover from skillet and cook another 5 minutes. Cut butter into three pieces and lay each piece of butter in a different spot over the potatoes, allowing to melt. DO NOT STIR. Keep cooking until all liquid has evaporated and you hear a sizzling sound – that sound means that the potatoes are now starting to brown. Using something flat-bottomed (I use a tamper but anything flat-bottomed will do), gently press down on each potato to flatten gently (it’s okay if they split, you want to gently “pop” them). Now just leave them alone to brown – no stirring – for another 5 minutes or so, checking the bottoms occasionally.
  3. Meanwhile, add enough buffalo wing sauce to thoroughly coat chicken, then gently heat in microwave until just hot (don’t heat chicken until coated with sauce or it will become dry).
  4. Place chicken mixture on top of potatoes in skillet. Top with blue cheese crumbles, diced celery, and drizzle with ranch dressing. Serve immediately.
Nutrition Information:
Yield: 8 Serving Size: 1
Amount Per Serving: Calories: 329Total Fat: 17gSaturated Fat: 6gTrans Fat: 0gUnsaturated Fat: 10gCholesterol: 58mgSodium: 2058mgCarbohydrates: 28gNet Carbohydrates: 25gFiber: 3gSugar: 4gProtein: 17g

This data was provided and calculated by Nutritionix.

© Kristy Bernardo
Cuisine: American / Category: Main Dish
Buffalo Chicken & Potato Skillet

Zucchini Ribbons with Lemon & Black Pepper Vinaigrette

July 21, 2014 by Kristy Bernardo 51 Comments

zucchini ribbons take just minutes to make and you can toss with just about any dressing for a quick salad or side dish - plus they're so pretty!

Zucchini Ribbons are easy to make and take just minutes! All you need is a vegetable peeler and some fresh zucchini and you're all set.

zucchini ribbons take just minutes to make and you can toss with just about any dressing for a quick salad or side dish - plus they're so pretty!

My parents have a huge garden at their house. They live in Paris (VA, not France) and everything seems to grow better there. Tomatoes, peas, corn, zucchini...any vegetable they plant seems to thrive. Which is, of course, fantastic for my sister and me since we get to reap the benefits without doing much of the work.

Not such a bad deal at all!

Zucchini is the one vegetable that seems to overflow every garden everywhere. Again, not a bad problem to have but it can be tough to come up with recipes for zucchini that varies enough. I don't know about you, but I don't like feeling that I'm eating the same thing night after night - and it's easy to feel that way in the middle of the zucchini season. Just take a look at Pinterest and you'll see that zucchini recipes dominate right now - they're everywhere.

I've been making all sorts of recipes lately utilizing zucchini: Steak & Potato Chimichurri with Fresh Summer Vegetables and Zucchini stuffed with Goat Cheese & Marinara are two of my favorites. And while I love those zucchini recipes, sometimes I just want something for a quick lunch or easy starter. These zucchini ribbons fit the bill perfectly!

[Read more...]

Meringues with Berries & Vanilla Creme Fraiche

July 17, 2014 by Kristy Bernardo 52 Comments

meringues with berries and vanilla creme fraiche - or "what do make with leftover egg whites"! Such an easy, elegant dessert!

These Meringues with Berries and Vanilla Creme Fraiche couldn't be simpler to make or prettier to eat! Save this recipe for whenever you have leftover egg whites.

meringues with fresh summer berries and vanilla creme fraiche - or "what do make with leftover egg whites"! Such an easy, elegant dessert!

The other day I had a serious cooking failure.

I would love to say that everything in my kitchen turns out just oh-so-perfectly each and every time but it just isn't reality. And even when things aren't complete failures, often times recipes need to be made over and over again, until the flavor and texture come out just right.

Last week's failure was a simple chocolate mousse - one that I'd already made several times and was in final stages of recipe completion. The recipe is solid, I just wasn't paying enough attention and the chocolate seized on me. Which meant it wouldn't turn into a silky, luscious mousse but would instead be a grainy mess - still tasty but definitely not something to serve. I was feeling frustrated that I was out of ingredients for another go at it and annoyed with myself for being careless...and that's when I spied the leftover egg whites sitting on my counter.

I decided that instead of wasting time crying over seized chocolate I would dive straight into another dessert. And I knew immediately what it would be: pillowy meringues with berries and vanilla crème fraiche. Oh yes, I was suddenly smiling again.

[Read more...]

Steak & Potato Chimichurri with Fresh Summer Vegetables

July 16, 2014 by Kristy Bernardo 61 Comments

steak and potato chimichurri - a fantastic one-dish meal! {and a great use for leftover steak}

You need to make this chimichurri dish.

Today, right now. Go pick some parsley or get some from the store and start making the chimichurri sauce, right this very second. It only takes a minute and you will fall over with happiness with the first bite and be so glad that I can be so bossy and made you do it.

I'm serious. I love all of my recipes but this one is freakin' amazing, if I do say so myself. First of all, you can make and serve it all in one dish. So less cleaning after which is what we all want.

★★★★★

"Absolutely love this"

- Sherri J.

Second, it's a great way to use any leftover steak which is always a bonus. And third, the flavor will make you jump up and down with glee that it's summer and everything you're eating is fresh and healthy and sooo delicious. Minus the steak, that's not healthy.

Which brings me to number four...if steak's not your thing, make this all about the fresh veggies and potatoes and yummy chimichurri sauce. Or heck, make it with chicken. Vegetarian or carnivore, doesn't matter.

Just make it.

steak & potato chimichurri with fresh summer vegetables - so much flavor!!

If you recognize the "potatoes-in-bottom-of-the-cast-iron-skillet" thing going on there, then you must have seen my Breakfast Skillet from a couple of weeks ago. This means you already know how obsessed I am with preparing potatoes this way and how often I make them. Just today I made another one-skillet dish with the potatoes on the bottom just like the others...and it was also darn good (although this one is still my favorite).

It's possible you may have extra chimichurri once your noshing fest is over. I didn't, but then I could drink the stuff. If you do have a bit left, or if you simply want to make a double batch and have some on hand for other uses, then here's a list of 20 more delicious ways to use chimichurri. But do make this first, I promise you will love it!

A couple of other really good lookin' chimichurri dishes:

Grilled Steak with Roasted Jalapeno Chimichurri

Seared Ahi Tuna with Chimichurri Sauce, Arugula & Avocado

Steak & Potato Chimichurri with Fresh Summer Vegetables

Steak & Potato Chimichurri with Fresh Summer Vegetables

Yield: 8 servings
Prep Time: 10 minutes
Cook Time: 35 minutes
Total Time: 45 minutes

A fresh-tasting, flavorful and filling one-pan dish.

Ingredients

  • 1 cup extra-virgin olive oil
  • 2 cups fresh Italian parsley leaves
  • 3 garlic cloves
  • ¼ cup hot & spicy fresh oregano leaves (or regular with a large pinch of red pepper flakes)
  • ¼ cup red wine vinegar
  • 2 ribeyes (room temperature (or leftover steak, chopped))
  • 1 tablespoon vegetable oil
  • 2 pounds tiny baby potatoes (the tiniest you can find)
  • 1-2 cups reduced-sodium chicken stock or broth
  • 3 T unsalted butter
  • 1 green zucchini (diced)
  • 1 yellow zucchini (diced)
  • 3 ears corn (kernels removed and cobs discarded)
  • 1 red bell pepper (diced)
  • 2 green onions (chopped)
  • kosher salt & freshly ground black pepper (to taste)

Instructions

    For the chimichurri:

    1. Place all ingredients into a high-powered blender and blend until very smooth. Allow to sit at room temperature for at least 30 minutes to allow flavors to meld while you prepare the rest of the dish.

    For everything else:

    1. Preheat a 12-inch cast-iron skillet over medium-high heat. Season steaks on both sides with salt & pepper. Add a tablespoon of vegetable oil and add steaks to the skillet when the oil begins to shimmer. Cook steaks, turning once, until the desired degree of doneness (I recommend medium-rare). Remove steaks and set aside to rest, covering loosely with tented foil.
    2. Without cleaning the skillet, add vegetables to skillet and cook for just a few minutes, until tender but still slightly crisp. Remove and set aside.
    3. Place one layer of baby potatoes in the skillet, fitting slightly snugly. Pour chicken stock over potatoes just until halfway up their sides. Bring to a boil over medium-high heat. Reduce heat to medium, cover skillet and cook for 5 minutes.
    4. Remove the cover from skillet and cook another 5 minutes. Cut butter into three pieces and lay each piece of butter in a different spot over the potatoes, allowing to melt. DO NOT STIR. Keep cooking until all liquid has evaporated and you hear a sizzling sound – that sound means that the potatoes are now starting to brown. Using something flat-bottomed (I use a tamper but anything flat-bottomed will do), gently press down on each potato to flatten gently (it’s okay if they split). Now just leave them alone to brown – no stirring – for another 5 minutes, checking the bottoms occasionally.
    5. Meanwhile, cut the steak into bite-sized pieces. When potatoes are ready, top them with steak then pile on the vegetables. Use foil to tent for a few minutes to gently heat through.
    6. Pour chimichurri sauce over everything in skillet until just coated. Serve immediately with extra chimichurri at the table.
    Nutrition Information:
    Yield: 8 Serving Size: 1
    Amount Per Serving: Calories: 494Total Fat: 35gSaturated Fat: 7gTrans Fat: 0gUnsaturated Fat: 26gCholesterol: 12mgSodium: 342mgCarbohydrates: 43gNet Carbohydrates: 35gFiber: 8gSugar: 6gProtein: 8g

    This data was provided and calculated by Nutritionix.

    © Kristy Bernardo
    Cuisine: Argentinian / Category: Dinner
    Steak & Potato Chimichurri with Fresh Summer Vegetables

    How to Make Chimichurri Sauce + 20 ways to use it

    July 16, 2014 by Kristy Bernardo 25 Comments

    a black bowl of chimichurri sauce on a wood table

    Chimichurri sauce is an easy way to transform any number of dishes from boring to fantastic. Check out 20 delicious ways to use it below!

    We enjoy this flavorful sauce all year long. If you've wondered how to make chimichurri or even just want to find out what it is, you've come to the right place.

    [feast_advanced_jump_to]
    a black bowl of chimichurri sauce on a wood table with a wooden spoon showing how to make chimichurri

    What is Chimichurri?

    Chimichurri is an Argentinian sauce and condiment that Argentinian's put on just about everything. It's filled with flavor and a wonderful acidic tang that can really bring a dish to life. It can also be used as a marinade.

    I make it most often in the summertime when fresh herbs are everywhere but it's delicious anytime, on and in almost any dish you can come up with. It's most commonly used to top grilled steak, however, which is another reason it's perfect for summer barbecues.

    When I say we put chimichurri on everything, I mean it! We use it to top vegetables, and we especially love on top of cauliflower steaks. I love to make roast beef with chimichurri, and these chimichurri chicken bites are to die for! We even make a steak, potatoes, and veggies in a skillet and top it with chimichurri.

    So yeah...we're big fans. Scroll down for more ideas for how to use chimichurri!

    grilled steak topped with chimichurri as an example of how to use chimichurri

    Is Chimichurri Sauce Spicy?

    Chimichurri is typically not a spicy condiment, however, it's an easy sauce to spice up if that's your thing. In my garden this year I'm growing "hot and spicy" oregano and I used some in this chimichurri sauce.

    I highly suggest trying it if you get the chance, but if you'd prefer to use regular oregano just add a pinch of crushed red pepper flakes for a little heat. It has so much flavor that you won't miss the heat if you're cooking for a crowd and want to keep it mild so everyone can enjoy.

    roasted cauliflower topped with chimichurri sauce as a way to show how to use chimichurri

    How to Make Chimichurri Sauce

    Part of what makes this flavorful condiment such a wonderful choice to make at home is because of how simple it is to make. There's no cooking involved, just throw a handful of ingredients into a high-powered blender and let it go on high speed until it's very smooth. That's it!

    Like many sauces, it's best when allowed some time to sit for the flavors to develop. You can use it right away, but keep this in mind when planning your meal.

    slices of freshly roasted beef topped with chimichurri as a way to show how to use chimichurri

    How to Use Chimichurri Sauce - 20 Ways!

    1. Toss with hot grilled or roasted vegetables for an easy, flavorful side dish.
    2. Stir some into mayonnaise for a fantastic sandwich spread.
    3. Grill some bread and dip it into chimichurri sauce.
    4. Add it to your favorite pasta salad.
    5. It's typically served with steak, but it's wonderful with chicken, too!
    6. Use it as a burger topping!
    7. Make a wrap with roasted vegetables and feta cheese, using Chimichurri as the sauce.
    8. Slow-cook some pork with chimichurri for an easy, delicious pork stew.
    9. Coat chicken tenders with chimichurri then panko breadcrumbs, then bake at 425°F until crispy and cooked through.
    10. It's terrific over your morning eggs. Especially with some avocado on the side.
    11. Make a chorizo and chimichurri sandwich.
    12. Add a dollop to a bowl of soup.
    13. Slice a fresh tomato and top it with chimichurri for a healthy snack.
    14. Stir some into mashed potatoes. Make Chimichurri potato cakes with any leftovers.
    15. Grill halloumi cheese and top it with chimichurri for an easy appetizer.
    16. Add it as a topping to grilled steak tacos.
    17. Make a chimichurri chicken salad.
    18. Use it as a salad dressing with lots of chopped veggies. It's amazing!
    19. Toss it with warm cannellini beans for an easy side dish.
    20. Mix it into softened cream cheese and use it as a spread for crackers.
    a black bowl of chimichurri sauce on a wood table

    Chimichurri Sauce Recipe

    Yield: 12 servings
    Prep Time: 5 minutes
    Additional Time: 30 minutes
    Total Time: 35 minutes

    Chimichurri sauce is an easy way to transform any number of dishes from boring to fantastic!

    Ingredients

    • 1 cup extra-virgin olive oil
    • 2 cups fresh Italian parsley leaves
    • 3 garlic cloves
    • ¼ cup hot & spicy fresh oregano leaves (or regular with a large pinch of red pepper flakes)
    • ¼ cup red wine vinegar
    • ½ teaspoon kosher salt (or to taste)
    • freshly ground black pepper

    Instructions

      Place all ingredients into a high-powered blender and blend until very smooth. Allow it to sit at room temperature for at least 30 minutes to allow flavors to meld.

    Nutrition Information:
    Yield: 12 Serving Size: 1
    Amount Per Serving: Calories: 180Total Fat: 18gSaturated Fat: 3gTrans Fat: 0gUnsaturated Fat: 15gCholesterol: 0mgSodium: 96mgCarbohydrates: 5gNet Carbohydrates: 2gFiber: 3gSugar: 0gProtein: 1g

    This data was provided and calculated by Nutritionix.

    © Kristy Bernardo
    Cuisine: Argentinian / Category: Sauces
    How to Make Chimichurri Sauce + 20 ways to use it

    Crostini with Goat Cheese, Slow-roasted Tomatoes & Balsamic Syrup

    July 15, 2014 by Kristy Bernardo 35 Comments

    crostini with whipped goat cheese, slow-roasted tomatoes and a balsamic syrup
    an easy, elegant & delicious appetizer!

    So last week we talked about how to make a balsamic glaze (or syrup, reduction...whatever you feel like calling it) and I gave you "20 awesome ways to use it". I made a fairly large batch of my own at the time and this is one of the awesome ways in which I used mine 🙂

    I love making crostini and usually always have some around.

    Even if I don't top the crostini with anything and just dip it into soup or enjoy a few pieces with a salad, they're still a great way to add some crunch to a meal.

    I love dipping them into fresh pesto or marinara and topping with fresh mozzarella. Sometimes I'll even sprinkle on a little shredded parmesan and pop them under the broiler for a couple of minutes. So many wonderful ways to use them!

    Balsamic goes so perfectly with goat cheese (or blue, yowza that's delicious!) or any number of other cheeses. Slow-roasting tomatoes brings out their sweetness which makes them the perfect topping - then the drizzle of balsamic syrup brings it all together. This crostini is an easy appetizer to prepare yet is sophisticated enough that you could serve it at a dinner party - but not so high-flyin' that it wouldn't work for a casual barbecue, either. You'll need a bit of time to prepare this one, if only because slow-roasting tomatoes is just that - slow. But you can make all the other components while the tomatoes roast or simply prepare it all the day before (or both). In any case, this crostini recipe is worth the effort to put together - you're going to love it!

    crostini with goat cheese, slow-roasted tomatoes & balsamic syrup

    crostini with goat cheese, slow-roasted tomatoes & balsamic syrup

    Yield: 15 -20 crostini
    Prep Time: 10 minutes
    Cook Time: 2 hours
    Total Time: 2 hours 10 minutes

    This is such a simple recipe but the flavor combination is to die for!

    Ingredients

    Crostini

    • 1 baguette, cut across into 1-inch slices
    • ¼ cup extra-virgin olive oil, plus 2 tablespoons (divided)
    • 1 pint cherry tomatoes, large ones cut in half
    • 1 5- ounce log goat cheese
    • 2-3 tablespoons heavy cream
    • ½ cup balsamic vinegar
    • kosher salt & freshly ground black pepper

    Instructions

    For the tomatoes:

    1. Preheat the oven to 250F.
    2. Line a baking sheet with parchment paper. Place tomatoes in one layer on baking sheet, drizzle with 2 tablespoons extra-virgin olive oil and season with kosher salt. Roast until the tomatoes are soft and starting to dry but still a bit moist (time depends on the size of your tomatoes but mine usually take about 2 hours or so).

    For the crostini:

    1. Place bread slices on baking sheet. Brush remaining ¼ cup extra-virgin olive oil over one side of bread. Sprinkle lightly with kosher salt and freshly ground black pepper. Bake at 350F until lightly browned, about 10-15 minutes.

    For the Whipped Goat Cheese:

    1. Whip together goat cheese and cream in a small bowl until light and spreadable.

    For the Balsamic Syrup:

    1. Place vinegar in a saucepan and bring to a boil. Reduce heat and keep it at a strong simmer until reduced by approximately one-third and mixture coats a spoon.
    2. Remove from heat and allow to cool (it will thicken as it cools). If it's too thick, add a bit more vinegar, place back over heat and stir until incorporated. If not thick enough, put back on burner until it thickens a bit more.

    Assembly:

    1. Spread some whipped goat cheese on each crostini. Top with 2-3 slow-roasted cherry tomatoes and drizzle some balsamic over the top. (You can also let guests assemble it themselves if you prefer).

    Notes

    Cook time is listed as two hours since you can prepare everything else while the tomatoes are roasting. All of the components can be made the day before, just bring it all to room temperature before assembling.

    Nutrition Information:
    Yield: 5 Serving Size: 1
    Amount Per Serving: Calories: 410Total Fat: 22gSaturated Fat: 8gTrans Fat: 0gUnsaturated Fat: 12gCholesterol: 23mgSodium: 591mgCarbohydrates: 41gFiber: 2gSugar: 9gProtein: 13g

    This data was provided and calculated by Nutritionix.

    © Kristy Bernardo
    Cuisine: Italian / Category: Appetizers
    Crostini with Goat Cheese, Slow-roasted Tomatoes & Balsamic Syrup

    More fantastic toppings for crostini:

    Summer Crostini with Whipped Roasted Garlic Goat Cheese

    Crostini with Kale and Parmesan

    Bacon, Egg & Crispy Potato Breakfast Skillet

    July 7, 2014 by Kristy Bernardo 34 Comments

    bacon, egg & potato breakfast skillet - a one-pan meal and super delicious!

    This hearty breakfast skillet has it all - crispy potatoes, eggs, bacon and loads of other toppings! All made together in one cast-iron skillet.

    bacon, egg & potato breakfast skillet - a one-pan meal and super delicious!

    We had some gorgeous weather here in Northern VA last week. Normally at this time of the year, it's very hot and very humid and we're all holed up indoors where there's some air-conditioned relief. This year, however, our 4th of July weather couldn't have been more perfect - mid to upper '70's, no humidity, not a cloud in the sky.

    Which, of course, made me crave something hearty for breakfast. During these hot summer months, my breakfasts are typically nothing more than a smoothie or a healthy green juice - it's just too hot for my usual voracious appetite.

    And who wants to cook over a hot stove when it's 95 degrees outside? I'd kept all the windows open overnight and when we woke up it was only 65 degrees in the house with sunny skies all-around. And so I got making this yummy breakfast skillet.

    I crisped some bacon in my cast-iron skillet (nothing else will do when it comes to bacon!), drained the grease and added my potatoes. This is the easiest method for cooking potatoes (it comes from Jacques Pepin) and it is so good.

    Feel free to make just the potatoes and stop there - the potatoes are crispy on the bottom and soft on the top - they make a terrific side dish. But I didn't want to stop there, I had a hearty breakfast skillet in mind.

    bacon, egg & potato breakfast skillet - a one-pan meal and super delicious!

    Start with teeny, tiny baby potatoes, the smallest you can find. Lay them in the skillet in one layer. You're going to add some chicken stock to your pan, too, enough to come about halfway up the sides of the potatoes.

    Cover and cook for about 5 minutes or so. Remove cover, add some butter and let it melt onto and into the potatoes. Allow all the liquid to evaporate - that's when you'll hear the potatoes starting to sizzle. Which means they're starting to brown, which means they're about to turn into something heavenly.

    You'll gently press down each potato to flatten them slightly, giving them a nice flat bottom so they can really crisp up. As I said, you can stop here and eat to your heart's content if you wish.

    bacon, egg & potato breakfast skillet - a one-pan meal and super delicious!

    After this, things speed up significantly. Pour over some beaten eggs, finish cooking in the oven, pull it out then add all your toppings. Cheese goes on first so it has time to melt thoroughly.

    Then feel free to add whatever toppings you like. We prefer bacon around these parts but sausage would be fantastic, too.

    bacon, egg & potato breakfast skillet - a one-pan meal and super delicious!

    What is it about one-pan breakfast skillets that are so appealing? Fewer dishes to wash, of course. Not having to keep an eye on three pans on the stove is also nice.

    And there's just something satisfying about slicing this hearty breakfast into pieces and knowing that it's all there - the meat, the potatoes, the eggs. What's not to love about that?

    bacon, egg & potato breakfast skillet - a one-pan meal and super delicious!

    More delicious breakfast recipes:

    • Raspberry Almond Flour Pancakes
    • Baked Eggs in Tomato-Chipotle Sauce
    • Avocado Baked Eggs
    • Butter & Cream Poached Eggs (great for Keto!)
    • 45 Easy Breakfast Ideas
    bacon, egg & potato breakfast skillet - a one-pan meal and super delicious!

    Bacon, Egg & Crispy Potato Breakfast Skillet

    Yield: 8 servings
    Prep Time: 10 minutes
    Cook Time: 20 minutes
    Total Time: 30 minutes

    You can cook your bacon in the cast-iron skillet first, then just set bacon aside and discard grease. No need to wipe out the skillet, just add your potatoes and start cooking.

    Ingredients

    • 2 pounds tiny baby potatoes (the tiniest you can find)
    • 1-2 cups reduced-sodium chicken stock or broth
    • 4 T unsalted butter
    • 6 large eggs (beaten well with 1 T water)
    • 1 cup shredded cheddar cheese
    • 8 slices thick-cut bacon (cooked and crumbled)
    • ½ cup sour cream
    • ½ red bell pepper (diced)
    • 1 jalapeno (minced)
    • 2 green onions (chopped)
    • ¼ cup chopped flat-leaf parsley

    Instructions

    1. Place one layer of baby potatoes in a 12-inch cast-iron skillet, fitting slightly snugly. Pour chicken stock over potatoes just until halfway up their sides. Bring to a boil over medium-high heat. Reduce heat to medium, cover skillet and cook for 5 minutes.
    2. Remove the cover from skillet and cook another 5 minutes. Cut butter into four pieces and lay each piece of butter in a different spot over the potatoes, allowing to melt. DO NOT STIR. Keep cooking until all liquid has evaporated and you hear a sizzling sound – that sound means that the potatoes are now starting to brown. Using something flat-bottomed (I use a tamper but anything flat-bottomed will do), gently press down on each potato to flatten gently (it’s okay if they split). Now just leave them alone to brown – no stirring – for another 5 minutes, checking the bottoms occasionally.
    3. Once the bottoms of the potatoes have browned, pour beaten eggs over potatoes. Reduce heat to medium-low, cover and cook until the egg on the side is starting to look done (about 3 minutes). Place skillet under broiler and, watching carefully, cook the top of the eggs until just done.
    4. Remove skillet from the oven. Top cooked eggs with cheese, then bacon, sour cream, and remaining ingredients. Serve immediately.
    Nutrition Information:
    Yield: 8 Serving Size: 1
    Amount Per Serving: Calories: 373Total Fat: 22gSaturated Fat: 10gTrans Fat: 0gUnsaturated Fat: 9gCholesterol: 190mgSodium: 551mgCarbohydrates: 28gNet Carbohydrates: 25gFiber: 3gSugar: 3gProtein: 17g

    This data was provided and calculated by Nutritionix.

    © Kristy Bernardo
    Cuisine: American / Category: Breakfast and Brunch
    Bacon, Egg & Crispy Potato Breakfast Skillet

    Fresh Cherry-Chipotle Salsa

    July 1, 2014 by Kristy Bernardo 88 Comments

    Fresh Cherry-Chipotle Salsa - it is SO GOOD and is perfect with chips, over fish, on crusty garlic bread!

    Fresh cherries and smoky heat make this fresh Cherry Chipotle Salsa a sweet and spicy treat! Serve with tortilla chips or over fish or chicken.

    Fresh Cherry-Chipotle Salsa - it is SO GOOD and is perfect with chips, over fish, on crusty garlic bread!

     It's the pick-your-own-cherries season right now and I have fresh cherries coming out of my ears!

    What a terrible problem to have, right?

    I picked 5 pounds over the weekend just so that I could make this Cherry Chipotle Salsa and a Rustic Cherry Tart. Tomorrow I go back to pick more and I'm thinking a cherry ice cream topping and a cherry-balsamic chicken dish. Ideas are still forming so I'll have to just surprise you.

    This cherry-chipotle salsa is so good. A little smokey heat from the chipotle, sweetness from the cherries and garlic & onion to pull it all together. It's perfect with some salty chips and a margarita but it's also delicious over fish or chicken.

    Fresh Cherry-Chipotle Salsa - it is SO GOOD and is perfect with chips, over fish, on crusty garlic bread!

    I have to admit that I'm not a fan of pitting all those cherries, though. It only took me about 10 minutes but it's a job I'd really rather skip. I thankfully have a cherry pitter to make the job easier. My mom can pit cherries with just a knife faster than anyone I've ever seen! I'm not slow by any means but I'd still rather use a pitter. Or have Mom do it for me when she visits!

    You're really going to love this cherry salsa, I promise you. It would be amazing over salsa chicken, too. Now go get picking!

    If this recipe looks familiar it's because it was originally published here in 2010. It didn't have photos, however, so I thought I'd give it a little update, especially since I love this recipe so much!
    Fresh Cherry-Chipotle Salsa

    Fresh Cherry-Chipotle Salsa

    Yield: 1 ½ cups
    Prep Time: 10 minutes
    Total Time: 10 minutes

    Fresh cherries and smoky heat make this fresh Cherry Chipotle Salsa a sweet and spicy treat! Serve with tortilla chips or over fish or chicken.

    Ingredients

    • 1 clove garlic
    • 2 cups halved fresh pitted cherries
    • ¼ chopped red onion
    • ¼ cup cilantro
    • 1 – 2 t. chipotle pepper
    • juice of half a lime
    • salt (to taste)

    Instructions

    1. Place garlic clove in a food processor and pulse a few times until finely chopped.
    2. Add half of the cherries and the rest of the ingredients (except salt) and process until finely chopped.
    3. Add the rest of the cherries and pulse until cherries are coarsely chopped (you want some larger pieces for a better texture). Season with salt to taste.

    Notes

    The instructions call for a food processor but you can also just chop it all up by hand and mix well.

    Nutrition Information:
    Yield: 6 Serving Size: 1
    Amount Per Serving: Calories: 58Total Fat: 0gSaturated Fat: 0gTrans Fat: 0gUnsaturated Fat: 0gCholesterol: 0mgSodium: 122mgCarbohydrates: 15gNet Carbohydrates: 13gFiber: 2gSugar: 11gProtein: 1g

    This data was provided and calculated by Nutritionix.

    © Kristy Bernardo
    Cuisine: Mexican / Category: Appetizers
    Fresh Cherry-Chipotle Salsa
    • Roasted Tomato Salsa
    • Pico de Gallo
    • Queso Dip with Hatch Chiles
    • Hot Mexican Corn Dip
    • Cinco de Mayo Recipes
    • Taco Recipes for Taco Night
    • Mexican Dessert Recipes

    Roasted Garlic & Pesto Chicken Flatbread

    June 30, 2014 by Kristy Bernardo 66 Comments

    roasted garlic & pesto chicken flatbread recipe - takes just minutes to throw together!

    This flatbread recipe is made with roasted garlic, pesto and shredded chicken for an easy, delicious and fast meal.

    roasted garlic & pesto chicken flatbread - takes just minutes to throw together!

    And so my flatbread recipe craze continues! I can't seem to help myself, flatbread is so easy to put together and I love that I can throw some in both the oven or on the grill.

    This version is much different from my other recent flatbread recipe: Caramelized Onion & Gruyere Flatbreads and those Cilantro-Lime Chicken Flatbreads with Mango & Roasted Jalapenos. I had some basil pesto and roasted garlic left to use and it was just too tempting to put them together with some tender chicken, gooey cheese and warm flatbread!

    And can I just say that it turned out fantastic?? For something that takes so little effort (once you've made your garlic & pesto) it really packs a ton of flavor. You could even skip the roasted garlic if you had to and it would still be awesome.

    Next time I may even just skip the flatbread, put it on top of bread and bake it, the ingredients are versatile enough. Using shredded rotisserie chicken makes fast work of this easy meal, too.

    Save this recipe for one of those times you just don't feel like cooking and you want something fast & easy but still really tasty!

    roasted garlic & pesto chicken flatbread - takes just minutes to throw together!
    Roasted Garlic & Pesto Chicken Flatbread

    Roasted Garlic & Pesto Chicken Flatbread

    Yield: 2 servings
    Prep Time: 8 minutes
    Cook Time: 12 minutes
    Total Time: 20 minutes

    This could also be thrown on the grill alongside whatever else you're cooking instead of baking it in the oven. Just be sure to turn off the burners directly underneath and keep the lid closed.

    Ingredients

    • 2 6-inch flatbreads, or one 12-inch
    • 1 head roasted garlic
    • 2 heaping tablespoons basil pesto, homemade or store-bought
    • 1 - 1 ½ cups shredded rotisserie or leftover chicken
    • ½ cup shredded cheese, such as mozzarella or a cheese blend
    • 2 heaping tablespoons shredded parmesan
    • fresh basil leaves, for garnish (optional)

    Instructions

    1. Preheat oven to 400F.
    2. Place flatbreads on baking sheet.
    3. Spread roasted garlic over flatbreads. Spread 1 heaping tablespoon pesto over each flatbread on top of roasted garlic. Add chicken then both cheeses.
    4. Bake for 8-12 minutes or until hot and cheese is melted and just starting to brown.
    Nutrition Information:
    Yield: 2 Serving Size: 1
    Amount Per Serving: Calories: 694Total Fat: 36gSaturated Fat: 15gTrans Fat: 0gUnsaturated Fat: 18gCholesterol: 123mgSodium: 989mgCarbohydrates: 51gFiber: 2gSugar: 2gProtein: 41g

    This data was provided and calculated by Nutritionix.

    © Kristy Bernardo
    Cuisine: Italian / Category: Main Dish
    Roasted Garlic & Pesto Chicken Flatbread

    Cheesy Chive & Garlic Pull-Apart Bread

    June 24, 2014 by Kristy Bernardo 64 Comments

    cheesy chive & garlic pull-apart bread - EASY and tastes AMAZING!

    This recipe for Cheesy Chive & Garlic Pull-Apart Bread couldn't be easier or more delicious. Make an extra loaf because everyone will be fighting over it!

    cheesy chive & garlic pull-apart bread - EASY and tastes AMAZING!

    We did so good yesterday with our healthy basil pesto and 25 things to do with it, didn't we? How to toss it with fresh vegetables or beans for easy dishes, how it's so much better made from scratch than anything you can buy.

    This is why today I think we all deserve some buttery, garlicky, cheesy hot pull-apart bread that melts in our mouths and makes us glad to be alive.

    This Cheesy Chive & Garlic Pull-Apart Bread is off the charts! You know I'm not a bread baker so the fact that I baked bread (merely a technicality that I purchased the actual bread loaf) is really quite impressive. Except that this recipe is so simple that a child could do it (with a little knife help, of course)!

    cheesy chive & garlic pull-apart bread - EASY and tastes AMAZING!

    You start with a good, crusty loaf, preferably round or oval. I went the round route and went with French bread, but any sourdough or similar bread will work just fine.

    It just needs to have a good, hearty crust on it, otherwise, go with what you like. Make slices about ½ inch or so apart going both ways, drizzle on a mixture of butter, garlic & chives then warm it up a bit in the oven. Pull it out, pour on your cheese and place it back in the oven until the cheese is all melty and golden brown.

    You're going to want to eat this pull-apart bread immediately, so be sure to have dinner on the table right when you pull this baby out of the hot oven. Or don't have dinner ready - heck, this can be your dinner! You'll want to eat the entire thing anyway so why not?

    cheesy chive & garlic pull-apart bread - EASY and tastes AMAZING!

    Another thing that I will say about this cheesy, yummy bread is that it's really not suited for guests. The only way to eat pull-apart bread properly is to just dig in and fight over the cheesiest, butteriest, most garlicky pieces which is probably something only a family should do.

    My plan is to make some with small, individual bread loaves and, believe you me, I have more killer, cheesy, some even sophisticated versions of this recipe coming where I'll be showing you how to make them dinner party style (yes, some even include bacon). But for now, save the big loaves for your hungry family - just don't forget to share.

    cheesy chive & garlic pull-apart bread - EASY and tastes AMAZING!

    Cheesy Chive & Garlic Pull-Apart Bread

    Yield: 8 servings
    Prep Time: 10 minutes
    Cook Time: 25 minutes
    Total Time: 35 minutes

    This recipe for Cheesy Chive & Garlic Pull-Apart Bread couldn’t be easier or more delicious. Make an extra loaf because everyone will be fighting over it!

    Ingredients

    • 1 large round or an oval-shaped loaf of French bread (or Italian, Sourdough, etc.)
    • ½ cup butter (melted)
    • 1 clove garlic (minced)
    • ¼ cup minced chives
    • 3-4 cups Mexican-blend shredded cheese (or a combination of cheddar and jack)
    • ¼ cup minced parsley

    Instructions

    1. Preheat oven to 350°F. Spray a sheet of foil with cooking spray and set the loaf on top.
    2. Slice ½-inch grid lines into the bread, crosswise in both directions, stopping just before the bottom of the bread (don’t cut all the way through).
    3. Mix together the melted butter, garlic, and chives.
    4. Gently spoon the butter mixture in all of the crevices, making sure it gets in every part of the loaf. Wrap the loaf up in the foil and place directly on the oven rack and bake for 10 minutes.
    5. Remove from the oven and increase the oven temperature to 400°F.
    6. Open the foil and sprinkle the shredded cheese on top of the bread. Be sure to get as much cheese pushed down into each crevice, then the rest of the cheese can sit on top of the loaf. Leave the foil open and return it to the oven. Bake until the cheese is melted and golden brown, about 15 minutes. Garnish with parsley and serve immediately.
    Nutrition Information:
    Yield: 8 Serving Size: 1
    Amount Per Serving: Calories: 948Total Fat: 69gSaturated Fat: 40gTrans Fat: 2gUnsaturated Fat: 22gCholesterol: 198mgSodium: 1553mgCarbohydrates: 36gNet Carbohydrates: 35gFiber: 1gSugar: 4gProtein: 45g

    This data was provided and calculated by Nutritionix.

    © Kristy Bernardo
    Cuisine: American / Category: Appetizers
    Cheesy Chive & Garlic Pull-Apart Bread

    The Best No Bake Butterfinger Pie – Just 10 Minutes Prep!

    June 22, 2014 by Kristy Bernardo 52 Comments

    Butterfinger Pie Parfaits with a Nutella Drizzle | www.thewickednoodle.com

    If you're craving a creamy, crunchy, peanut buttery dessert that's ridiculously easy to make, this No Bake Butterfinger Pie is it! With just a handful of ingredients and no baking time, it's perfect for the hot days of summer or anytime you want a delicious treat.

    It's made with a graham cracker crust, a rich peanut butter and cream cheese filling, and loads of crushed Butterfinger candy bars. You can serve it as a full pie or as individual parfaits, as we've done here (see the image below).

    three servings of no bake butterfinger pie on a colorful napkin with a spoon

    Why You'll Love This No Bake Butterfinger Pie

    • No Oven Needed - Perfect for hot days or busy holidays when the oven's already full.
    • Quick & Easy - Just 15 minutes of prep time and a few simple ingredients.
    • Loaded with Butterfinger Flavor - Crushed Butterfingers are in both the pie filling and on top, so you get a Butterfinger bite every time.
    • Make-Ahead Friendly - Chill it for a few hours or overnight, whatever best suits your needs. It's one of those make-ahead desserts that only gets better with time!
    • Versatile - Serve it as a full pie or in individual dishes, which makes it so easy to determine serving sizes and amounts.
    • Loved by both Kids and Adults - This is one of those desserts that disappears fast no matter what the occasion is.

    Ingredients You'll Need

    You only need a few simple ingredients to make this rich and creamy No Bake Butterfinger Pie:

    • Graham Crackers: Just mix these with melted butter to form the crust.
    • Butter: Melt this to mix with the graham crackers.
    • Heavy Whipping Cream - This makes the filling extra light and fluffy. You could use Cool Whip in a pinch (but omit the powdered sugar).
    • Powdered Sugar: This is what will sweeten the cream.
    • Cream Cheese (softened): What every good no-bake pie needs!
    • Salt: A surprisingly necessary ingredient. It makes all the difference!
    • Butterfinger Candy Bars (crushed) - The star of the show! You'll fold some into the filling and sprinkle more on top.
    • Nutella or chocolate drizzle (optional) - A fun extra layer of flavor, especially if you're serving it in parfait or dessert dishes.

    Note: For a richer flavor, use full-fat cream cheese and real whipped cream, especially if serving it at a dinner party or holiday meal.

    three servings of no bake butterfinger pie on a colorful napkin with two spoons

    How to Make No Bake Butterfinger Pie

    This easy dessert comes together in just a few steps. The hardest part is waiting for it to chill!

    Step 1: Prepare the Crust

    The first step is to mix together the crushed graham crackers and melted butter, then press it firmly into a 9-inch pie dish or your dessert dishes.

    Step 2: Make the Filling

    Next you'll beat the heavy cream and powdered sugar until stiff peaks form. Then add the softened cream cheese and salt, and you'll mix it just until it's incorporated. On very low speed or by hand, mix in all but 3 crushed Butterfinger candy bars.

    Step 3: Assemble the Pie

    Spoon the filling over the graham cracker crust and smooth out the top.

    Step 4: Chill and Serve

    Refrigerate the pie(s) for at least 3 hours, although overnight is best. When you're ready to serve, drizzle with melted Nutella or chocolate syrup and top with the remaining crushed Butterfingers.

    a dish of no bake butterfinger pie on a colorful napkin with a spoon

    Make-Ahead Tips

    You can prepare the entire Butterfinger pie up to 2 days in advance (wait to drizzle the melted Nutella and the last of the crushed Butterfinger until just before serving). Just cover it tightly with plastic wrap or foil and keep it refrigerated until you're ready.

    Can You Freeze Butterfinger Pie?

    Yes! No-bake pies like this freeze beautifully.

    • Wrap the pie tightly in plastic wrap, then again in foil to prevent freezer burn.
    • Freeze for up to 1 month.
    • Thaw it in the refrigerator overnight before serving.

    You can also freeze it in individual slices. Wrap each slice separately as directed above. It's so nice to be able to take just one or two servings out at a time!

    How to Store Leftovers

    Store any leftover No Bake Butterfinger Pie covered in the fridge for up to 4-5 days. Keep it chilled until ready to serve as it's best served really cold.

    a closeup of three servings of no bake butterfinger pie on a colorful napkin with a spoon

    Expert Tips for No Bake Butterfinger Pie

    • Soften the Cream Cheese First
      Let the cream cheese come to room temperature before mixing. This will help give the pie a silky-smooth filling without lumps.
    • Crush the Butterfingers Well
      For the best texture, place the candy bars in a zip-top bag and crush with a rolling pin. You want small, even pieces, not powder.
    • Don't Overmix the Whipped Topping
      You want the filling to be light and airy, so don't mix it too long and use a light hand.
    • Chill for at Least 3 Hours
      The pie needs time to set properly. If you can, refrigerate it overnight for the best flavor.
    • Try a Chocolate Cookie Crust
      Graham crackers are classic, but a chocolate cookie crust (you can use Oreos or chocolate wafers for this) is incredible.
    • Use Full-Fat Ingredients for Best Flavor
      Full-fat cream cheese and whipped topping deliver a richer, creamier filling. Of course!
    • Make It a Parfait!
      Layer the filling and crushed crust in small dessert dishes - my favorite way to serve it!
    a closeup of a dish of no bake butterfinger pie

    Frequently Asked Questions

    Can I use a store-bought crust?

    Yes! A store-bought graham cracker crust works really well and cuts down on prep time. You can also use a pre-made Oreo or chocolate crust. This is a great choice if you're making a classic pie instead of dessert dishes.

    Can I make Butterfinger Pie without cream cheese?

    Technically, you could use mascarpone or even Greek yogurt for a tangier, lighter version. We haven't tried this, however, and keep in mind that it's a significant enough change that it will likely alter the final flavor and texture.

    Can I use Cool Whip instead of homemade whipped cream?

    Absolutely. Just swap one for the other, but omit the powdered sugar as that's what's used to sweeten the heavy whipping cream.

    How far in advance can I make this pie?

    You can make it up to 2 days ahead and store it in the refrigerator. Wait to add the toppings until just before serving.

    Does No Bake Butterfinger Pie need to be refrigerated?

    Yes, since it contains dairy, it should be kept refrigerated. Store any leftovers in an airtight container for up to 4-5 days.

    Can I freeze Butterfinger Pie?

    Yes! Wrap it tightly and freeze for up to 1 month. Thaw overnight in the fridge before serving.

    Can I use Butterfinger Bits instead of whole bars?

    Definitely. Butterfinger Bits are convenient and work great in this recipe, especially since there would be no need to crush candy bars yourself!


    No-bake desserts are so easy to make and perfect to make year-round. During the hot summer months, fire up your grill for these grilled pineapple no-bake cheesecakes or try peanut butter pie parfaits. Try these homemade chocolate truffles, a no-bake boozy dessert, or these gorgeous Christmas tree shaped meringues for the holidays!

    Butterfinger Pie Parfaits with a Nutella Drizzle | www.thewickednoodle.com

    No Bake Butterfinger Pie

    Yield: 6-8 servings
    Prep Time: 10 minutes
    Additional Time: 3 hours
    Total Time: 3 hours 10 minutes

    This easy No Bake Butterfinger Pie takes just 10 minutes of prep time and is always a huge hit!

    Ingredients

    • 4 graham crackers, finely crushed
    • 2 tablespoons butter, melted
    • 1 pint heavy whipping cream
    • 2 tablespoons powdered sugar
    • 8 oz cream cheese, softened
    • ½ teaspoon salt
    • 1 11.5 oz package mini Butterfinger candy bars (crushed into small pieces; reserve 3 bars for garnish)
    • ½ cup Nutella (softened in microwave; can also use chocolate sauce or hot fudge)

    Instructions

    1. Thoroughly mix together the crushed graham crackers and melted butter.
    2. In a large mixing bowl, beat the heavy cream and powdered sugar until stiff peaks form. Add the softened cream cheese and salt; mix just until incorporated. On very low speed or by hand, mix in all but 3 crushed Butterfinger candy bars.
    3. Using small dessert glasses, a pie pan or a baking dish, assemble the pie by adding first the graham cracker crumbs, pressing gently into the bottom of the dish(es). Add the Butterfinger mixture, smooth out the top, and cover with saran wrap. Refrigerate at least a few hours or overnight.
    4. When ready to serve, drizzle the melted Nutella over parfaits and top with the reserved Butterfinger pieces. (If Nutella isn’t thin enough after melting, add a teaspoon or two of water and whisk until it reaches your desired consistency). 
    Nutrition Information:
    Yield: 8 Serving Size: 1
    Amount Per Serving: Calories: 513Total Fat: 42gSaturated Fat: 27gTrans Fat: 1gUnsaturated Fat: 12gCholesterol: 105mgSodium: 335mgCarbohydrates: 30gFiber: 1gSugar: 21gProtein: 6g

    This data was provided and calculated by Nutritionix.

    © Kristy Bernardo
    Cuisine: American / Category: Desserts
    The Best No Bake Butterfinger Pie – Just 10 Minutes Prep!

    Garlic Portobello Mushrooms with Pecorino Romano

    June 20, 2014 by Kristy Bernardo 39 Comments

    garlic portobello mushrooms with pecorino romano - Just 3 little ingredients in this fantastic side dish! | www.thewickednoodle.com

    This 3-ingredient recipe for Garlic Portobello Mushrooms is the perfect delicious side dish all year-round. Grill them in the summer and sauté in winter!

    Garlic Portobello Mushrooms Recipe

    Next to a grilled rib-eye (medium rare, thank you very much), grilled portobello mushrooms are my favorite meaty dish.

    Or, in this case, sliced and sautéed.

    These garlic portobello mushrooms are to die for. I made them for the first time last week after coming into a rather large amount of portobellos - what to do with them all?

    Stuffing was my first thought - perhaps with freshly grilled vegetables and a little feta or goat cheese, and/or a drizzle of dressing - but I didn't have what I needed on hand. I was on my own for the evening so I also didn't want to cook too much food.

    So I decided to just slice them and give them a quick sauté along with a bit of garlic.

    That's when I remembered the Pecorino Romano in my refrigerator, just waiting to be grated over the top of these hot, delicious little beauties.

    Garlic portobellos with pecorino romano Just 3 little ingredients in this fantastic side dish!

    And, aside from the salt, pepper and a little oil used for sautéeing - those three ingredients are all that went into this dish. It didn't then - and doesn't now - need a single thing more.

    The garlic and cheese simply enhance the earthy flavor of these meaty mushrooms and made the perfect side dish. Or, in this case, the main dish - yep, I ate the entire pan. Not in one sitting, of course - half at dinner, half at late-night snack (they're delicious at room temperature).

    Don't be alarmed or think it's a typo when you see "HIGH" heat in the recipe. Mushrooms are best when cooked over a high heat - the real cooking begins only after they've released their moisture and it's evaporated; that's when the browning starts.

    You want your portobello mushrooms to be browned because that's where all the flavor lies. Trust me on this one - your mushrooms (and your palate) will thank you for it!

    garlic portobello mushrooms with pecorino romano - Just 3 little ingredients in this fantastic side dish! | www.thewickednoodle.com

    Garlic Portobello Mushrooms with Pecorino Romano

    Yield: 4 servings
    Prep Time: 5 minutes
    Cook Time: 10 minutes
    Total Time: 15 minutes

    This 3-ingredient recipe for Garlic Portobello Mushrooms is the perfect delicious side dish all year-round. Grill them in the summer and sauté in winter!

    Ingredients

    • 2 tablespoons canola or vegetable oil (can also use ghee)
    • 4 portobello mushrooms, gills removed and thickly sliced
    • 2 garlic cloves, minced
    • ¼ cup or more finely grated pecorino romano (or Parmigiano Reggiano)
    • kosher salt & freshly ground black pepper, to taste

    Instructions

    1. Heat canola oil in a large skillet over HIGH heat. Add mushroom slices and cook, stirring occasionally until well browned, about 8 minutes.
    2. Reduce heat to medium. Add minced garlic and cook, stirring frequently, for another two minutes, tasting and seasoning with kosher salt and freshly ground black pepper.
    3. Place mushrooms on serving plate and grate cheese over the top.
    Nutrition Information:
    Yield: 4 Serving Size: 1
    Amount Per Serving: Calories: 154Total Fat: 12gSaturated Fat: 4gTrans Fat: 0gUnsaturated Fat: 8gCholesterol: 21mgSodium: 366mgCarbohydrates: 4gNet Carbohydrates: 3gFiber: 1gSugar: 1gProtein: 8g

    This data was provided and calculated by Nutritionix.

    © Kristy Bernardo
    Cuisine: American / Category: Sides
    Garlic Portobello Mushrooms with Pecorino Romano

    Roasted Garlic Recipe (and 25 things to do with it)

    June 19, 2014 by Kristy Bernardo 41 Comments

    Close up of fresh roasted garlic bulbs

    Making Roasted Garlic couldn't be easier - or more delicious - but the question is "what to do with it?" Here you'll find how to make roasted garlic as well as 25 delicious things to do with it.

    Oven roasted garlic is one of those recipes that everyone should learn to do, and do often.

    The sharp garlic flavor mellows and the roasted garlic cloves soften and brown; it becomes something almost entirely different. The cloves will slip right out and can be eaten as is (really!) or mashed and used in any number of ways.

    And, because garlic is inexpensive and roasting it takes just a minute to prep, it should become a go-to "recipe" to keep in your arsenal.

    I've prepared a list of 25 things you can do with roasted garlic - the possibilities really are almost endless. My favorite way is to use it mixed with mayo for a sandwich spread - yowza, it makes a sandwich go off the charts!!

    How to make roasted garlic and 25 ways to use it

    How to Roast Garlic in the Oven

    1. Preheat oven to 400F.
    2. Cut the top ½ inch from garlic bulb (straight across the top so you cut into just the tops of the cloves). Place garlic bulb in a ramekin, muffin pan or wrap directly in foil, drizzle with olive oil and cover with foil.
    3. Roast for 30-40 minutes at 400°F or until garlic is very soft and lightly browned.
    4. Remove from oven and allow to cool.
    5. Squeeze the garlic out of its skin and into a small dish. Mash with a fork and use as desired.

    See the recipe card at the bottom for printable instructions for how to roast garlic in the oven, right after all the delicious ways I've shared to use it.

    Roasted Garlic Recipe

    25 Ways to Use Roasted Garlic

    Roasted garlic, with its sweet and mellow flavor, can enhance a variety of recipes and dishes. Here are some creative ideas:

    1. Add roasted garlic to these easy mashed potatoes.
    2. Use it as a base for homemade pizza.
    3. Combine it with some mayonnaise or mustard for a delicious sandwich or burger spread.
    4. Add it to soups or stews for a subtle garlic flavor.
    5. Cook with carrots and other delicious veggies.
    6. Mix it into hamburger meat then toss them on the grill.
    7. Mix it into softened butter, then use that for grilled cheese sandwiches.
    8. Mix it into hummus, mustard, jam or mayonnaise.
    9. Add some to gravy for a deeper, richer flavor.
    10. Mix it with your mayo and make a roasted garlic potato salad.
    11. Try adding some to your favorite salad dressing (balsamic & dijon is delightful)!
    12. Toss some into your favorite Mexican dish.
    13. Mix some with sour cream or greek yogurt for an easy dip (don't forget the salt)!
    14. Use it in place of regular garlic for a roasted garlic pesto.
    15. Make compound butter by combining the garlic with creamy butter and fresh herbs.
    16. Rub it onto corn on the cob.
    17. It makes a terrific garlic bread!
    18. Mix it into your mac and cheese.
    19. Stuff roasted garlic into a juicy steak, chicken or lamb before baking, roasting or grilling.
    20. Mix it with some high-quality olive oil and use it for dipping bread.
    21. Make an easy flatbread: drizzle flatbread with olive oil, spread on some roasted garlic, top it with gorgonzola crumbles then bake it in a 400F oven until it's soft and warm.
    22. Include on a cheese board.
    23. It would be fantastic in your favorite salsa or guacamole recipe!
    24. Create garlic-infused olive oil.
    25. Last, but certainly not least...spread it directly on warm bread. Or just pop it directly into your mouth!

    If you liked this post, you might also enjoy "20 things to do with a Balsamic Reduction" and "25 ways to use Basil Pesto". You can also make Instant Pot Roasted Garlic!

    Close up of fresh roasted garlic bulbs
    Close up of fresh roasted garlic bulbs

    How to Roast Garlic

    Yield: 1 head
    Prep Time: 2 minutes
    Cook Time: 40 minutes
    Total Time: 42 minutes

    Roasting garlic couldn't be easier. You'll love the mellow, rich flavor so much you'll be popping cloves straight into your mouth!

    Ingredients

    • 1 head garlic (outer paper leaves discarded but bulb left intact)
    • 1-2 teaspoons extra-virgin olive oil

    Instructions

      1. Preheat oven to 400F.
      2. Cut the top ½ inch from garlic bulb (straight across the top so you cut into just the tops of the cloves). Place garlic bulb in a ramekin, , muffin pan or wrap directly in foil, drizzle with olive oil and cover with foil.
      3. Roast for 30-40 minutes or until garlic is very soft and lightly browned. Remove from oven and allow to cool.
      4. Squeeze the garlic out of its skin and into a small dish. Mash with a fork and use as desired.

    Notes

    On average, a single bulb of garlic contains approximately 10-12 cloves, but keep in mind that the exact number may vary.

    Nutrition Information:
    Yield: 4 Serving Size: 1
    Amount Per Serving: Calories: 31Total Fat: 2gSaturated Fat: 0gTrans Fat: 0gUnsaturated Fat: 2gCholesterol: 0mgSodium: 1mgCarbohydrates: 2gFiber: 0gSugar: 0gProtein: 0g

    This data was provided and calculated by Nutritionix.

    © Kristy Bernardo
    Cuisine: Italian / Category: Seasonings
    Roasted Garlic Recipe (and 25 things to do with it)

    Caramelized Balsamic Onion & Gruyere Flatbread

    May 30, 2014 by Kristy Bernardo 33 Comments

    Make your caramelized onions up to a week before, buy your favorite store-bought flatbread and some gruyere cheese...dinner is done in 10 minutes. AND it's delicious! | www.thewickednoodle.com | #flatbread #pizza #dinner

    Make the delicious caramelized onions in advance and you'll have this easy Caramelized Balsamic Onion & Gruyere Flatbread Pizza on the table in minutes.

    Make your caramelized onions up to a week before, buy your favorite store-bought flatbread and some gruyere cheese...dinner is done in 10 minutes. AND it's delicious! | www.thewickednoodle.com | #flatbread #pizza #dinner

    Remember those awesome caramelized balsamic onions we made last week? And remember how I told you we could top just about anything with them?

    Here's one of those anything's.

    You need nothing but flatbread, those yummy onions, some gruyere cheese and a sprinkling of parsley for presentation.

    Dinner in less than 10 minutes*.

    I've been on a flatbread recipe craze lately. I've never been much of a pizza-at-home gal but, for some reason, flatbread is different. I like the texture better and the way it bakes more evenly. I've made my Cilantro-Lime Chicken Flatbreads with Mango & Roasted Jalapeno over and over - just can't get enough! Stonefire sent me some of their flatbread to try (I guess my obsession is public knowledge by now) and - omgee - is it yummy. I'm sad because I don't know if they sell it where I normally shop but I'm going to be on the lookout for some. SIDE NOTE: (Their naan bread was awesome, too. My mom made some shredded beef in gravy which she was going to put over sliced buns. We all decided to try it over the garlic naan...fabulous. Really soft and flavorful. Highly recommend).

    So I had this flatbread on hand along with some of those caramelized balsamic onions. Gruyere cheese - which can be pricey - was on sale for dirt cheap...you see where this is going. That evening I brought the onions to room temp while I shredded a few cups of cheese, put it all together and baked for about 10 minutes. And, lordy, was it ever good!

    *If you make the onions in advance.

    Make your caramelized onions up to a week before, buy your favorite store-bought flatbread and some gruyere cheese...dinner is done in 10 minutes. AND it's delicious! | www.thewickednoodle.com | #flatbread #pizza #dinner

    caramelized balsamic onion & gruyere flatbread

    Yield: 4 servings
    Prep Time: 10 minutes
    Cook Time: 1 hour 15 minutes
    Total Time: 1 hour 25 minutes

    A delicious and easy flatbread recipe!

    Ingredients

    Caramelized Balsamic Onions

    • 2 Tablespoons extra-virgin olive oil
    • 3 sweet onions, sliced thickly (about 5-6 slices per onion)
    • 1 teaspoon kosher salt
    • freshly ground black pepper
    • 2 Tablespoons sugar
    • ¼-1/2 cup balsamic vinegar, based on personal preference

    Flatbread Pizza

    • 3 cups shredded Gruyere cheese
    • 1 store-bought flatbread
    • ¼ cup chopped parsley

    Instructions

    1. Heat oil in a large skillet over medium-low heat. Add half of onions, cook down slightly then add the other half. (You can add them all at once but it might be difficult to stir until they cook down some, depending on the size of your skillet). Season with salt & pepper.
    2. Once onions are cooked down slightly (enough that you can stir them all in the skillet without any going overboard) add sugar and stir gently. Add balsamic and stir again. Reduce heat to low and slowly cook onions, stirring occasionally, for an hour or so. Vinegar will reduce and coat onions.
    3. Meanwhile, preheat oven to 400F (or according to package directions on flatbread).
    4. Top flatbread with half of cheese, desired amount of onions (see note) then the remaining cheese. Bake for 10 minutes or until cheese is melted and golden brown. Remove from oven, sprinkle with parsley, cut into slices and serve immediately.

    Notes

    The amount of onions in this recipe makes a very thick layer of onions. If you prefer less, either halve the amounts for the onions or save some for another use (they're fantastic on burgers, pizza, chicken, steak or even on salads or in eggs). If making onions in advance, bring to room temperature before placing on pizza and baking.

    Nutrition Information:
    Yield: 4 Serving Size: 1
    Amount Per Serving: Calories: 645Total Fat: 37gSaturated Fat: 18gTrans Fat: 0gUnsaturated Fat: 17gCholesterol: 100mgSodium: 1327mgCarbohydrates: 46gFiber: 3gSugar: 27gProtein: 31g

    This data was provided and calculated by Nutritionix.

    © Kristy Bernardo
    Cuisine: American / Category: Appetizers
    Caramelized Balsamic Onion & Gruyere Flatbread

    Chopped Veggie Salad with Lemon-Garlic Dressing

    May 29, 2014 by Kristy Bernardo 32 Comments

    Great texture and flavor plus takes just minutes to make! | www.thewickednoodle.com | #healthy #vegetables #salad
    Great texture and flavor plus takes just minutes to make! | www.thewickednoodle.com | #healthy #vegetables #salad

    I'm sure you've noticed that I'm becoming a wee-bit obsessed with salads. Chopped salads. No lettuce, just healthy veggies.

    Maybe a little cheese, too. With a light, tasty dressing.

    For this chopped veggie salad I used just four vegetables: asparagus, fresh corn, chopped cherry tomatoes and cucumbers. We were heading down to my sister's for a barbecue and I had the side dish job. This was easy and I knew it would keep well (keep the dressing and salad separate until ready to serve). It has a nice crunch to it and makes a nice light pairing to burgers & ribs.

    Although...I made it a second time the next day and have been eating it for lunch every day this week. It stands on its own.

    You could certainly add some lettuce to this and just double the dressing, too. Some salty bacon wouldn't hurt anything, either. I added feta this go-round but goat cheese would be fantastic.

    The point is...make this one your own. Add chicken, steak, croutons, cheese or nothing at all...lots of flexibility here. Just don't sub canned or frozen corn for the fresh!! It's summertime, folks, save the cans for your winter soups 🙂

    Chopped Veggie Salad with Lemon-Garlic Dressing

    Chopped Veggie Salad with Lemon-Garlic Dressing


    • 1 pound asparagus (trimmed and cut into ½-inch pieces)
    • 1 tablespoon olive oil
    • 3 ears corn (kernels removed)
    • 1 pint cherry tomatoes (quartered or halved, depending on their size)
    • 4 mini-cucumbers ("cuties", chopped (or 1-2 large, seeds removed))
    • ½ cup feta (crumbled)
    • 1 clove garlic (minced)
    • juice of a lemon
    • 1 teaspoon Dijon mustard
    • ¼ cup extra virgin olive oil
    • kosher salt & freshly ground black pepper (to taste)
    1. Preheat oven to 400F.
    2. Place asparagus on a baking sheet. Drizzle with oil and toss to coat. Season well with salt & pepper. Roast for 3 minutes or until just crisp-tender.
    3. Meanwhile, whisk together garlic, lemon juice, mustard and olive oil. Season to taste with salt & pepper.
    4. Place all vegetables in a serving bowl. When ready to serve, pour dressing over and toss well. Top with feta and serve
     

    Fish Taco Salad with a Creamy Chipotle Dressing

    May 23, 2014 by Kristy Bernardo 83 Comments

    healthy fish taco salads! SO good - you'll never think about all the great nutrients & omega-3's you're getting! | www.thewickednoodle.com | #salad #healthy #fish
    healthy fish taco salads! SO good - you'll never think about all the great nutrients & omega-3's you're getting! | www.thewickednoodle.com | #salad #healthy #fish

    Holy man, do I adore fish tacos.

    The tender, flaky fish, crunchy greens, flavorful sauce...the flavors and textures are just so perfect together.

    I'll admit...I prefer mine fried with extra sauce. If it's made right, it can be better than a perfectly grilled rib-eye (sorta close, anyway).

    But we all know we can't eat that way every day or we'll all become chubby, obese, unhealthy. And no one wants that. But we do all want killer flavor and to enjoy our food.

    healthy fish taco salads! SO good - you'll never think about all the great nutrients & omega-3's you're getting! | www.thewickednoodle.com | #salad #healthy #fish

    I had some fish in the freezer and was craving fish tacos. Badly. To my horror, there wasn't a tortilla in sight and not enough ingredients to make them. Sure, I could run to the store, but...what else might I have that would satisfy my craving?

    That's when I came up with the idea for a fish taco salad. One that was healthy as well as delicious. The key is marinating and grilling the fish, using greek yogurt in the dressing (and just a little mayo to keep it creamy) and lettuce instead of tortillas. Add some fresh corn (no canned or frozen...the texture just will not be the same! Are you tired of me preaching that yet? 😉

    Healthy and sooo tasty! Add more veggies if you'd like, even if they're not typical "fish taco" veggies. Diced red bell pepper would be good or freshly diced tomatoes. Pile up the cilantro on it, too. You're going to love this one!

    healthy fish taco salads! SO good - you'll never think about all the great nutrients & omega-3's you're getting! | www.thewickednoodle.com | #salad #healthy #fish

    I used my George Foreman grill to cook the fish. It's perfect for recipes like this! I use it to grill all kinds of things: rib-eyes, fish, chicken...even my Grilled Pound Cakes with Nutella & Strawberries! I love that it cuts down on the fat (up to 42%!) and that I can just throw the grill grates into the dishwasher. I gave one to my mom and she's really excited about trying it out. It's perfect since it's just her and my dad now; they can make full meals just for them without having to heat up their outdoor grill all the time. And, since they're trying to eat healthier, it's really just perfect for them. (I'm also sending one to my best friend's daughter who just started college, it will be perfect for her, too)!

    healthy fish taco salads! SO good - you'll never think about all the great nutrients & omega-3's you're getting! | www.thewickednoodle.com | #salad #healthy #fish

    However you want to make this salad your own, I know you'll definitely love it. Would love to hear some ideas for more healthy things we could add to this. Thanks & Happy {almost} Memorial Day, all!

    Fish Taco Salad with a Creamy Chipotle Dressing

    Fish Taco Salad with a Creamy Chipotle Dressing

    Cook time includes time to marinate the fish while you prep the other ingredients.

    FISH

    • 2 tablespoons extra-virgin olive oil
    • juice and zest of a lime
    • ½ teaspoon each kosher salt & freshly ground black pepper
    • 1 pound white flaky fish fillet (I used halibut)

    CHIPOTLE DRESSING

    • 1 cup plain greek yogurt
    • ¼ cup mayonnaise
    • 2 teaspoons pureed chipotle pepper in adobo sauce (puree the entire can, measure out 2 teaspoons and store the rest in the fridge or freezer. Can also finely chop 2 teaspoons of the chipotle peppers with a little of the sauce)
    • tiny squeeze of lime
    • kosher salt & freshly ground black pepper (to taste)

    SALAD ASSEMBLY

    • 8 cups chopped romaine lettuce (or a mixture of shredded cabbage & lettuce)
    • 1 cup fresh corn kernels
    • 1-2 avocados (chopped)
    • chopped cilantro (green onion & lime wedges, to garnish)
    1. Mix together the ingredients for the marinade (olive oil through salt & pepper). Place fish on a large plate and drizzle marinade over, taking care to lift each filet to get marinade both over and under fish. Marinate for 30 minutes.
    2. Meanwhile, mix all dressing ingredients together and allow to sit at room temperature.
    3. Grill fish until just cooked through. Pull fish apart (if it's cooked properly it should come apart fairly easily) and set aside briefly.
    4. Assemble the salad: Fill four bowls with chopped romaine lettuce. Top with fish, fresh corn kernels, chopped avocado and garnishes. Drizzle the creamy chipotle dressing over the top of each salad and serve.
     

    Moroccan-Inspired Beef Tagine – Easy One-Pot Meal

    May 22, 2014 by Kristy Bernardo 56 Comments

    easy beef tagine {you don't have to own a tagine to make it, either!} | thewickednoodle.com #morocco #moroccan #beef #onedish

    I created this Easy Beef Tagine after returning from an unforgettable trip to Morocco. After tasting tagine after tagine, I knew I had to recreate it at home.

    This version is simplified for weeknight cooking, with accessible ingredients and no special equipment required (though if you have a tagine pot, even better!). The blend of spices, slow-simmered beef, and tender vegetables brings me right back to the streets of Marrakech and the quiet magic of the Sahara.

    a beef tagine in a traditional tagine from Morocco. the tagine is made with beef, carrots, potatoes, and spices then topped with chopped herbs.

    What is Tagine?

    In Morocco, tagine refers to both the iconic cone-shaped cooking vessel and the slow-simmered stew that's traditionally cooked inside it. The pot's unique design allows steam to circulate while the dish simmers, which keeps the meat tender and the flavors rich and concentrated, all with very little added liquid.

    Tagines are often made with beef, lamb, or chicken, and paired with ingredients like potatoes, carrots, preserved lemons, olives, or dried fruit, depending on the region. While many Moroccan homes use a clay tagine over coals, you absolutely don't need one to enjoy this dish. A Dutch oven, heavy-bottomed skillet, or even a slow cooker will still deliver all that comforting, spiced flavor.

    This recipe captures the heart of a traditional Moroccan tagine but is simplified for the home cook - no specialty tools required!

    Why You'll Love This Easy Beef Tagine

    • No tagine pot required. You can make this dish in a Dutch oven, heavy skillet, or any covered pot.
    • It's the same Moroccan flavor, just simplified. Traditional spices like cumin, ginger, and saffron are used to recreate those delicious flavors.
    • It's perfect for weeknights or entertaining. It's easy enough for a cozy family dinner, yet impressive enough to serve guests.
    • It's a one-pot meal with familiar ingredients. Potatoes, carrots, and tomatoes make this both hearty and approachable, and even picky eaters tend to love it.
    • It's inspired by real Moroccan cooking. This recipe was created after my own travels through Morocco, and while it's simplified, the flavors stay true to what I experienced there.
    • Leftovers taste even better the next day!

    Ingredients You'll Need

    This beef tagine is made with everyday ingredients that simmer into something truly special. Here's what you'll need:

    • Olive Oil - Used to sear the beef and sauté the onions.
    • Beef (1 lb) - Stew meat works well, but feel free to use a better cut like chuck or sirloin if you prefer.
    • Onion (1 large) - It wouldn't be a stew without onions!
    • Ground ginger - A key flavor in Moroccan cuisine.
    • Ground cumin - This is a staple in tagines.
    • Saffron - Optional but authentic, and just a pinch goes a long way.
    • Fire-Roasted Diced Tomatoes (1 can) - Adds flavor and a bit of moisture for simmering.
    • Carrots (3 medium) - Slice them crosswise into bite-sized rounds - these add a bit of sweetness.
    • Baby Potatoes (1 lb) - Halved or quartered, these make the dish much heartier.
    • Fresh Cilantro (¼ cup) - Added at the end, green herbs add color and freshness.
    • Coarse Salt & Freshly Ground Black Pepper - Essential for seasoning at every stage.
    • Optional add-ins: A handful of golden raisins, dried apricots, or a drizzle of honey will give your tagine a traditional sweet-savory twist.
    a closeup of a beef tagine in a traditional tagine from Morocco. the tagine is made with beef, carrots, potatoes, and spices then topped with chopped herbs.

    Step-by-Step Instructions

    You don't need a traditional tagine pot to make beef tagine, just a sturdy Dutch oven or heavy-bottomed pan with a lid. Here's how to make it:

    1. Season and Sear the Beef
      Start by seasoning your beef generously with coarse salt and black pepper. Heat the olive oil in your pot over medium-high heat. Add the beef in a single layer (work in batches if needed) and sear until browned on all sides, about 3-4 minutes per batch. Don't overcrowd the pan, as spacing helps the meat brown instead of steam.
    2. Sauté the Onions and Spices
      Once the beef is browned, return all the meat to the pot. Add the chopped onion and cook for 2-3 minutes, stirring occasionally. Then stir in the ground ginger, cumin, and saffron until the spices coat everything evenly and become fragrant.
    3. Add the Vegetables and Tomatoes
      Pour in the fire-roasted tomatoes with their juices. Add the carrots and baby potatoes, nestling them around the meat. Give everything a quick stir to combine.
    4. Simmer Low and Slow
      Cover the pot with a lid and reduce the heat to low. Let the tagine simmer gently for at least 1 hour, stirring occasionally, until the beef is tender and the vegetables are soft. The longer it simmers, the better the flavor. You can go up to 90 minutes if time allows.
    5. Finish and Serve
      Taste and adjust the seasoning with more salt and pepper if needed. Just before serving, stir in the fresh chopped cilantro. Serve hot with warm flatbread, couscous, or rice to soak up the flavorful sauce.

    Frequently Asked Questions

    Do I need a tagine pot to make this recipe?
    Nope! While a traditional tagine pot adds authenticity, you can make this dish in a Dutch oven, heavy-bottomed saucepan, or even a slow cooker. The key is slow simmering and a covered cooking vessel that retains moisture.

    What's the best cut of beef for tagine?
    Stew meat, chuck roast, or beef shoulder are all great options. They become tender as they simmer. For a more luxurious version, try sirloin tips or boneless beef short ribs.

    Can I make this in a slow cooker?
    Yes! Sear the beef and sauté the onions and spices first, then transfer everything to your slow cooker and cook on low for 6-8 hours or high for 4-5 hours until the beef is fork-tender.

    Can I freeze beef tagine?
    Definitely. Let it cool completely, then transfer it to an airtight container and freeze for up to 3 months. Thaw overnight in the fridge and reheat it gently on the stovetop or in the microwave.

    camel in Sahara desert
    a lunch we enjoyed in Morocco of a variety of dishes, including a delicious tagine with apricots
    lunch in the Black Desert

    Inspired by Morocco

    This easy beef tagine was born out of a deep craving after returning from an unforgettable trip to Morocco. We spent most of our time exploring the colorful souks and vibrant food scene in Marrakech (it's where I tried pigeon for the first time!), followed by a magical two nights under the stars in the Sahara Desert, riding camels and all. Nearly every meal featured some version of tagine, from tender beef and lamb to chicken with preserved lemons and olives.

    When I got home, the first thing I did was recreate a beef tagine that my whole family could enjoy. I carried home an actual tagine pot from the markets of Marrakech (which made it all the way through Paris, New York, and finally to my kitchen - no small feat!). But you don't need one to enjoy this dish - I wanted to share a version that anyone could make, with ingredients you can find at your local grocery store.

    Every time I make this beef tagine, it brings me right back to that quiet, star-filled desert and the warmth of Moroccan hospitality. I hope it becomes a favorite in your kitchen, too.

    Easy Beef Tagine

    Easy Beef Tagine

    Yield: 4 servings
    Prep Time: 15 minutes
    Cook Time: 1 hour 15 minutes
    Total Time: 1 hour 30 minutes

    Tagine is the most common dish in Morocco; it is both the vessel you cook with and the name of the finished dish. Chicken, beef and lamb are all common meats used in tagine cooking. Sear your meat, add some spices and vegetables and let it simmer away. It's an easy, exotic dish that will take your taste buds back to Morocco even on busy weeknights.

    Ingredients

    • 2 T olive oil
    • 1 lb beef, cut into bite-sized pieces (stew meat or a better cut, if desired (see notes)
    • 1 large onion, chopped
    • 1 t ginger
    • 1 t cumin
    • 1 t saffron
    • 1 can fire-roasted diced tomatoes
    • 3 carrots, sliced crosswise into bite-sized pieces
    • 1 lb baby potatoes, cut into bite-sized pieces
    • ¼ cup chopped cilantro
    • kosher salt & freshly ground black pepper

    Instructions

    1. Season beef with salt and pepper.
    2. Heat tagine over medium-high heat. Add olive oil then beef. Cook beef until browned on all sides (cook in two batches if necessary, see notes). Add onions, stir and cook for two minutes more.
    3. Add ginger, cumin and saffron, mix well. Top with tomatoes, carrots and potatoes. Place tagine lid over stew and simmer for at least one hour, stirring occasionally.
    4. Season stew to taste with salt and freshly ground black pepper. Top with freshly chopped cilantro and serve.

    Notes

    When searing the beef, be sure not to overcrowd the tagine or the beef will steam and not brown. Sear in two batches if necessary. Stew meat will work fine in this recipe, however, a better cut will have more flavor. Be sure to season the meat well for optimum flavor.

    Nutrition Information:
    Yield: 4 Serving Size: 1
    Amount Per Serving: Calories: 486Total Fat: 26gSaturated Fat: 9gTrans Fat: 1gUnsaturated Fat: 15gCholesterol: 99mgSodium: 204mgCarbohydrates: 30gFiber: 4gSugar: 4gProtein: 33g

    This data was provided and calculated by Nutritionix.

    © Kristy Bernardo
    Cuisine: Middle Eastern / Category: Dinner
    Moroccan-Inspired Beef Tagine – Easy One-Pot Meal

    4-minute Spicy Garlic Shrimp

    May 21, 2014 by Kristy Bernardo

    These shrimp are KILLER! They make a great main dish with a salad and bread or a wonderful appetizer. They always go FAST!! | the wicked noodle | #shrimp #appetizer

    This easy recipe for Spicy Garlic Shrimp comes together in just 4 minutes. Fresh shrimp sauteed with garlic, crushed red pepper and lemon juice - delicious!

    This easy recipe for Spicy Garlic Shrimp comes together in just 4 minutes. Fresh shrimp sauteed with garlic, crushed red pepper and lemon juice, delicious!

    This spicy garlic shrimp recipe is absolutely AMAZING. Make it once and it will become one of your go-to recipes, just like it is mine.

    It's great as an appetizer. Makes a fantastic main dish, too - add a salad and some bread and you're done.

    Leftovers are best eaten straight out of the fridge. Preferably late at night.

    How to make spicy garlic shrimp

    What's even better is that these spicy garlic shrimp really do take just four minutes to throw together. Toss the garlic & shrimp in the pan, add seasoning and lemon juice/zest, toss it all into a large serving bowl and go to town. Spicy garlic shrimp in just 4 minutes!

    4-minute Spicy Garlic Shrimp

    If you don't want the spicy part of the spicy garlic shrimp, just omit the crushed red pepper flakes. The dish will still taste amazing!

    You could also toss them with pasta or even put them on a sandwich with some homemade mayo. But they're really best served hot and fresh out the skillet, although if you serve them at a party you won't need to worry if they cool to room temperature before they disappear - these spicy garlic shrimp are still great at room temperature.

    SHOULD YOU BUY YOUR SHRIMP FROZEN?

    Unless you live somewhere that you can get truly fresh shrimp straight off the boat that you're certain is truly fresh, then buy it frozen. The shrimp in the seafood section of your grocery store has very likely already been frozen then thawed - and who knows how long it's been thawed?

    HOW TO THAW FROZEN SHRIMP?

    If you buy a bag of frozen shrimp then you get to decide how long it will be thawed before cooking it. And it's easy to thaw frozen shrimp - just place it in a colander and run cold water over it continuously until it's all thawed, shaking the colander now and then the water runs over different pieces. It's the best and easiest way to make your spicy garlic shrimp!

    This easy recipe for Spicy Garlic Shrimp comes together in just 4 minutes. Fresh shrimp sauteed with garlic, crushed red pepper and lemon juice, delicious!

    Try the delicious shrimp recipes next!

    • Cajun Shrimp and Grits
    • Gambas al Ajillo (Shrimp in Garlic Sauce)
    • Garlic Butter Shrimp Scampi Recipe
    • Grilled Shrimp with Garlic & Beer
    • Stuffed Poblanos with Potatoes and Shrimp
    These shrimp are KILLER! They make a great main dish with a salad and bread or a wonderful appetizer. They always go FAST!! | the wicked noodle | #shrimp #appetizer

    4-minute Spicy Garlic Shrimp

    Yield: 4 servings
    Prep Time: 1 minute
    Active Time: 3 minutes
    Total Time: 4 minutes

    This easy recipe for Spicy Garlic Shrimp comes together in just 4 minutes. Fresh shrimp sauteed with garlic, crushed red pepper and lemon juice, delicious!

    Ingredients

    • 2 tablespoons extra virgin olive oil
    • 4 cloves garlic (crushed)
    • ½ – 1 teaspoon crushed red pepper flakes (depends on how hot you like it!)
    • 24 jumbo shrimp (peeled and deveined, tails left on)
    • 2 teaspoons grill or steak seasoning blend (such as Montreal Steak Seasoning by McCormick, that stuff is soooo good)
    • 1 lemon (zested and juiced)
    • ¼ cup chopped parsley leaves

    Instructions

    1. Heat a large skillet over medium high heat.
    2. Add extra-virgin olive oil, garlic, red pepper flakes and shrimp. Season with grill seasoning or salt and pepper and cook shrimp 3 minutes or until just pink.
    3. Toss with lemon zest and juice. Sprinkle chopped parsley over the top. Pour onto a serving platter or into a large bowl (leaving the garlic cloves in the pan).

    Notes

    Seafood tip: Unless you live somewhere that you can get freshly-caught fish that’s never been frozen, buy your shrimp in the frozen section of your store. Most seafood at the seafood counter has already been frozen and there’s no way to tell how long it’s been sitting in the case after being thawed. If you thaw your own you can control how long until it’s cooked. Thaw shrimp in a colander while running cold water over it continuously until it’s completely thawed.

    Nutrition Information:
    Yield: 4 Serving Size: 1
    Amount Per Serving: Calories: 148Total Fat: 8gSaturated Fat: 1gTrans Fat: 0gUnsaturated Fat: 6gCholesterol: 127mgSodium: 812mgCarbohydrates: 5gFiber: 1gSugar: 1gProtein: 14g

    This data was provided and calculated by Nutritionix.

    © Kristy Bernardo
    Cuisine: American / Category: Appetizers
    4-minute Spicy Garlic Shrimp
    • « Previous Page
    • 1
    • …
    • 14
    • 15
    • 16
    • 17
    • 18
    • Next Page »

    Trending Recipes

    • a metal basket lined with parchment paper that's filled with air fryer flautas mexicanas and topped with pico de gallo, guacamole, and Cacique cheese. there are bowls of guacamole and fresh pico de gallo in the background.
      Air Fryer Flautas Mexicanas – Crispy in Minutes!
    • a closeup of a coconut smoothie bowl topped with fresh blueberries, granola, and goji berries
      Coconut Smoothie Bowl
    • top down view of two birria tacos on a wooden board next to a small bowl of consommé
      Authentic Birria Tacos Recipe (Step-by-Step with Consommé)
    • A stack of keto chocolate chip cookies next to a glass of milk
      Keto Chocolate Chip Cookies

    Popular Spring Recipes

    • a white dish with scalloped edges, filled with an easy pea salad that's topped with chopped parsley on a wooden table
      Make-Ahead Easy Pea Salad for Parties
    • Fried Deviled Eggs on a white plate
      Fried Deviled Eggs with Sausage
    • Beet-Pickled Deviled Eggs Recipe
      Beet-Pickled Deviled Eggs
    • A keto salad on a white plate, made up with grilled romaine, sliced cherry tomatoes, thinly sliced avocado and halved lemon slices for a garnish.
      Keto Salad | Lemony Romaine and Avocado Salad

    Footer

    ↑ back to top

    • Privacy Policy
    • About
    • Contact
    • Cookbooks

    Copyright © 2026 The Wicked Noodle