The Wicked Noodle

  • All Recipes
  • Freezer Meals
  • Dinner Ideas
menu icon
go to homepage
  • All Recipes
  • Freezer Meals
  • Dinner Ideas
search icon
Homepage link
  • All Recipes
  • Freezer Meals
  • Dinner Ideas
×

Smoked Hot Dogs

July 3, 2023 by Monique McArthur Leave a Comment

Smoked Hot Dogs

Hot dogs are good, but smoked hot dogs are even better. If you've never had one, now is the time to change that because you're doing yourself a disservice.

I have a great appreciation for hot dogs especially smoked hot dogs. They're already fully cooked; therefore, the sole focus is infusing them with wood-fired flavor, which leaves room to play with toppings and condiments!

Some days, I crave nothing more than a classic dog. On other days, I enjoy switching things up with toppings like Mexican street corn, the irresistible combination of queso and pickled jalapenos, or a special sauce. Regardless of your choice, you'll be serving perfectly smoked hot dogs that can be customized to your liking.

Smoked Hot Dogs

Why You'll Love Smoked Hot Dogs

Unforgettable flavor - Smoking hot dogs adds a depth of flavor that is hard to beat. The specific flavor notes vary depending on the type of wood used, but the smoky taste and aroma are genuinely transformative.

Unique texture - Smoking hot dogs gives them a distinct texture that differentiates them from traditionally cooked ones. The smoking process imparts a slight crispness to the exterior while keeping the inside juicy and tender. Overall, it's an incredibly satisfying combination of textures.

Versatility - Smoked hot dogs are versatile and, as mentioned earlier, can be served in various ways. Feel free to experiment with different toppings, slice and add them to salads or pasta dishes, roll them in a tortilla, or even incorporate them into breakfast recipes like hash. The possibilities are endless.

Easy - If you're new to smoking meats, smoked hot dogs are an excellent starting point. Since they're already cooked, you don't have to ensure they reach a certain internal temperature for food safety. Instead, the focus is on developing their delicious flavor and ensuring that they are heated through.

Smoked Hot Dogs Ingredients

  • Hot Dogs: Whether it's all beef, beef and pork, turkey, chicken, or vegan. Choose the one you love the most and proceed from there. 100% all-beef beef franks are my favorite but sometimes I opt for healthier smoked turkey hot dogs. Use any brand you like.
  • Smoking wood: Smoking wood is not an ingredient per se, but it is essential for this recipe. The best smoking woods for smoked hot dogs are apple, cherry, oak, and hickory. Apple and cherry woods provide a light, fruity smoke flavor, while oak offers a deeper flavor profile with a subtle sweetness. Hickory, on the other hand, delivers a sweet yet strong bacon flavor.
  • Hot dog buns: You can use your favorite store-bought brand of hot dog buns, or if you prefer, you can bake them from scratch. Also, make sure to have melted butter available for toasting.
  • Toppings and condiments: Feel free to get creative with your choice of toppings and condiments. Options include ketchup, mustard, relish, hot sauce, chopped onions, jalapenos, corn, and more. Have fun and make the hot dogs your own!

Find the complete ingredients list with amounts in the recipe card below!

How to Make Smoked Hot Dogs

  1. Prepare your smoker: Preheat your smoker or prepare your charcoal or gas grill for smoking using an indirect setup with a water pan.
  2. Score the hot dogs: While optional, scoring the dogs is recommended as it allows the smoke to permeate the hot dogs easily, enhances their presentation, and helps prevent splitting during cooking, which can result in the loss of flavorful juices. To score or cross-hatch, cut parallel lines in opposite directions which will form X's.
  3. Smoke: Transfer the hot dogs to the grates, do not place them too close together to allow proper smoke circulation, and smoke the hot dogs for approximately one hour.
  4. Serve: Serve the smoked hot dogs as desired.
Smoked Turkey Dogs

Variations, Substitutions, and Cooking Tips

Check the grill temperature periodically if you use a charcoal or gas grill instead of a smoker or pellet grill. You want to maintain a steady temperature of 225 degrees Fahrenheit. For a charcoal grill, open the vents to increase the temperature and close them to decrease it. With a gas grill, you can adjust the temperature by adjusting the burners.

What to Serve with Smoked Hot Dogs

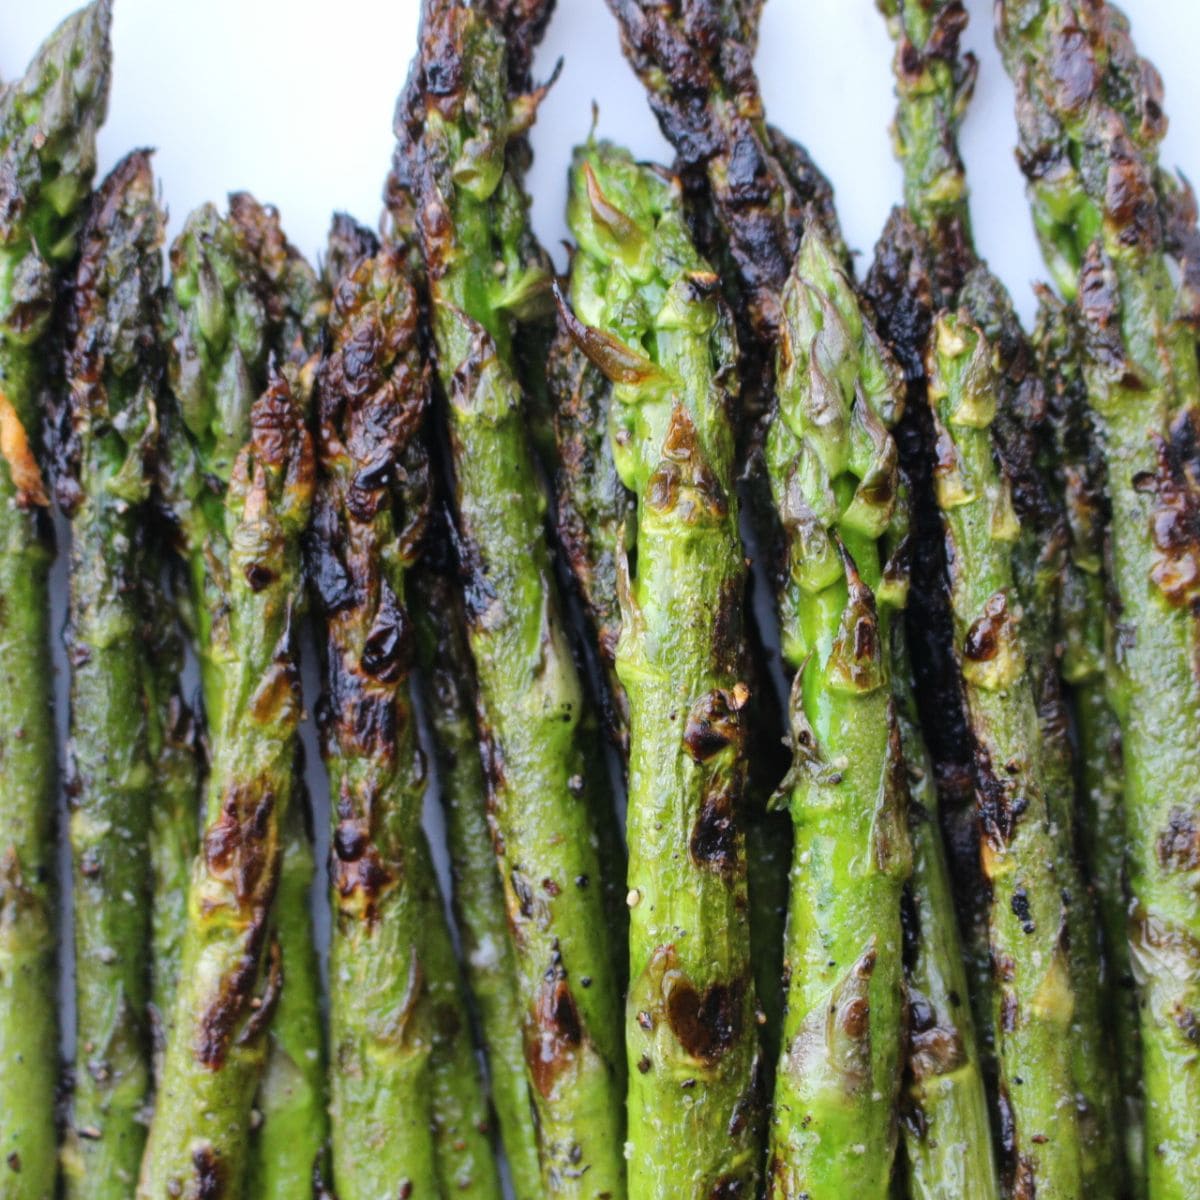
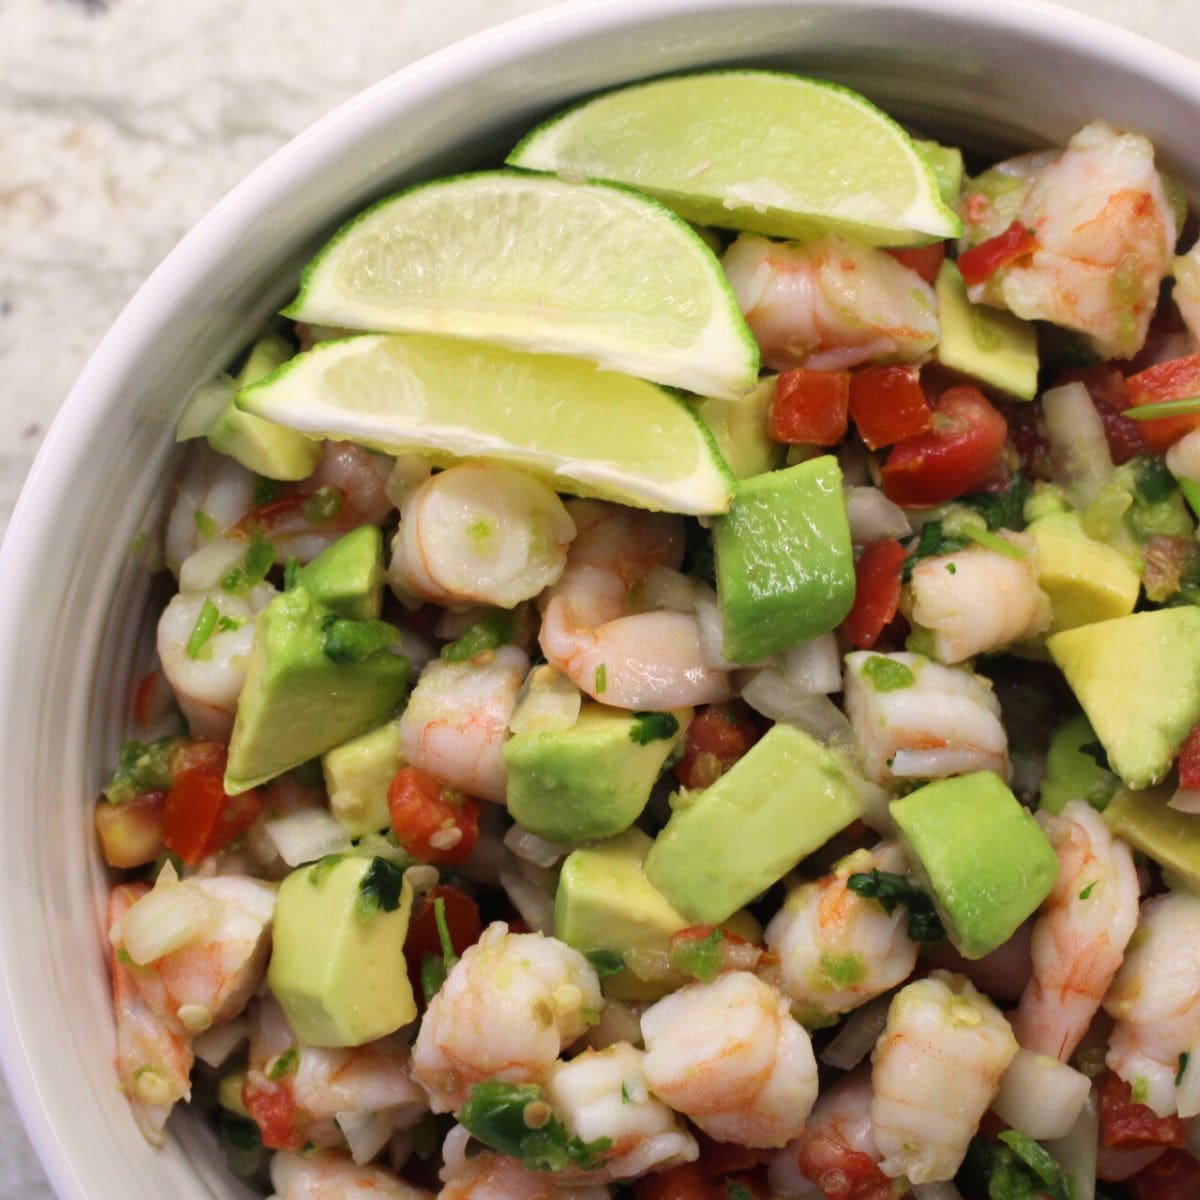
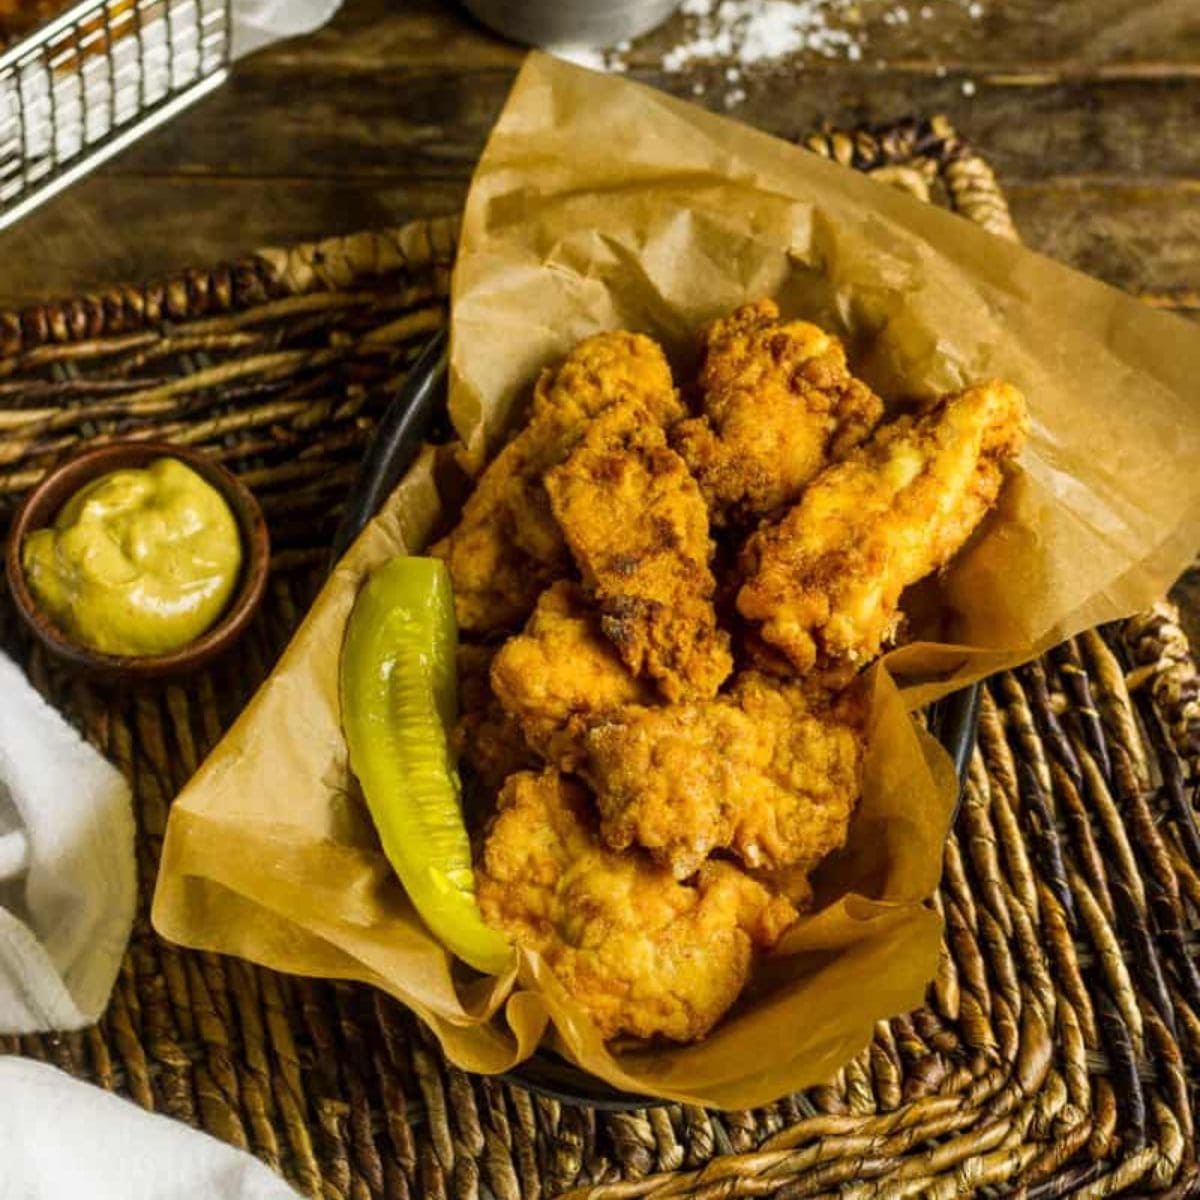
There are numerous delicious accompaniments to serve alongside smoked hot dogs. Options include smoked mac and cheese, fries, homemade potato chips, macaroni salad, smoked baked beans, bacon wrapped tater tots, and grilled vegetable salad. Feel free to choose your favorite side dishes to complete the meal.

And don't forget the toppings! One of our favorites is this thick and beefy beanless chili. Or try these fantastic buffalo hot dogs if you love a little spice.

Storage and Freezer Tips

To store smoked hot dogs, place them in a single layer in a shallow, airtight container and refrigerate. They will stay fresh in the fridge for up to 4 days. Alternatively, you can freeze them by placing them in a freezer bag. Smoked hot dogs can be stored in the freezer for up to 3 months without losing flavor. This means you can prepare a larger batch and have smoked hot dogs on hand whenever you desire.

How to Reheat

When it comes to reheating smoked hot dogs, you have a few options. You can use the microwave - heat them for 45 seconds to a minute. Another method is to place the hot dogs in a hot skillet with a splash of water if you prefer the stovetop. As for the oven, arrange the hot dogs on a baking sheet and heat them at 350 degrees Fahrenheit for 5-7 minutes. If the hot dogs are frozen, thaw them before reheating.

Smoked Hot Dogs

Smoked Hot Dogs

Yield: 6 hot dogs
Prep Time: 5 minutes
Cook Time: 1 hour
Total Time: 5 minutes

Hot dogs are good, but smoked hot dogs are even better. If you’ve never had one, now is the time to change that because you’re doing yourself a disservice.

Ingredients

  • 6 hot dogs, beef, beef and pork, turkey, chicken, or vegan
  • 6 hot dog buns
  • Toppings of choice
  • Condiments of choice

Instructions

    1. Preheat a smoker to 225 degrees Fahrenheit or prepare a grill for smoking. If using a pellet grill, load the grill with the desired pellets and preheat with the lid closed. As for a charcoal grill, set up a two-zone fire and arrange wood chips on top of the lit coals. For gas, create a two-zone setup by adjusting the burners accordingly, then add wood to the designated smoker box or DIY with a foil pouch. Also, use a water pan if using a charcoal or gas grill.
    2. Use a sharp knife to score an “X” pattern (cut parallel lines in opposite directions) into each hot dog.
    3. Transfer the beef franks to the grates, close the lid, and smoke for 1 hour. The smoked hot dogs are ready to remove from the grates when the internal temperature reaches 160 degrees Fahrenheit.
    4. Remove the hot dogs from the grates and serve as desired.

Notes

The best smoking woods for smoked hot dogs are apple, cherry, oak, and hickory.

Whether it's all beef, beef and pork, turkey, chicken, or vegan. Choose the type of hot dog and brand that you prefer.

Nutrition Information:
Yield: 6 Serving Size: 1
Amount Per Serving: Calories: 480Total Fat: 27gSaturated Fat: 10gTrans Fat: 0gUnsaturated Fat: 14gCholesterol: 99mgSodium: 743mgCarbohydrates: 28gFiber: 1gSugar: 4gProtein: 31g

This data was provided and calculated by Nutritionix.

© Monique McArthur
Cuisine: American / Category: Dinner
Smoked Hot Dogs

Grilled Halibut

July 2, 2023 by Monique McArthur Leave a Comment

Grilled Halibut

Grilled halibut is tasty, but grilled halibut with mango salsa is even better! If you want to spice up your usual fish dinner, try this recipe!

Grilled halibut is a lean fish with a slightly sweet, mild flavor, making it highly versatile, but I think pairing it with fresh flavors is best. I usually pair grilled halibut with a colorful salsa like the mango salsa featured in this recipe. The salsa is sweet, tart, and spicy. Moreover, the astringency of the onion is super delicious, as is the citrusy flavor of the cilantro. Not only does it play up the natural flavor of the fish, but it complements the charred flavor developed during cooking.

Grilled Halibut

Why You'll Love Grilled Halibut

Short cook time - Halibut fillets are grilled and ready to go in 10 minutes. You can't beat that!

Fresh ingredients - Freshness is essential here because of the dish's simplicity and makes the food shine. When you go in with quality ingredients, you can taste the freshness in every bite. The flavor profile is so clean and satisfying.

Low in fat - If you're looking for a lower-fat fish option, grilled halibut, or any halibut for that matter, is an excellent choice. Halibut is also low in cholesterol and sodium.

High in protein - Six ounces comes in at an impressive 30 grams!

Colorful - Nothing beats a vibrant, colorful dish, and grilled halibut doesn't disappoint. Yellow, white, green, red - so many vibrant hues. The dish is so appealing to the eyes!

Grilled Halibut Ingredients Notes

To make grilled halibut, you need the following:

  • Halibut: When shopping for halibut, look for white glossy flesh (not slimy) with no fishy smell. Instead, it should smell like the sea. Skinless halibut is also vital because although edible, the skin doesn't taste good. Even if you buy the fish with the skin on, remove it before grilling.
  • Olive oil: Use extra-virgin olive oil since you're grilling the fish. It has a much higher smoke point, so extra-virgin olive oil can handle the grill's high heat.
  • Salt and pepper: This synonymous duo is all a good piece of fish really needs.
  • Mango: Use a red mango or two honey mangos. Honey mangos bring a smooth, almost creamy texture to the salsa.
  • Tomato: Roma tomatoes are great for salsas since they have a garden-fresh flavor, fewer seeds, and denser flesh able to stand up against the other ingredients in a chunkier salsa.
  • Jalapeno: A fresh jalapeno adds heat to the salsa. Scale back the spice by removing the seeds and ribs or leave both intact for more kick.

You'll find the complete ingredients list with amounts in the recipe card below!

How to Make Grilled Halibut

Making grilled halibut is a simple process that takes almost no time. To make this dish:

  1. Prepare the salsa: Add all the ingredients to a bowl and mix until well combined. You want to make the salsa first to give the flavors time to meld.
  2. Season and grill: Brush the fish with oil, season both sides of each fillet, and grill for 5 minutes per side.
  3. Plate and serve: Plate the fish, top each serving with a few spoonfuls of mango salsa, and enjoy.
Halibut Grilled

Variations, Substitutions, and Cooking Tips

Clean the grates before cooking - Take the time to clean your grill grates, especially when grilling fish which is more prone to sticking than other proteins. To clean, spray the grates with a mixture of water and vinegar, leave on the grates for 10 minutes, then brush clean or use a grill spray.

Use a grill basket to prevent sticking - Remember to grease the basket to prevent the fish from sticking to it. Even if the basket is nonstick, lightly grease it anyway because the fillets will fall apart if they stick. They'll still taste good, but the presentation won't be.

Replace the halibut with another white fish - Cod, striped bass, flounder, or sole are all delicious substitutes.

Switch up the salsa ingredients - Try another fruit like pineapple, use habanero to up the heat, and incorporate herbs, spices, and more. There are numerous ways to make it your own.

What to Serve with Grilled Halibut

It's easy to create a meal around grilled halibut. A grilled vegetable side is always a good choice. If you prefer rice, try cilantro lime rice or go with pasta, like pasta tossed in a creamy avocado pesto. Another option is something cold like a salad or chilled soup. Whatever you choose, keep the flavors clean and bright.

Storage and Freezer Tips

Store leftover grilled halibut fillets in a single layer in an airtight container once it has cooled to room temperature, then refrigerate. For optimal texture and flavor, do not freeze leftovers. As for the salsa, store it in a separate airtight container and refrigerate. The salsa will last much longer (5-7 days), but the recipe yields enough for four fillets.

Grilled Halibut

Grilled Halibut

Yield: 4 Servings
Prep Time: 12 minutes
Cook Time: 10 minutes
Total Time: 22 minutes

Grilled halibut is tasty, but grilled halibut with mango salsa is even better! If you want to spice up your usual fish dinner, try this recipe!

Ingredients

Salsa

  • 1 large red mango, chopped
  • 3 tablespoons chopped yellow onion
  • Juice of 1 lemon
  • 1 small jalapeño, seeds removed and chopped
  • 1 Roma tomato, chopped
  • 1 tablespoon chopped fresh cilantro
  • ¼ teaspoon fine sea salt
  • ⅛ teaspoon black pepper

Halibut

  • 4 (6-ounce) halibut fillets, skinless
  • 2 tablespoons extra-virgin olive oil
  • 1 teaspoon kosher salt
  • ½ teaspoon black pepper
  • ¼ teaspoon chili powder

Instructions

  1. Add the salsa ingredients to a bowl, mix well, and refrigerate until the fish is ready.
  2. Gently rinse the fish under cool water and pat dry with paper towels. 
  3. Prepare a grill for medium-high heat cooking over direct heat. You can also preheat a grill pan over medium-high. 
  4. Brush the halibut with oil and season both sides of each fillet with salt, black pepper, and chili powder. 
  5. Grill for 5 minutes per side or until the internal temperature reaches 130-135 degrees Fahrenheit. 
  6. Plate the grilled halibut, spoon salsa on the fillets, and serve.
Nutrition Information:
Yield: 4 Serving Size: 1
Amount Per Serving: Calories: 123Total Fat: 7gSaturated Fat: 1gTrans Fat: 0gUnsaturated Fat: 6gCholesterol: 0mgSodium: 454mgCarbohydrates: 16gFiber: 2gSugar: 13gProtein: 1g

This data was provided and calculated by Nutritionix.

© Monique McArthur
Cuisine: Seafood / Category: Main Dish
Grilled Halibut

Try These Recipes Next!

  • Grilled Tilapia
  • Grilled Trout
  • Grilled Avocado
  • Grilled Artichokes
  • Grilled Asparagus

Tater Tot Nachos (Loaded Blue Cheese Burger Totchos)

July 2, 2023 by Kristy Bernardo Leave a Comment

Close-up of loaded tater tot nachos on a white plate with a spoon, topped with seasoned ground beef, red onions, blue cheese dressing drizzle, and chopped herbs.

These Tater Tot Nachos (Blue Cheese Burger Totchos) are everything you love about a juicy blue cheese bacon burger, just layered over crispy, golden tater tots instead of a bun. It's comfort food meets party food in the very best way! We're talking sizzling ground beef tossed with tangy ketchup, then topped with smoky bacon, blue cheese crumbles, and chives. It's SO good!

Close-up of loaded tater tot nachos on a white plate with a spoon, topped with seasoned ground beef, red onions, blue cheese dressing drizzle, and chopped herbs.

Why You'll Love This Recipe

  • A total crowd-pleaser: These totchos are a guaranteed hit at parties, game day gatherings, or any casual dinner. Everyone loves tater tots, and loading them with burger toppings just takes it to the next level.
  • Quick and easy to make: With minimal prep and ingredients you likely already have on hand, this recipe is weeknight-friendly and stress-free.
  • Customizable: Not a fan of blue cheese? Swap it out for any cheese you like! Want to add pickles or jalapeños? Go for it. You can easily tweak this dish to fit your tastes.
  • It's comfort food with a twist: It combines the flavors of burger night with the fun of loaded nachos. Tater tot nachos are crispy, cheesy, and flavorful in all the right ways.
  • Great for leftovers: If you somehow have any leftovers, just reheat and enjoy them all over again. They'll always taste best right after serving but they're still pretty good (and perfect for lunch)!

What Are Tater Tot Nachos?

Tater Tot Nachos (aka "totchos") are exactly what they sound like: a fun twist on traditional nachos using crispy tater tots in place of tortilla chips. Instead of loading your nachos on a bed of chips, you use golden-brown tater tots as the base, then pile on your favorite toppings.

In this version, we're channeling the flavors of a classic blue cheese bacon burger. Seasoned ground beef, crispy bacon, melty blue cheese crumbles, and a drizzle of blue cheese dressing is layered over hot, crispy tots and finished with red onions and chives. It's insanely satisfying!

Close-up of crispy tater tots loaded with crumbled bacon, ground beef, chopped red onions, ranch dressing, and blue cheese crumbles.
Three white plates filled with tater tot nachos topped with ground beef, bacon, diced onions, and drizzled with creamy dressing.

Ingredients

Here's everything you'll need to make this easy recipe:

  • 1 (32 oz) package frozen tater tots: The crispy base for your totchos. Use your favorite brand or go with extra-crispy tater tots.
  • 1 lb lean ground beef: Go with 85-90% lean.
  • ½ cup ketchup: Adds a classic burger flavor to the beef.
  • ½ cup crumbled cooked bacon: Salty, smoky, and adds more crispy texture.
  • ½ cup blue cheese dressing: Drizzled over the tots for extra flavor and creaminess.
  • ½ cup blue cheese crumbles: Crumbled over the top for loads of blue cheese flavor.
  • 2 tablespoons chopped red onion: A nice balance to the blue cheese.
  • 1 tablespoon chopped fresh chives: Adds a nice pop of green.
  • Optional: A drizzle of hot sauce, diced pickles, or crispy fried onions for even more burger flavor.

Step by Step Instructions

  1. Cook the Bacon: If you haven't already cooked your bacon, now's the time. Fry it in a skillet or cook in the oven until it's crispy, then chop or crumble it into bite-sized pieces.
  2. Bake the Tater Tots: Preheat your oven to 425°F. Spread the tater tots in a single layer on a large baking sheet and bake according to the package directions, or until they're extra crispy and golden brown. (Crispier tots = better totchos!)
  3. Cook the Ground Beef: While the tots are baking, heat a skillet over medium heat and cook the ground beef until browned and no longer pink. Drain any excess grease. Stir in the ketchup and simmer for just a few minutes, then remove it from the heat.
  4. Assemble the Totchos: Once the tater tots are done, transfer them to a large serving platter or tray (a clean sheet pan works great for this). Drizzle with the blue cheese dressing, then top it with the warm ground beef mixture.
  5. Add the Toppings: Sprinkle over the cooked bacon, blue cheese crumbles, red onion, and chives. Add any extras like pickles or hot sauce if you'd like.
  6. Serve Immediately: These are best served hot and fresh!

Recipe Variations

This is one of those recipes that can be made with just about any flavors you like! Here are ten ideas for different ways to enjoy your tater tot nachos:

  1. Street Taco: Shredded carnitas, pickled red onions, cotija cheese, jalapeños, chopped cilantro, salsa verde and/or chipotle crema, and a squeeze of lime
  2. Buffalo Chicken: Shredded buffalo chicken, crumbled blue cheese, chopped celery, green onions, with a ranch or blue cheese dressing drizzle
  3. Garlic Parmesan: Roasted garlic, shaved Parmesan, fresh parsley, and crispy pancetta, with garlic aioli or white queso
  4. Hawaiian Barbecue: Pulled pork, pineapple chunks, red onion, mozzarella, and a d rizzle of smoky barbecue sauce
  5. Loaded Guacamole: Taco-seasoned ground beef, fresh guacamole, pico de gallo, shredded cheddar, sour cream or jalapeño lime crema
  6. Nacho Supreme: Ground beef, black beans, olives, jalapeños, cheddar cheese, lettuce, tomatoes, sour cream, and a classic nacho cheese sauce
  7. Philly Cheesesteak: Thinly sliced steak, sautéed onions and bell peppers, provolone, cheese whiz or sauce
  8. Elote (Mexican Street Corn): Fire-roasted corn, cotija, lime, chili powder, and a creamy mayo-based elote sauce with cilantro
  9. Mediterranean: Ground lamb or falafel crumbles, diced cucumber, cherry tomatoes, kalamata olives, feta, with a tzatziki or lemon tahini drizzle
  10. Tex-Mex Chorizo: Mexican chorizo, black beans, pickled jalapeños, pepper jack cheese, with avocado crema or chipotle ranch
Basket lined with paper filled with tater tot nachos and served with forks, topped with bacon, onions, blue cheese, and blue cheese dressing.
Single serving of tater tot nachos in a white bowl, loaded with bacon, ground beef, blue cheese crumbles, and chopped green onions.

Tips for Perfect Totchos

  1. Get the tots extra crispy: Bake the tater tots a little longer than the package suggests to get them extra crispy, especially since they'll soften slightly once the toppings are added.
  2. Drain excess grease: If you're using beef or any other fatty meat, make sure to drain it well after browning. This keeps your totchos from getting soggy.
  3. Layer with intention: For the best bites, layer your toppings evenly across the pan. It helps to do two smaller layers (tots, toppings, then repeat) so nothing gets lost under a mountain of cheese.
  4. Use quality cheese: Shred your own cheese if possible, because it melts better and avoids the anti-caking agents that comes with store-bought shredded cheese.
  5. Finish with the cold garnishes on top: Add fresh toppings at the end to keep them cool (like chopped onions or tomatoes, herbs, or sour cream).
  6. Make it your own: Tater Tot Nachos are a blank canvas! Swap the protein, mix up the cheeses, or add something fun like crushed chips, avocado, or hot sauce.
  7. Serve immediately: They're best served hot and fresh. If they sit too long, the tots can lose their crispiness.
  8. Keep sauces separate for a crowd: Whenever I'm serving these to a group, I like to leave sauces like sour cream, guacamole, or dressings on the side so everyone can customize their own serving.

Storage, Reheating & Make-Ahead Tips

Storage

Store any leftovers in an airtight container in the fridge for up to 3-4 days. If you're prepping ahead or expecting leftovers, store the tots and toppings separately whenever possible to help prevent sogginess.

Reheating

  • Oven: Preheat to 400ºF and bake tots on a sheet pan for 8-10 minutes or until hot and crispy.
  • Air fryer: 375ºF for 5-6 minutes works great to crisp everything up.

If possible, reheat the ground beef separately in the microwave or stovetop and add it after the tots are hot. Fresh garnishes (onions, herbs, sauces) should be added after reheating.

Make-Ahead Tips

  • Prep Ahead: You can cook the ground beef mixture, bacon, and chop garnishes in advance. Store everything separately in the fridge.
  • Day-of Assembly: Bake the tots and reheat your toppings just before serving. This keeps everything hot and crispy.
  • Don't pre-assemble: Don't assemble them in advance, as the tater tots will absorb moisture from the toppings and lose their crunch.
Overhead view of a large white platter piled with golden tater tots and generously topped with bacon, red onion, blue cheese, and green onions.
Bright and colorful plate of tater tot nachos with ground beef, bacon, creamy blue cheese dressing, red onions, and green onions on a wood background.

Frequently Asked Questions

What's the best way to make these vegetarian?

Just swap the ground beef for plant-based crumbles or even cooked lentils. You can also load them up with sautéed mushrooms, black beans, or chopped fresh or roasted veggies.

Can I use a different cheese instead of blue cheese?

Yep! Try shredded cheddar, pepper jack, gouda, mozzarella, or even queso fresco. If blue cheese isn't your thing, you've got plenty of options.

Are tater tots gluten-free?

Many brands of tater tots are naturally gluten-free, but always check the label to be sure (some include additives or coatings that may contain gluten).

Can I use sweet potato tots instead of regular?

Yes and this is a delicious swap! Sweet potato tots add a little extra flavor and pair well with tangy cheeses like goat cheese or feta.

What protein can I use instead of ground beef?

Try ground turkey, chorizo, shredded chicken, or pulled pork. Even leftover brisket or carnitas would be delicious.

What's the best way to serve totchos for a party?

Use a large sheet pan for easy serving, or build a totcho bar where guests can customize their toppings.

Can I reheat leftover totchos?

Yes, but they're definitely best fresh. Reheat the tots in the oven or air fryer to bring back that crispiness, and warm the meat separately. Avoid microwaving if you can as it'll make the tots soggy.

Can I make Tater Tot Nachos ahead of time?

You can prep the individual components (ground beef, bacon, chopped toppings) ahead of time, but for the best texture, assemble and bake the totchos just before serving. This keeps everything hot and the tots nice and crispy.


If you're as obsessed with nachos as I am, you're definitely going to want to check out my other nachos recipes! My healthy nachos are packed with lighter, wholesome toppings without skimping on flavor (yes, it's possible!). If you're after a foolproof method, this oven-baked nachos recipe walks you through all the best tips for crisp chips and gooey cheese every time. Then there's loaded fries, made with crispy fries instead of chips! And don't miss the cauliflower nachos with buffalo sauce - they're spicy, flavorful, and SO addictive (plus a sneaky way to get some veggies in)!

Best Blue Cheese Burger Totchos

Blue Cheese Burger Totchos (Tater Tot Nachos)

Yield: 12 servings
Prep Time: 10 minutes
Cook Time: 40 minutes
Total Time: 50 minutes

All of your favorite flavors and ingredients from a Blue Cheese Burger served over tater tots to create Totchos - an easy, crowd-pleasing dish!

Ingredients

  • 1 pkg tater tots (32 oz)
  • 1 lb. lean ground beef
  • ½ cup ketchup
  • ½ cup blue cheese dressing
  • ½ cup cooked, crumbled bacon
  • ½ cup blue cheese crumbles
  • 2 tablespoon chopped red onions
  • 1 tablespoon chopped fresh chives

Instructions

  1. Bake the tater tots as directed on package, either in the oven or the air fryer.
  2. Meanwhile, brown the ground beef in a large skillet. Carefully drain any excess grease. Stir in the ketchup and cook for another 2-3 minutes.
  3. Spread the hot tater tots onto a large serving platter or a clean sheet pan.
  4. Drizzle with the dressing, then add the ground beef mixture, bacon, blue cheese crumbles, chopped red onions, and the fresh chives.
  5. Serve immediately.
Nutrition Information:
Yield: 12 Serving Size: 1
Amount Per Serving: Calories: 184Total Fat: 13gSaturated Fat: 4gTrans Fat: 0gUnsaturated Fat: 7gCholesterol: 44mgSodium: 313mgCarbohydrates: 4gFiber: 0gSugar: 3gProtein: 13g

This data was provided and calculated by Nutritionix.

© Kristy Bernardo
Cuisine: American / Category: Dinner
Tater Tot Nachos (Loaded Blue Cheese Burger Totchos)

Carrot Bacon

July 2, 2023 by Monique McArthur Leave a Comment

Carrot Bacon

Carrot bacon is a delicious vegan alternative to pork. Each strip is smoky, crispy, salty, and meaty. Doubtful? This recipe will make you a believer!

Bacon lovers, both former and current, can rejoice! There's an exciting twist on those salty strips of goodness that will leave your taste buds in awe. Allow me to introduce you to carrot bacon-an incredible vegan alternative that perfectly captures the smoky, crispy essence of bacon while providing a healthier and more sustainable option. Whether you're a vegetarian, vegan, or simply seeking something more nutritious, carrot bacon is an absolute must-try.

Carrot Bacon

Why You'll Love Carrot Bacon

Crispy and flavorful - Carrot slices magically transform into crispy, golden strips with a delightful crunch.

Versatile - Take your breakfast or sandwich game to the next level by adding homemade carrot bacon, or enjoy a few slices when you want a salty, smoky snack.

Vegan and gluten-free - Carrot bacon is entirely plant-based and gluten-free (if you use tamari), making it an ideal choice for individuals with various dietary preferences.

Quick and easy - With only a handful of simple ingredients and minimal preparation required, you'll have a batch of carrot bacon ready in no time.

Carrot Bacon Ingredients Notes

To make this irresistible carrot bacon, gather the following ingredients:

  • Carrots: Opt for firm, medium-sized carrots to achieve the best results. Their natural sweetness and texture are ideal for this recipe.
  • Liquid smoke: This ingredient imparts a smoky flavor reminiscent of traditional bacon. Look for liquid smoke in the condiment section of your local grocery store or buy it online.
  • Maple syrup: A touch of maple syrup adds sweetness and aids in caramelizing the carrots while they cook.
  • Tamari or soy sauce: These savory sauces contribute a depth of flavor and provide a salty kick to the carrot bacon.
  • Smoked paprika: The smoky undertones of smoked paprika perfectly complement the liquid smoke, enhancing the bacon-like flavor. It also adds a nice color.

The complete ingredients list with amounts is in the recipe card below!

How to Make Carrot Bacon

  1. Prepare the carrots: Wash them thoroughly, ensuring a good scrub, and then thinly slice them lengthwise. You can use a mandolin for slicing (remember to use the hand guard) or slice with a sharp knife.
  2. Make the marinade: Whisk all the ingredients together in a shallow dish large enough to accommodate the length of the carrots.
  3. Marinate: Place the carrot slices into the dish with the marinade and toss them to ensure they are evenly coated.
  4. Roast or air fry: Arrange the carrot slices in a single layer, then roast or air fry for approximately 10-12 minutes.
  5. Enjoy: Once the carrot bacon is ready, allow it to cool briefly, as it will crisp up further during this time. Then, enjoy!
How To Make Carrot Bacon

Variations, Substitutions, and Cooking Tips

Go sugar-free - Opt for your favorite sugar-free maple syrup instead of real maple syrup.

Reduce the salt - Choose low-sodium soy sauce, tamari, or coconut aminos to lower the sodium content in the marinade.

Add pineapple juice - For a tropical twist, add a tablespoon of pineapple juice to the marinade. Carrots and pineapples complement each other wonderfully. Use 100% pineapple juice for the best results.

Try honey - Honey adds a pleasant floral sweetness to carrot bacon. However, please note that honey is not vegan.

Monitor closely - Whether roasting or air frying, keep a close eye on the carrot slices to prevent them from burning. Your oven or air fryer may run a little hot.

What to Serve with Carrot Bacon

Serve carrot bacon as you would pork bacon: on sandwiches or alongside scrambles, waffles, and toast. I particularly enjoy incorporating carrot bacon into potato hash with diced onion and garlic. Before serving, break the slices into smaller pieces and toss them into the potato hash. The smoky bits elevate the already delicious dish to new heights. Additionally, you can crumble the bacon and add it to a vegan quiche for extra flavor. The possibilities are endless!

Storage and Freezer Tips

Store leftover carrot bacon in an airtight container and leave it at room temperature for 3 days max. Do not refrigerate or freeze, as the cold temperatures will ruin the texture.

How to Reheat

Reheating carrot bacon is easy. To reheat, preheat your oven to 300 degrees Fahrenheit and arrange the slices on a baking sheet in a single layer. Once the oven is hot, reheat for 3-4 minutes. Keep a close eye on the bacon to avoid burning. Alternatively, you can use an air fryer to reheat. For this method, preheat the air fryer to 300 degrees Fahrenheit and air fry the bacon for 2 minutes. Stay nearby and use your sense of smell to determine if the carrot bacon needs to be removed sooner. Again, you don't want to burn it.

Carrot Bacon

Carrot Bacon

Yield: 3 Servings
Prep Time: 20 minutes
Cook Time: 15 minutes
Total Time: 35 minutes

Carrot bacon is a delicious vegan alternative to pork. Each strip is smoky, crispy, salty, and meaty. Doubtful? This recipe will make you a believer!

Ingredients

  • 2 medium carrots, preferably organic
  • 1 ½ tablespoons olive oil
  • 1 tablespoon soy sauce, tamari, or coconut aminos
  • 1 ½ teaspoons real maple syrup
  • ½ teaspoon liquid smoke
  • ¼ teaspoon garlic powder
  • ¼ teaspoon onion powder
  • ⅛ teaspoon smoked paprika
  • ⅛ teaspoon black pepper

Instructions

  1. Preheat the oven or air fryer to 350 degrees Fahrenheit. If using an oven, line the baking sheet with parchment paper. 
  2. Wash the carrots and thinly slice them lengthwise using a mandoline or vegetable peeler. If you are not using organic carrots, peel them before you slice them. 
  3. Whisk the remaining ingredients in a shallow dish and marinate the carrot strips for 5-10 minutes. Work in batches to ensure that all the slices are fully coated. 
  4. Arrange the slices on the baking sheet in a single layer or place them in a single layer in the air fryer basket. 
  5. Roast for 10-12 minutes, flipping halfway through, or air fry for 10 minutes (again, flipping halfway through). Carrot bacon is ready when it is golden brown and crisp at the edges. The middle may not be as crisp, which is fine. 
  6. Transfer to a wire rack to cool (they will crisp up as they cool) and enjoy.
Nutrition Information:
Yield: 3 Serving Size: 1
Amount Per Serving: Calories: 89Total Fat: 7gSaturated Fat: 1gTrans Fat: 0gUnsaturated Fat: 6gCholesterol: 0mgSodium: 677mgCarbohydrates: 6gFiber: 1gSugar: 4gProtein: 1g

This data was provided and calculated by Nutritionix.

© Monique McArthur
Cuisine: American / Category: Sides
Carrot Bacon

Try These Recipes Next!

  • Grilled Artichoke
  • Grilled Avocado
  • Glazed Carrots
  • Balsamic Caramelized Onions
  • Chipotle Candied Bacon

Rotisserie Chicken Noodle Soup

July 2, 2023 by Monique McArthur Leave a Comment

Rotisserie Chicken Noodle Soup

This hearty rotisserie chicken noodle soup is exceptional. It's loaded with veggies, juicy bites of chicken, and perfectly cooked noodles in a flavorful broth.

Few can compete with the classic goodness of rotisserie chicken noodle soup. When it comes to warm and nourishing dishes, chicken soup reigns supreme. A steaming bowl filled with tender chicken, hearty vegetables, and noodles is a go-to favorite for many. Whether you're feeling under the weather or simply seeking a satisfying meal, this recipe will hit the spot. The soup's simplicity and yield of two generous bowls sets it apart, making it ideal for those cooking for themselves.

Rotisserie Chicken Noodle Soup

Why You'll Love Rotisserie Chicken Noodle Soup

It's delicious - The combination of juicy rotisserie chicken, aromatic vegetables, and herbs creates a soup that is both flavorful and comforting. Each spoonful will warm your soul.

Easy and convenient - Utilizing rotisserie chicken saves time and effort. It's a convenient way to incorporate that yummy roasty flavor into soup without the work.

Nutritious - This soup is packed with protein from the rotisserie chicken and various vitamins and minerals from the vegetables. This rotisserie chicken soup contains garlic, onion, carrot, celery, cabbage, and lean protein. You can't get much better than that!

Small batch - Have you ever craved soup but didn't feel like preparing a large pot? You don't have to with this rotisserie chicken noodle soup. The recipe yields just two bowls. Share with a friend or save the second serving for later.

Rotisserie Chicken Soup Ingredients Notes

To make rotisserie chicken soup, you will need the following ingredients:

  • Rotisserie chicken: Breast meat works exceptionally well, as will a combination of white and dark meat. Use a sharp knife to separate the meat from the bone and take the time to remove the skin, but don't throw it away. You can crisp the skin in the oven or air fryer and use the cracklings to garnish. Yum!
  • Aromatic vegetables: Garlic, onion, carrots, and celery are responsible for rotisserie chicken soup's mouthwatering aroma. They also add depth of flavor.
  • Cabbage: Napa cabbage is a tender yet hearty green with a mild sweetness when cooked. I like how easy it wilts when added to the hot broth.
  • Broth: Choose a high-quality chicken broth or stock. Opting for reduced sodium allows better control over the salt level. However, the choice is yours. If you don't use low-sodium chicken broth, start with half a teaspoon of soy sauce, complete the recipe, and adjust the seasoning at the end if necessary. Homemade broth is also an option if available.
  • Noodles: I recommend wide egg noodles, but feel free to use any noodles or small pasta you like.

You'll find the complete ingredients list with amounts in the recipe card below!

Rotisserie Chicken Noodle Soup Ingredients

How to Make Rotisserie Chicken Noodle Soup

Making rotisserie chicken noodle soup is a simple process that takes almost no time. To make it:

  1. Saute the aromatics: Heat oil in a saucepan and sauté garlic, onion, carrot, and celery until lightly browned and fragrant.
  2. Add the broth and boil: Pour in the broth and seasonings, then bring it to a boil. Once boiling, reduce the heat to a simmer, allowing the aromatics to infuse the broth.
  3. Cook the noodles: Return the broth to a boil and add the noodles, cooking them for approximately 3 minutes less than the recommended time on the packaging. This is important as the chicken will be added later and needs about 3 minutes to heat through in the hot broth.
  4. Add the chicken: Transfer the rotisserie chicken to the saucepan to heat through. Remove the saucepan from the heat and stir in the cabbage to wilt.
  5. Serve: Ladle the rotisserie chicken noodle soup into bowls and serve.

Variations, Substitutions, and Cooking Tips

Slow cook the broth - Bring it to a boil, add the bones and wings from the rotisserie chicken, and let it simmer for a few hours. The result is impressive, as the collagen works magic, creating a richer, more flavorful broth.

Go gluten-free - To make the soup gluten-free, replace the noodles with quinoa. Additionally, ensure that the broth and chicken used in the recipe are not processed in a facility where they may have come into contact with gluten.

Vegetarian option - For a vegetarian twist, substitute the chicken with a plant-based alternative like tofu or seitan, and use vegetable broth. This allows you to enjoy all the flavors and textures of the dish while catering to a vegetarian diet.

Flavorful additions - Elevate the flavor of your soup by incorporating tasty additions. Fresh lemon juice can add a vibrant zing, while a sprinkle of grated Parmesan cheese brings a delightful salty nuttiness, and a dash of hot sauce will provide an extra kick for those who crave heat.

Storage and Freezer Tips

Cool the rotisserie chicken soup to room temperature before storing the leftovers in an airtight container. Deli containers are particularly convenient as they allow you to reheat the soup directly in the container and are also travel-friendly. Alternatively, you can transfer the soup to a freezer bag. The soup will remain fresh in the refrigerator for up to 4 days or can be frozen for up to 3 months.

Rotisserie Chicken Noodle Soup

Rotisserie Chicken Noodle Soup

Yield: 2 Servings
Prep Time: 10 minutes
Cook Time: 30 minutes
Total Time: 40 minutes

This hearty rotisserie chicken noodle soup is exceptional. It’s loaded with veggies, juicy bites of chicken, and perfectly cooked noodles in a flavorful broth.

Ingredients

  • 1 tablespoon olive oil
  • 4 garlic cloves, minced
  • 2 ounces chopped onion
  • 2 ounces carrot, cut into 1-1 ½ inch thick strips
  • 3 ounces sliced celery
  • 3 cups reduced-sodium chicken broth
  • 2 teaspoons soy sauce
  • 1 teaspoon garlic powder
  • ½ teaspoon black pepper
  • 3 ounces egg noodles
  • 4 ounces shredded rotisserie chicken
  • 3 ounces chopped napa cabbage
  • ½ teaspoon dried oregano
  • 2 tablespoons chopped fresh parsley

Instructions

  1. Heat the oil in a saucepan over medium heat.
  2. Sauté the garlic, onion, carrot, and celery for 3-4 minutes, stirring frequently to prevent burning. 
  3. Once the aromatics are lightly brown, pour in the broth, soy sauce, garlic powder, and black pepper. 
  4. Bring to a boil, reduce to a simmer, cover, and simmer for 10 minutes. 
  5. Uncover and return the soup to a boil, add the noodles, and cook 3 minutes shy of the packaging instructions. 
  6. Stir in the chicken and cook for 3 minutes to heat through. 
  7. Remove the soup from the heat. Stir in the cabbage, oregano, and parsley. The cabbage will wilt.
Nutrition Information:
Yield: 2 Serving Size: 1
Amount Per Serving: Calories: 319Total Fat: 15gSaturated Fat: 3gTrans Fat: 0gUnsaturated Fat: 10gCholesterol: 82mgSodium: 1407mgCarbohydrates: 24gFiber: 3gSugar: 4gProtein: 24g

This data was provided and calculated by Nutritionix.

© Monique McArthur
Cuisine: American / Category: Soups and Stews
Rotisserie Chicken Noodle Soup

Try These Recipes Next!

  • Easy Meatball Soup
  • Kirkland Split Pea & Ham Soup
  • Korean Cold Noodle Soup
  • Leftover Rotisserie Chicken Recipes

60+ Fun Ice Cream Toppings

June 24, 2023 by Heidi Deal Leave a Comment

The Best Ice Cream Toppings

There's no question that ice cream is one of everyone's favorite desserts. But sometimes, the best thing about ice cream is all the ice cream toppings that you can put on top to make it a decadent, delicious dessert that is a delight for any occasion. Maybe you're a purist and like one or two toppings, or maybe you like to add as many as you can fit on top. Whatever your preference, here's a list of all the best ice cream toppings from sauces to sprinkles, and beyond.

The Best Ice Cream Toppings

Sauces, Syrups, Dollops & Drizzles

Sauces and syrups add a special dollop or drizzle of sweetness, or an extra ooey gooey texture that perfectly complements the cool, creamy base. There are many specially developed sauces to top your ice cream, but you can get creative and try some of these others as well. Keep in mind that some brands make sauces and syrups in a variety of flavors, including seasonal options like pumpkin, orange, blueberry, vanilla, peppermint, hazelnut, etc.

  • Chocolate Sauce or Syrup
  • Hot Fudge
  • Caramel Sauce or Syrup
  • Strawberry Sauce or Syrup
  • Pineapple Sauce or Syrup
  • Cherry Sauce or Syrup
  • Butterscotch Sauce or Syrup
  • White Chocolate Sauce or Syrup
  • Peanut Butter/Almond Butter
  • Magic Shell
  • Cookie dough
  • Apple Butter
  • Raspberry Sauce
  • Honey
  • Whipped Cream
  • Cool Whip
  • Marshmallow Cream
  • Strawberry Fluff
  • Jam, Jelly, Marmalade, & Fruit Preserves
  • Lemon, Lime, and other Fruit Curd
  • Balsamic Vinegar
  • Maple Syrup
  • Cake Frosting/Icing
  • Nutella
  • Espresso or Coffee Syrup
  • Dulce de Leche

Candy & Cookie Ice Cream Toppings

Everyone loves adding an extra spoonful of sweets. Whether it's the traditional sprinkles or something more creative, here's a list of popular candy and cookie ice cream toppings for you to add to your next ice cream sundae.

  • Sprinkles
  • Marshmallows or roasted marshmallows
  • Gummy Bears/Sour Gummies
  • Nerds
  • Pop Rocks
  • Andes Mints
  • Oreos
  • Chips Ahoy
  • Girl Scout Cookies
  • Fudge Stripes
  • Graham Crackers
  • Donuts
  • Twix
  • Raisinettes
  • Chocolate Chips
  • M&Ms
  • Jelly Beans
  • Cotton Candy
  • Crushed Oreos
  • Cookie Dough Chunks
  • Cream Filled Wafers
  • Crumbled Waffle Cones
  • Chocolate Bark
  • Peppermint Bark
  • Peanut Butter Cups
  • Butterfinger
  • Snickers
  • Crumbled Pop Tarts
  • Nilla Wafers
  • Malted Milk Powder
  • Whoppers
  • Crumbled Brownies
  • Crumbled Birthday Cake
  • Kit Kat
  • Snow Caps
  • Peanut Brittle
  • Heath Bar
  • Licorice
  • Rock Candy
  • Gingerbread Cookie
  • Shortbread Cookie

Crispy & Crunchy Ice Cream Toppings

If you really want to add a complementary topping to your sundae, add something crispy, crunchy, and savory. Nuts have always been a popular topping to add that crunchy kick, but here's a list of both basic and creative crispy, crunchy ice cream toppings.

  • Potato Chips
  • Doritos
  • Pretzels
  • Chocolate Covered/Yogurt Covered Pretzels
  • Candied Bacon/Bacon Bits
  • Popcorn
  • Caramel Corn
  • Ritz Crackers
  • Trail Mix
  • Chia
  • Cocoa Nibs
  • Crumbled Waffles
  • Crushed Waffle Cones or Sugar Cones
  • Sunflower Seeds
  • Slivered/Sliced Almonds
  • Peanuts (regular, spanish, or honey roasted)
  • Pecans/Candied Pecans
  • Pumpkin Seeds
  • Pistachios
  • Hazelnuts
  • Cashews
  • French Fries
  • Honeycomb
  • Fried Corn Silk
  • Chocolate Chip Cookies
  • Vanilla Fleur de Sel

Fruity Ice Cream Toppings

I'll be honest. I'm the one who goes straight to the strawberries. Every time. It's a favorite for many reasons, but it's also ok to branch out. Here's a list of some of the best fruit-focused ice cream toppings that you can mix and match.

  • Strawberries
  • Bananas
  • Blueberries
  • Raspberries
  • Blackberries/Boysenberries
  • Peaches/Nectarines
  • Apples/Cinnamon Apples
  • Mango
  • Passion Fruit
  • Pomegranate
  • Guava
  • Pineapple
  • Mandarin Oranges
  • Pomegranate Arils
  • Kiwi
  • Dragon Fruit
  • Coconut Flakes
  • Banana Chips
  • Raisins
  • Dried Cranberries
  • Maraschino Cherries
  • Crystallized Ginger
  • Tapioca Pearls
  • Popping Boba
  • Boba Jellies
  • Candied Lemon Peel
  • Grapes

Cereal Ice Cream Toppings

Cereal combines the best of both worlds. You get a touch of sweetness and a punch of crunch. Walk through the cereal aisle at the grocery store and imagine the possibilities! Here are some of our favorite cereals to use as ice cream toppings.

  • Granola
  • Frosted Flakes
  • Trix/Mini Trix
  • Cookie Crisp
  • Cap'n Crunch
  • Fruit Loops
  • Apple Jacks
  • Reese's Puffs
  • Lucky Charms
  • Golden Grahams
  • Cinnamon Toast Crunch
  • Rice Krispies
  • Fruity Pebbles
  • Cocoa Pebbles
  • Corn Flakes
  • Special K (plain or with fruit)

Unique Ice Cream Toppings

These unique ice cream toppings can inspire you to think outside the box and create unique flavor combinations.

  • Sea Salt Flakes
  • Sriracha Caramel Sauce
  • Lemon Zest
  • Bacon Crumbles
  • Candied Jalapeños
  • Popping Boba
  • Tempura Bits
  • Olive Oil
  • Chili Crisp
  • Marzipan
  • Matcha Powder
  • Wasabi Peas
  • Basil Leaves
  • Tamarind Paste or Chutney
  • Crushed Cheetos
  • Takis Powder
  • Cake Bites
  • Caviar
  • Edible Lavender

See These Recipes Next!

  • Strawberry Icebox Cake
  • Butterfinger Pie Parfaits
  • Candy Apple Snickers Salad
  • Dulce De Leche Ice Cream Sandwiches

26+ Easy Late Night Snacks: 5 Minutes Or Less

June 22, 2023 by Heidi Deal Leave a Comment

Easy Late Night Snacks 5 Minutes Or Less

Midnight isn't the time that you want to be slaving over the stove. No, you want easy late night snacks that take 5 minutes or less, so you can knock out your snack monster and get into bed. Whether you're looking to fill up after a fun night out, or just had an early dinner and find yourself hungry again, we've got a great list of late night snack recipes for you.

Easy Late Night Snacks 5 Minutes Or Less

Quick & Easy Late Night Snacks: No Recipe Required

When it comes to late night snacks, it doesn't have to be fancy, and you definitely don't want it to require a lot of effort. Honestly, sometimes I wake up in the middle of the night and the only thing I can round up is pickles and lunch meat, but it does the trick at 2 AM. But I know you want something that's a little better than that!

Here are some quick and easy no recipe required ideas for good late night snacks that are ready to eat in 5 minutes or less:

  • Make chocolate covered pretzels by melting chocolate chips in a bowl and dipping your favorite pretzels. Or swap the pretzels for strawberries.
  • Make easy avocado toast by smearing with avocado and topping with your favorites like cheese, sliced tomatoes, or salsa.
  • Smear a tortilla with cream cheese, add a few slices of lunch meat (add avocado if you're feeling fancy), and roll it up.
  • Dip apple slices in peanut putter or almond butter or drizzle them with melted chocolate.
  • Make a parfait with fruit, yogurt, and granola.
  • If you have leftover rotisserie chicken (or any meat for that matter) in the fridge, wrap it in a tortilla with some shredded cheese, avocado, and salsa.
  • If you have edamame on hand (especially the kind still in the pods), heat it up a bit, then toss it in a splash of sesame oil, a splash of chili oil, and salt.
  • Make top ramen, and stir an egg into it like egg drop soup. Cup of Noodles is always a good late night snack too if you have them on hand.
  • Make strips and cheese - just tortilla strips/chips with shredded cheddar cheese, melted in the microwave.
  • Cereal and milk. We recommend old school cereal like Cap'n Crunch and Apple Jacks or popular favorites like Cheerios and Frosted Flakes. Throw some banana slices on top too!
  • Toast Tacos: While a piece of bread is toasting, zap your favorite precooked or leftover meat in the microwave. Put meat in the middle of toasted bread, add the toppings of your choice, fold the bread and eat. It's the solution when there are no tortillas in the house.
  • Monkey salad: Sliced banana, handful of blueberries, drizzle of almond butter and top with coconut flakes and cashews.
  • Classic cheese and crackers with or without salami or pepperoni.
  • Keep a box of frozen soft pretzels on hand and a jar of nacho cheese dip. Boom. Easy midnight snack problem solved.
  • Greek yogurt with almonds and honey is a great healthy alternative.
  • Everything bagel microwave popcorn.
  • Halve a bagel, put a tomato slice on it (and a slice of bacon if you have any precooked) then put a slice of cheese over it and pop it in the toaster oven or air fryer until the cheese starts to melt.
  • Throw a frozen burrito in the microwave, then top it with salsa and avocado to dress it up and make it more substantial.

Whether you are looking for something sweet or savory, late night snacks should be quick and satisfying. Here are a few of our favorites easy late night snack ideas to try.

Easy Late Night Snacks - 5 Minutes or Less!

Try these easy late night snacks that can be made in 5 minutes or less to conquer those midnight munchies.

Easy Pretzel Cheese Dip Recipe

3-ingredient Cheese Dip with Pretzel Rolls

A super-fast 3-ingredient cheese dip that takes just 5 minutes to throw together!

Crispy Air Fryer Tater Tots

Air Fryer Tater Tots

This may take a little over 5 minutes depending on your air fryer, but there's zero prep involved. Tater tots are the perfect late night snack. Dip them in ketchup, ranch, mustard, cheese sauce, or whatever your favorite dipping sauce is.

Air Fryer Grilled Cheese (2 Ways)

Air Fryer Grilled Cheese (2 Ways)

Quite possibly the best midnight snack, with crispy bread and gooey American cheese.

Microwave Nachos

How to Make Microwave Nachos

Photo Credit: www.macheesmo.com

You don't need to go crazy to make a great plate of nachos, and this microwave nachos recipe proves that this is a winning late night snack!

Mug Pizza

Microwave Mug Pizza

Photo Credit: www.biggerbolderbaking.com

When you want pizza as a late night snack, you can whip up this pizza in a mug in about 5 minutes. Mind blown.

Pepperoni Pizza Quesadilla

5-Minute Pepperoni Pizza Quesadilla

Photo Credit: twohealthykitchens.com

If you want to get your pizza fix in the middle of the night, don't worry, you don't need to fire up the oven. These pizza quesadillas are exactly what you need.

Seasoned Popcorn

Sriracha Popcorn

Photo Credit: www.tablespoon.com

For a late night snack with a kick, toss your popcorn in butter and sriracha!

Popcorn

Cool Ranch Popcorn

Photo Credit: www.tablespoon.com

If spicy popcorn isn't your thing, try this one instead with dry ranch dressing mix and white cheddar mac and cheese powder!

salsa dip

Five-Minute Feta Bruschetta Dip

Photo Credit: www.healthyrecipeecstasy.com

Whip up this easy bruschetta dip, then spread it on some toasty bread or dip your favorite party crackers. This is a great healthy late night snack for those looking for something not so calorie-rich.

Corn Dip

5-Minute Corn Dip

Photo Credit: amandascookin.com

This corn dip is a party favorite, so if you happen to have the ingredients, you can throw this one together and enjoy it immediately. It's great with chips, crackers, bread, and veggies. But it's so good you may just want to eat it by the spoonful.

5-minute egg mcmuffin

5-Minute Homemade Egg McMuffin

Photo Credit: www.familyfoodonthetable.com

If you crave breakfast late at night, you don't need to hit the drive through. Make a five-minute egg mcmuffin instead.

Easy Late Night Snacks

Egg and Cheese Burrito

Photo Credit: myminichefs.com

This is the other go-to late night breakfast. And there's something seriously comforting about a warm, cheesy egg burrito. Bonus -- if you happen to have any of those tater tots in the air fryer, throw those into the burrito too.

Creamy Vitamix Hummus

Creamy Vitamix Hummus

Grap your crackers or pita and dig into this creamy hummus made in just five minutes.

Easy Guacamole

Easy Guacamole Recipe (Homemade in 5 Minutes)

Photo Credit: joyfoodsunshine.com

Guacamole is a favorite snack food, it can be thrown together in under five minutes, and pairs perfectly with chips, crackers, and toasty bread.

5 Minute Refried Bean Dip

5 Minute Refried Bean Dip- just 4 ingredients!

Photo Credit: www.thriftyfrugalmom.com

Make a batch of this late night bean dip and dig in! Dip with chips, or smear it on a tortilla or a bagel.

Bean & Cheese Burrito

Bean and Cheese Burritos

Photo Credit: www.iheartnaptime.net

Bean and cheese burritos are a quick late night snack, and while this recipe calls for about 15 minutes total, you can knock time off by not doing the extra bake. Simply heat the beans, add the cheese (and salsa or other additions to your preference), add to the tortilla, wrap and eat.

Easy Shrimp Ceviche

Easy Shrimp Ceviche

This really can be thrown together in 5 minutes if you've got the ingredients. Precooked shrimp, store-bought pico de gallo, and avocado. Just chop up the shrimp and avocado and stir it all together and dig in with those tortilla chips.

These shrimp are KILLER! They make a great main dish with a salad and bread or a wonderful appetizer. They always go FAST!! | the wicked noodle | #shrimp #appetizer

4-minute Spicy Garlic Shrimp

Leftovers are best eaten straight out of the fridge. Preferably late at night. And these really do take just 4 minutes.

5-minute faux pho recipe | www.thewickednoodle.com | #pho #ramen

5-minute Quick Faux Pho Recipe

Take your midnight ramen up a notch and make this 5-minute faux pho.

Cottage Cheese and Salsa is one of my favorite healthy snacks! Plus an easy way for more great cottage cheese mix-in ideas.

Cottage Cheese and Salsa

While this might strike you as a breakfast or lunch snack, it totally satisfies a late night craving for something cool and refreshing.

ice cream sandwich

dulce de leche ice cream sandwiches with toasted pecans & salted caramel sauce

If you've got cookies and ice cream on hand, make ice cream sandwiches! Doesn't matter what flavor, just go for it. These will definitely satisfy your late night sweet tooth.

Cinnamon Bananas

Pan Fried Cinnamon Bananas

Photo Credit: dizzybusyandhungry.com

These are like candy with their cinnamon and sugar, and it takes minimal effort to make. Perfect for lazy late nights when you want a quick bite.

Coffee Cake Mug Cake

A Quick Single Serving Microwave Coffee Cake Mug Cake!

Photo Credit: bakeitwithlove.com

This right here! It really hits the spot, and it's easy to throw together. We don't always love the texture of the mug cakes, but this one worked well, and the gooey crumb topping was the perfect touch.

Cinnamon Apples

2 Minute Microwave Cinnamon Apples Dessert

Photo Credit: listotic.com

A late night snack that's easy as pie - and tastes like it too!

Chocolate Mug Cake

Chocolate Mug Cake! BEST Chocolate Cake In A Mug Recipe

Photo Credit: createyum.com

Chocolate cake in a mug? Yup. It works, especially when those late night cravings creep in. And this one has a great texture that is moist and fudgy.

Oven Baked Smores

S'mores in the Oven, Air Fryer, or Microwave

Photo Credit: abeautifulmess.com

Yes, you can make s'mores in the air fryer at midnight. And this recipe shows you exaclty how, with all the traditional ingredients.

42 Leftover Rotisserie Chicken Recipes

June 22, 2023 by Heidi Deal Leave a Comment

Leftover Rotisserie Chicken Recipes

If you have an extra rotisserie chicken on hand but you're tired of your regular recipe rotation, we've got a list of leftover rotisserie chicken recipes for you to try.

[feast_advanced_jump_to]

If you're anything like me, you'll grab a rotisserie chicken or two at Costco or the grocery store, even if you don't need it, just so you can use it to prep quick lunches or dinners when you don't have time to make a full meal. I'll also roast a whole chicken in the oven myself sometimes, or pop one in the slow cooker, and shred the chicken to make something else. Honestly, it's such a versatile protein and so easy to make.

The best thing about rotisserie chickens are that you can usually pick one up at Walmart, Sam's Club, Safeway, Food Lion and many more places for under $10. You can feed the family in minutes by pairing it with an easy side. Some stores offer $5 deals or two-for-one days. Keep an eye on your grocery stores circular to see when you can get the best deal.

Leftover Rotisserie Chicken Recipes

If you're looking for new and creative ways to use this versatile protein, we've got a list of leftover rotisserie chicken recipes for you to try.

Sandwiches

Level up your sandwich game with these easy and delicious recipes using leftover rotisserie chicken.

Image for Shredded Rotisserie Chicken Sliders

Shredded Rotisserie Chicken Sliders

Photo Credit: Cozy Cravings

These are made by layering spicy mayo, shredded chicken, cheese, onion, pickles, and tomatoes. They’re then topped with an out-of-this-world herb garlic butter and baked to perfection.

Buffalo Chicken Sliders topped with Blue Cheese Celery Slaw on a white plate

Shredded Buffalo Chicken Sliders

Shredded Buffalo Chicken Sliders are topped with a creamy, crunchy Blue Cheese Celery Slaw for the ultimate crowd-pleaser (and they took TOP prize in a national contest!)

Rotisserie Chicken Bruschetta Sandwich

Rotisserie Chicken Bruschetta Sandwich

Photo Credit: keytomylime.com

This rotisserie chicken bruschetta sandwich is easy and delicious! Topped with easy balsamic aioli, tomato, basil, and cheese.

Chicken Shawarma Wrap

Rotisserie Chicken Shawarma Pita Wrap

Photo Credit: www.seasonsandsuppers.ca

These pita wraps are made easy with your leftover chicken, and they are perfect to take for lunch.

Rotisserie Chicken Salad

Tasty Rotisserie Chicken Salad Recipe For Easy Salads & Sandwiches!

Photo Credit: bakeitwithlove.com

If you want a basic chicken salad recipe, give this one a try, then you can dress it up however you want with all the toppings you like to make sandwiches, wraps, and salads.

Rotisserie Chicken Pita Pockets

Veggie Chicken Pitas

Photo Credit: www.tasteofhome.com

For a healthy lunch, use your leftover shredded chicken and some fresh veggies to put together these pita pocket sandwiches.

Rotisserie Chicken Crockpot Recipes

The only thing easier than a recipe using rotisserie chicken is if it's for the slow cooker, too!

Image for Slow Cooker Chicken and Corn Soup

Slow Cooker Chicken and Corn Soup

Photo Credit: Tasty Oven

This is a dump and go recipe that requires very little effort but creates a flavorful meal full of sweet corn and tender seasoned chicken.

Image for Crockpot Chicken and Broccoli Rice Casserole

Crockpot Chicken and Broccoli Rice Casserole

Photo Credit: Tasty Oven

Simple ingredients are used to make a quick, family-friendly meal. and it's great for meal prepping, too!

Image for Creamy Crockpot Chicken Potato Chowder

Creamy Crockpot Chicken Potato Chowder

Photo Credit: The Default Cook

Budget friendly vegetables are slow cooked with a little dairy mixed in to make a creamy soup that tastes indulgent without using heavy cream!

Image for Crockpot Buffalo Chicken Mac and Cheese

Crockpot Buffalo Chicken Mac and Cheese

Photo Credit: Tasty Oven

This Crockpot Buffalo Chicken Macaroni and Cheese is a grown-up version of your favorite kid comfort dinner. It's super simple to make and is loaded with flavor and spice.

Casseroles

Casseroles are the queen of comfort food, and they're extra easy when you use leftover rotisserie chicken.

Corn Casserole with Chicken and Rice - so easy to throw together and healthy, too!

Corn Casserole with Chicken and Rice

This Corn Casserole with Chicken and Rice is delicious, healthy and easy to make even on a busy weeknight!

Image for Rotisserie Chicken Casserole

Rotisserie Chicken Casserole

Photo Credit: The Diary of a Real Housewife

Made with a juicy rotisserie chicken and topped with buttery Ritz crackers, everyone will love this casserole!

Fresh Broccoli Rice Casserole with Chicken - Cheesy, hearty and has a ton of flavor and crunch from the buttery cracker topping!

Fresh Broccoli Rice Casserole with Chicken

This Fresh Broccoli Rice Casserole with Chicken is cheesy, hearty and has a ton of flavor and crunch from the buttery cracker topping!

Chicken Cobbler

Chicken Cobbler Recipe

Discover a twist on tradition with chicken cobbler – a delicious alternative to the ordinary chicken pot pie. It’s rich, buttery, and oh so filling.

Chicken Potato Bake

Leftover Chicken Potato Bake

Photo Credit: www.everydayhealthyrecipes.com

A citrusy chicken and potato bake using leftover rotisserie chicken is a perfect dinner that takes only 15 minutes of prep time.

You already know that Alfredo sauce is creamy, cheesy and rich. Try it in this luscious Chicken Alfredo Pasta Bake for a delicious meal!

Chicken Alfredo Pasta Bake

You already know that Alfredo sauce is creamy, cheesy and rich. Try it in this luscious Chicken Alfredo Pasta Bake for a delicious meal!

individual pot pies

Chicken, Potato & Summer Vegetable Pot Pie

These easy pot pies can be made quickly with convenient pre-prepped ingredients but have the homecooked classic comfort food flavor.

Wild Rice Hotdish without a can in sight! Fresh mushrooms and the easiest "sauce" ever makes this the best you'll ever enjoy!

Wild Rice Hotdish

Wild Rice Hotdish without a can in sight. Fresh mushrooms and the easiest “sauce” ever make this the best you’ll ever enjoy!

Soups and Stews

Toss that leftover rotisserie chicken into a pot, add a few more ingredients, and you'll have an entirely new meal!

Creamy Chicken Noodle Soup

Creamy Chicken Noodle Soup

Photo Credit: sallysbakingaddiction.com

Chicken noodle soup is an obvious way to use leftover rotisserie chicken, but this recipe is the one you want to use it for! You'll never go back to regular chicken noodle soup.

White Chicken Chili

White Chicken Chili

Photo Credit: tastesbetterfromscratch.com

This creamy white chicken chili is made with shredded leftover rotisserie chicken to cut back on cook time, but it definitely doesn't cut back on flavor!

a pot of easy an brunswick stew recipe on striped towel

Brunswick Stew (Stovetop or Crockpot)

This easy Southern Brunswick Stew recipe is a great way to use leftover meat and it’s on the dinner table in about half an hour!

Chicken Pho

Simple Chicken Pho

Photo Credit: jz-eats.com

Make fresh chicken pho with leftover chicken to cut down on prep time, and still end up with a flavorful belly warming bowl of soup.

Rotisserie Chicken Noodle Soup

Rotisserie Chicken Noodle Soup

Total Time 40 minutes Yield 2 Servings

This hearty rotisserie chicken noodle soup is exceptional. It’s loaded with veggies, juicy bites of chicken, and perfectly cooked noodles in a flavorful broth.

a closeup of a bowl of chicken tortilla soup with hatch chiles that's topped with crispy tortilla strips, sour cream, and chopped fresh cilantro

Chicken Tortilla Soup with Hatch Chiles

If you prefer a thicker soup, add corn tortillas to the soup (see recipe below).

Hatch chiles are the preferred chile for this recipe, but you can substitute anaheim or poblano.

Image for Rotisserie Chicken Mushroom Soup

Rotisserie Chicken Mushroom Soup

Photo Credit: Dara Cooks

There's something soothing about the creamy broth, tender chicken, and earthy mushrooms in this easy recipe that hits all the right notes.

Mulligatawny Soup - this easy version is basically chicken noodle soup with the exotic flavor of curry . It's warm, delicious and filling!

Mulligatawny Soup

Chicken Mulligatawny Soup is thick, rich and incredibly flavorful. Make with rice or orzo for a pureed base and loads of tender chicken.

Rotisserie Chicken Pasta Recipes

These easy pasta dishes are delicious and easy thanks to leftover rotisserie chicken.

Easy Pesto Chicken Pasta Recipe

Pesto Pasta with Chicken and Parmesan

This Pesto Pasta with Chicken and Parmesan has just FOUR ingredients and ONE pan!

Easy Chicken & Noodles

Easy Chicken and Noodles

Photo Credit: www.girlgonegourmet.com

Shredded rotisserie chicken, thick egg noodles, and a creamy sauce combine to make this a comfort food dish at its best - but without hours in the kitchen.

Rotisserie Chicken Stroganoff

Rotisserie Chicken Stroganoff

Photo Credit: www.simplyrecipes.com

Classic stroganoff gets a twist with shredded leftover rotisserie chicken! This whole dinner comes together in just a few minutes, making it a new staple for busy weeknights.

Chicken Gnocchi Pasta

Chicken Gnocchi Pasta (ONE Skillet!)

Photo Credit: www.chelseasmessyapron.com

This one pan dinner is easy to make with leftover chicken with a rich, creamy sauce. This will be a new favorite.

Filipino Macaroni Salad

Filipino Macaroni Salad

Photo Credit: urbanblisslife.com

This macaroni salad is next level! This sweet pasta salad with crunchy vegetables is easy to make and a great make-ahead dish.

Easy Mac and Cheese with Rotisserie Chicken

Easy Mac and Cheese with Rotisserie Chicken

Photo Credit: tiffinandteaofficial.com

One of the best ways to use up rotisserie chicken is to stir it into some creamy delicious mac and cheese, and this recipe takes you mac game up a notch.

Mexican Rotisserie Chicken Recipes

Grab your rotisserie chicken for an easy, delicious Taco Tuesday meal!

buffalo chicken mini-chimichangas

Buffalo Chicken Chimichangas

Tender chicken, spicy buffalo sauce and a fried-until-perfectly-crispy shell. These Buffalo Chicken Chimichangas are the ultimate comfort food!

Salsa Verde Chicken Enchiladas

Easy Salsa Verde Chicken Enchiladas

Photo Credit: www.inspiredtaste.net

Salsa Verde Chicken Enchiladas are one of my favorites, and this recipe is flavorful and perfect for a quick dinner.

Rotisserie Chicken Nachos

Rotisserie Chicken Nachos: an easy family favorite

Photo Credit: amandascookin.com

These leftover rotisserie chicken nachos are perfect for a fun dinner, an appetizer, or a serious snack!

Baked Avocado Chicken Burritos

Baked Avocado Chicken Burritos

Photo Credit: www.alattefood.com

Use your leftover shredded chicken to make these baked avocado chicken burritos that are perfect for a quick and easy lunch or fast weeknight dinner.

Mini Tex-Mex Chicken and Cheese Pies

Mini Tex-Mex Chicken and Cheese Pies

Photo Credit: www.tablespoon.com

Use rotisserie chicken to make these mini chicken pies - they are perfect for grab and go lunches, or a fun weekend meal that the kids will enjoy!

Pollo De Tinga Chicken

EASY Tinga de Pollo (Chicken Tinga Tacos with Rotisserie Chicken)

Photo Credit: borrowedbites.com

Tacos are an obvious go to for using up that leftover chicken, so we're including this one because it will become one of your new favorite taco night recipes.

Mexican Pizza

Mexican Pizza Recipe

Photo Credit: www.yummyhealthyeasy.com

We couldn't not include this homemade version of the Mexican Pizza. So easy to make and so good!

Rotisserie Chicken Quesadilla Stack

Chicken Tortilla Stack

Photo Credit: damndelicious.net

Who needs a quesadilla when you can make this?! These cheesy tortilla stacks are perfect for a quick weeknight dinner using leftover chicken.

More Rotisserie Chicken Recipes

This section is for anything that doesn't fall into our other categories.

Don't throw away that leftover rice! Easy Fried Rice is so much better for you than takeout and a lot tastier, too! | the wicked noodle | #dinner #asian #cheapeats

Easy Fried Rice {cheap eats}

Don’t throw away that leftover rice! Use it to make this delicious, easy fried rice. So simple you don’t even need a recipe.

Keto Stuffed Portobello Mushrooms with shredded chicken, spinach, mozzarella and wing sauce.

Keto Stuffed Portobello Mushrooms (Buffalo Chicken & Spinach)

These Keto Stuffed Portobello Mushrooms have just five ingredients and make a wonderful meal.

Easy as Chicken, Green Chile and Potato Pie! A lost recipe that a reader requested get recreated - yep, it's that good!

Chicken, Green Chile and Potato Pie

This delicious recipe for Chicken, Green Chile and Potato Pie will become a family favorite!

buffalo chicken & potato skillet - a one-pan dish!

Buffalo Chicken & Potato Skillet

This Buffalo Chicken & Potato Skillet is a fun variation to buffalo wings or even a buffalo wing dip. Crispy potatoes topped with shredded chicken, wing sauce, blue cheese, celery & a drizzle of dressing!

roasted garlic & pesto chicken flatbread recipe - takes just minutes to throw together!

Roasted Garlic & Pesto Chicken Flatbread

This flatbread recipe is made with roasted garlic, pesto and shredded chicken for an easy, delicious and fast meal.

Chicken Chow Mein

Easy & Delicious Chicken Chow Mein

Photo Credit: wokyourworld.com

Make this chow mein using the rotisserie chicken shortcut - just ski the chicken prep steps and add the shredded chicken at the end right before you add the sauce.

Simple Spinach Salad with Creamy Parmesan Dressing

Simple Spinach Salad with Parmesan Dressing

This is a great salad to make with your leftover rotisserie chicken. Keep the dressing on hand for later too!

BBQ Chicken Potatoes

BBQ Chicken Stuffed Baked Potatoes

Photo Credit: barefeetinthekitchen.com

This fluffy baked potatoes are stuffed with leftover chicken tossed with BBQ sauce and all your favorite toppings!

BBQ Chicken Pizza

BBQ Chicken Pizza

Photo Credit: feelgoodfoodie.net

Throw these pizzas together in a few minutes with leftover rotisserie chicken, store bought pizza dough, and your favorite BBQ sauce.

Chicken Lettuce Wraps

Teriyaki Chicken Lettuce Wraps Recipe

Photo Credit: thekitchengirl.com

These lettuce wraps are perfect for a healthy lunch and are packed with flavor.

Quick Curry Chicken

Quick Chicken Curry

Photo Credit: www.chelseasmessyapron.com

With shredded chicken and just a few other ingredients, you can have this quick chicken curry ready in no time!

White Chicken Chili Dip

Skillet White Chicken Chili Dip

Photo Credit: heartbeetkitchen.com

A cheesy skillet dip that tastes like white chicken chili. You'll blend white beans into the mix to make it healthier, and you can use rotisserie chicken to make things easy! Perfect snack or appetizer!

Best Way To Store Leftover Rotisserie Chicken

Did I mention that it's versatile? When you have a leftover rotisserie chicken you can get to work shredding all the leftovers off the bone. Put the shredded pieces in an airtight container and store it in the refrigerator for 3 to 4 days (but you'll use it before then). You can use the shredded chicken to toss into whatever you're making. If you don't plan on using the chicken right away, you can store it in the freezer in an airtight container for up to two months.

How to Make Chicken Broth With Rotisserie Chicken

If you don't like the skin you can discard those pieces when you throw out the bones. Or! You can make broth. You can do this in a regular pot, or you can make it in an instant pot or slow cooker. Here's the best way to make broth:

  • Remove all the meat from the carcass
  • Roughly chop some celery, carrots, and onion
  • Peel and crush a few garlic cloves
  • Add bones, skin (if using), vegetables, garlic, and salt and pepper to a pot (or slow cooker/IP)
  • Add enough water to completely cover your chicken and vegetables (12-16 cups), or in the IP fill to the max fill line
  • Bring the water to a boil, then turn down and simmer for as long as possible - some people recommend 12-14 hours, but I've done it for as little as 6 and still gotten flavorful broth
  • You can reduce the cook time by using an instant pot - cook it on high for 180 minutes using manual release
  • If using a crock pot, you can keep it cooking for 24 hours to get supper nutrient rich broth
  • Cool and strain the broth to remove the skin, bones, and vegetables then store the broth in mason jars or other airtight containers in the refrigerator for up to a week
  • You can also freeze your broth where it will last several months. If you don't have time to make the broth right away, you can freeze the carcass in an airtight container until you're ready to make it.
Leftover Rotisserie Chicken Recipes

In addition to making broth, the actual meat from the chicken is perfect for adding to many different dishes including:

  • Tacos, burritos, and quesadillas
  • Pasta and mac & cheese
  • Sandwiches
  • Salads
  • Soups and stews
  • Wraps
  • Enchiladas
  • Pizza and flatbread
  • Stir frys
  • Fried Rice and chow mein

And so much more! Avoid drying out the chicken by adding it to stove-top dishes near the end of the cooking process. If adding it to a casserole or other oven based recipe, the sauce should help it retain moisture. Cream bases and broth bases will keep the chicken from becoming too dry.

If you have a favorite recipe or other ideas for how to use leftover rotisserie chicken, please share it in the comments!

9 Best Mirin Substitutes

June 20, 2023 by Monique McArthur Leave a Comment

Best Mirin Substitutes

From sake to sweet marsala, discover the best mirin substitutes for your cooking needs. Explore their flavors, usage ratios, and tips for making your own.

Best Mirin Substitutes

What is Mirin?

Mirin, a Japanese sweet rice wine, is popular in Japanese cuisine. Its unique flavor profile adds subtle sweetness and depth to dishes. However, there may be times when you run out of mirin or cannot find it in your local grocery store. Fortunately, several mirin substitutes work just as well as the real thing. This article will explore the best mirin substitutes, how to use them, and what applications they are suited for.

There are different types of mirin including hon-mirin (true mirin) and mirin. The main difference between hon-mirin and mirin is that hon-mirin includes naturally fermented rice wine and has a higher alcohol content (14%). Mirin contains little to no sake and is intended as as condiment or seasoning ingredient.

Aji-Mirin

Aji-mirin, which translates to "tastes like mirin," lives up to its name. You'll find this in many supermarkets, and the product is less expensive than real mirin (hon-mirin). Aji-mirin comprises alcohol, rice, water, salt, and sweeteners and is one of the best substitutes for hon-mirin as it offers all the flavor notes of the real thing. Aji-mirin is layered, tangy, and sweet and replaces mirin in equal parts.

Sake

Sake, a traditional Japanese rice wine, is another excellent substitute for mirin. The main differences between the two are sugar and alcohol content. Sake has less sugar and more alcohol. The rice wine typically contains 15-16% alcohol, while hon mirin is 14% alcohol. Despite the minor differences, sake provides a similar sweetness and acidity. Use sake as a 1:1 substitute for mirin in your recipes and sugar to compensate for the lower sugar content. Stick with 2 parts sake to 1 part sugar or honey. For example, if you substitute 2 tablespoons of mirin with 2 tablespoons of sake, add 1 tablespoon of sugar or honey.

Rice Vinegar

Rice vinegar also makes the list of best mirin substitutes. Rice vinegar, or rice wine vinegar, has a similar flavor profile, with the main difference being its sour kick. In some applications, this sourness can overpower. To offset that, add sugar. Mix in ½ teaspoon of sugar (or honey) for every teaspoon of mirin that a recipe calls for. This substitute works best in marinades, sauces, and dressings.

Sweet Marsala Wine

Sweet marsala is a fortified wine from Sicily. Like mirin, this wine is sweet and acidic with a unique umami flavor, although it is slightly less sweet. However, you can replace mirin with sweet marsala in equal parts, but depending on the recipe, you may need to add sugar. Add no more than ½ teaspoon of sugar to every tablespoon of wine if needed. This replacement will work in pretty much any recipe.

Sherry

Sherry is another excellent mirin substitute since the fortified wine has a similar sweetness and complexity. Dry or sweet doesn't matter, as sherry possesses a pleasant sweetness regardless of the type. Just remember that sherry also has a more robust flavor, so you want to use it sparingly, specifically ½ teaspoon at a time. It works well in marinades, sauces, vinaigrettes, soups, stews, and braises.

Dry White Wine

If you have dry white wine available, you can use it as a substitute for mirin. Just remember to add sugar to counteract the tart acidity. Replace mirin with wine in equal parts, then add sugar to the recipe for balance, specifically ½ teaspoon per tablespoon of dry white wine. The general rule of thumb is to use a wine you enjoy drinking instead of going out of your way to buy a cheaper wine since it may impart a flavor you aren't fond of. 

Dashi Stock and Sugar

If you want an alcohol-free mirin substitute, dashi stock mixed with sugar is perfect. This mirin substitute works best in soups, stews, and other simmered dishes that call for dashi. All you need to do is add sugar. Therefore, there is no specific ratio to use. Instead, use dashi stock as the recipe requires, then sweeten to taste. It doesn't matter if you use a dashi packet you have lying around or make it from scratch with kombu and bonito flakes.

White Grape Juice

White grape juice, especially the unsweetened variety, can be used as an alternative for mirin in specific recipes. It offers a mild sweetness and fruity flavor that can complement various dishes. This may sound like an odd replacement, but the juice possesses many of mirin's characteristics when you think about it. It is tart and sweet with complex notes that give it depth. If you go this route, use high-quality, 100% white grape juice without unnecessary additives, as they will mask the fruit's natural flavor, which is what makes this mirin substitute one of the best. To replace a tablespoon of mirin, use a tablespoon of juice. If you find the juice to be a little too sweet, mix in ½ teaspoon of fresh lemon juice. This swap works well in marinades, soups, stews, and braises.

Homemade Mirin

Lastly, one of the best mirin substitutes is homemade mirin. Yes, you can make it at home! Here's a simple recipe to follow:

Ingredients

  • ¼ cup granulated sugar
  • 3 tablespoons water
  • ¾ cup sake

*See below for a printable recipe card for Homemade Mirin

Instructions

  1. Add the sugar and water to a saucepan over medium heat.
  2. Bring to a boil, reduce the heat slightly, and gently boil for 2 minutes.
  3. Remove from the heat and slowly drizzle in the sake. Stir well.
  4. Set the homemade mirin aside to cool completely.
  5. Store in a mason jar or another airtight container and use as desired. Any unused homemade mirin should be refrigerated.

Homemade mirin may not have the exact flavor profile of store-bought mirin, but it will offer a similar sweetness and depth to dishes.

Overall, mirin is a delicious addition, but when you don't have it, choose from the best mirin substitutes featured in this list! Mirin's impact on recipes is profound, so you don't want to forgo the flavor entirely. Whether you opt for traditional substitutes like sake or get creative with sherry or white grape juice, each replacement will enhance your recipes. Experiment with the best mirin substitutes and adjust the ratios according to your taste preferences to discover your favorites.

Marzipan Chocolates

June 19, 2023 by Monique McArthur Leave a Comment

Marzipan Chocolates

Embrace your inner chocolatier by trying your hand at marzipan chocolates. They feature a soft marzipan center, snappy chocolate shell, and almonds on top!

a closeup shot of amarzipan chocolate topped with slivered almonds

Chocolate covered marzipan is an easy way to try your hand at candy-making without having to master complex techniques. The main focus of this recipe is tempering the chocolate.

Tempering chocolate involves heating and cooling to stabilize the chocolate. As a result, the chocolate has a shiny, glossy appearance, doesn't quickly melt on your fingers, and has that light, satisfying snap when you bite into it.

As for the marzipan, you can easily make your own with finely ground almond flour, confectioners' sugar, almond extract, and water, or purchase some at the grocery store. During the holiday season, The Taste of Germany will ship some right to your door.

Why You'll Love Marzipan Chocolates

  • Complementary flavors - The chocolates' greatness lies in their simplicity. They feature a familiar duo: chocolate and nuts, but it is done well. The chocolate is rich, complex, and moderately bitter, which pairs nicely with the almond-forward sweetness of marzipan.
  • Beautiful presentation - These candies look like they came straight from a gourmet chocolate shop. Each marzipan chocolate candy is glossy with a uniform shape, and the almonds on top provide a bit of color contrast for visual interest. You can't beat a hard chocolate shell, soft melt-in-your-mouth marzipan, and crunchy nuts. They are just so pretty!
  • They require three ingredients - Yes, you can make homemade chocolates with just three simple ingredients! Who knew?
  • Traditional Christmas candy - Serving marzipan candies during the holidays is not only a tradition for many families but it also brings joy with each sweet bite. Plus, they make for gift gifts during the holidays.
  • Save money and time - Avoid the holiday lines at See's Candy and other candy stores and save money by making these easy marzipan chocolates at home.

Marzipan chocolate makes a wonderful edible gift during the holidays or for your cookie trays. We love to pair them with our other favorite no-bake desserts like M&M pretzel hugs and peppermint bark. It helps to keep the holidays stress-free!

Ingredients

  • Chocolate: Marzipan is quite sweet, so dark chocolate is the way to go. 70% dark is best because its bitterness isn't overwhelming.
  • Marzipan: Make it yourself or use store-bought. I find homemade marzipan much more enjoyable since it is made with simple ingredients, no unnecessary additives, and the sweetness isn't overwhelming.
  • Almonds: A pinch of finely chopped almonds garnishes each marzipan chocolate. The almonds also serve as a textural element.

The complete ingredients list with amounts is in the recipe card below!

a tray of marzipan balls covered in melted chocolate waiting to harden

Instructions

  1. Prepare the marzipan: If you don't have marzipan, make some with almond flour, sugar, almond extract, and water. After the marzipan has time to chill and firm up, shape tablespoon portions into equal-sized balls. You can also experiment with other shapes; balls are just the easiest and quickest.
  2. Chop the chocolate: You want a fine chop to encourage the chocolate to melt quickly and evenly. 
  3. Temper the chocolate: This process involves heating and cooling it to stabilize it.
  4. Coat the marzipan in chocolate: Place the marzipan on a wire rack over a baking sheet lined with parchment or foil and pour the chocolate over the marzipan. The excess chocolate will drip off, so you don't get a thick chocolate shell.
  5. Add the almonds: Quick! Sprinkle them on before the chocolate hardens!
  6. Set and eat: The chocolate will set in about 5 to 10 minutes. Once it sets, marzipan chocolates are ready to eat.

Variations, Substitutions, and Cooking Tips

  • Add flaked sea salt - A pinch of flaked sea salt on top of each with the almonds makes the flavors of the chocolate pop and works with the bitterness of the chocolate to balance the sweetness of the marzipan.
  • Switch up your garnish - Instead of almonds, top each marzipan chocolate with another nut, colorful sprinkles or nonpareils, edible metallic dust or flowers, or a gold leaf (when you're feeling extra fancy).
  • Make it fruity - Another fun way to mix things up is with dehydrated fruit, specifically dehydrated strawberries. If you've ever had some, you know that they have a robust strawberry flavor and are rather tart. To use them, crush dehydrated strawberries into a powder, then sprinkle them over the marzipan chocolates before the chocolate sets.
  • Always use a thermometer - You can try to go by the look of the chocolate, but tempering chocolate without a thermometer is very hit or miss. The only way to ensure accuracy is by monitoring the temperature.
  • Temper chocolate in the microwave - If you don't want to go the traditional route with a double boiler, temper chocolate in the microwave by adding ⅔ of the chopped chocolate to a microwave-safe bowl. Then, set your microwave to 50% power and microwave the chocolate in 1-minute intervals until it reaches 100-110 degrees Fahrenheit. From there, slowly stir in the remaining chocolate until completely melted and continue to stir until the temperature of the chocolate cools to 84-89 degrees Fahrenheit.
a tray of marzipan chocolate topped with slivered almonds

Storage Tips

Store marzipan chocolates in an airtight container at room temperature; you can individually wrap them. Keep the container in a cool, dry place for up to 2 weeks. Be sure to keep the chocolates away from any heat or moisture.

They can also be refrigerated, but it isn't necessary. For refrigeration, store the chocolates in an airtight container or at least wrap the marzipan chocolates so they don't absorb other food odors.

a tray of marzipan chocolate topped with slivered almonds

Marzipan Chocolates

Yield: 16-18 pieces
Prep Time: 10 minutes
Cook Time: 15 minutes
Additional Time: 17 minutes
Total Time: 42 minutes

Embrace your inner chocolatier by trying your hand at marzipan chocolates. They feature a soft marzipan center, snappy chocolate shell, and almonds on top!

Ingredients

Chocolates

  • 12 ounces marzipan, homemade or store bought
  • 6 ounces dark chocolate, 70% preferably)
  • 2 ounces almonds, finely chopped

You will also need:

  • Candy or instant-read thermometer
  • Double broiler or equivalent

Instructions

  1. Place a wire rack over a baking sheet lined with parchment or wax paper. 
  2. Roll tablespoons of marzipan into equal-sized balls and place them onto the wire rack. Ensure that they are evenly spaced. 
  3. Finely chop the dark chocolate using a sharp knife. 
  4. Add ⅔ of the chocolate to a double boiler or a heat-safe bowl placed over a saucepan or small pot with an inch or two of simmering water. If using the bowl and saucepan/pot, ensure that the water does not touch the bottom of the bowl. 
  5. Stir the chocolate until melted and heat until it reaches 115 degrees Fahrenheit.
  6. Remove from the heat and gradually add the remaining third of the chopped chocolate as you vigorously stir until the chocolate temperature decreases to 84 degrees. This can take as long as 12 minutes, so be patient. 
  7. Return the chocolate to the heat and bring the temperature to 89 degrees Fahrenheit. Do not let it exceed 91 degrees Fahrenheit. 
  8. Pour the tempered chocolate over the marzipan, then sprinkle almonds on top. Leave the chocolate shell to set for 5 minutes or so. Enjoy.
Nutrition Information:
Yield: 16 Serving Size: 1
Amount Per Serving: Calories: 172Total Fat: 9gSaturated Fat: 3gTrans Fat: 0gUnsaturated Fat: 5gCholesterol: 0mgSodium: 23mgCarbohydrates: 22gFiber: 2gSugar: 18gProtein: 2g

This data was provided and calculated by Nutritionix.

© Monique McArthur
Cuisine: German / Category: Desserts
Marzipan Chocolates

Buttermilk Texas Sheet Cake

June 16, 2023 by Monique McArthur Leave a Comment

Buttermilk Texas Sheet Cake

This chocolatey, rich Buttermilk Texas Sheet Cake recipe combines moist and tender chocolate cake with a delicious layer of smooth chocolate frosting.

This Texas sheet cake recipe with buttermilk has been passed down through generations, originating from my mother-in-law who received it from a neighbor many decades ago.

It's a true classic, with a touch of nostalgia evident in the use of ingredients like "oleo," a mostly long forgotten word for margarine. However, this timeless buttermilk Texas sheet cake recipe continues to impress with its incredibly rich, chocolate flavor.

a closeup shot of slice of buttermilk texas sheet cake on a white plate and topped with chopped pecans
★★★★★

"I moved and lost my recipe that I've made for at least 30 years. I found nothing on pinterest or the internet that made it exactly as I did. Thank goodness I found yours. Now my family holidays will be exactly the same with this yummy cake."

- Gail M.

We love a good Texas sheet cake, but the addition of buttermilk just takes it over the top! It's delicious served with a scoop of chunky monkey ice cream. During the holidays, we like to make little meringue christmas trees and top each slice with its own little tree!

Ingredients

  • Vegetable Shortening - I use Crisco but any vegetable shortening that you prefer will work.
  • Butter - The original recipe called for "Oleo" or margarine but I use real butter. Butter or margarine will work but I prefer the richer flavor and texture from real butter.
  • Unsweetened Cocoa Powder - Hershey Cocoa Powder is my go to and most commonly available cocoa powders are unsweetened because that is what bakers typically use.
  • Buttermilk - The addition of buttermilk contributes to the moist, tender texture while adding a pleasant slightly tangy flavor.
  • Powdered sugar - Sift the powdered sugar so there aren't any small lumps in the frosting.
  • Nuts (optional) - Pecans are quintessentially Texan, although you can also use walnuts or any other nut of your preference.

You'll find the complete ingredients list with amounts in the recipe card below!

Butter vs Shortening

The butter or shortening can be swapped out in equal parts in this buttermilk texas sheet cake recipe. However, this may result in slightly different results.

This recipe uses a combination of shortening and butter because of how well they work together. Shortening traps more air bubbles and has a higher melting point, resulting in a cake that rises higher, holds its shape during baking, and has a soft interior texture.

On the other hand, while shortening lacks flavor, the addition of butter adds a rich and buttery taste to the chocolate cake. Crisco even recognized this limitation when they developed Crisco Butter Flavor Shortening, although you'll still miss the naturally occurring ingredients and water that butter contains.

a texas sheet cake with buttermilk cooling on the stove

Instructions

Here's a quick summary for making this chocolate cake with the complete instructions in the printable recipe card below.

  1. Start by heating your oven and getting your baking pan ready.
  2. Then you'll mix the dry ingredients in one bowl while melting the butter, shortening, and cocoa together on the stove, then bringing it to a boil.
  3. Combine the two mixtures, stir in the remaining wet ingredients, and pour it all into your pan. Bake until it's just set and a toothpick comes out clean.
  4. While the cake is baking, make the frosting on the stovetop. It comes together quickly with butter, cocoa, and milk, then gets whisked smooth with powdered sugar and a touch of vanilla.
  5. Once the cake has had a few minutes to cool, pour the warm frosting right over the top so it spreads easily and sets into a glossy layer.
a handwritten vintage recipe card for texas sheet cake with buttermilk
a closeup of a texas sheet cake with buttermilk cooling on the stove

Recipe Tips

  • Oven time - Ovens and pan sizes may vary so keep an eye on the cake as baking time may vary.
  • Frosting consistency - The frosting should have a slightly thin consistency, allowing it to be poured onto the cake, and it will thicken as it cools.
  • Frosting timing - Begin preparing the frosting when the cake is slightly more than halfway through baking. This allows the icing to set and cool while still on the cake, preventing it from firming too early.
  • Cinnamon - Try adding a ½ to 1 teaspoon of cinnamon for a flavorful twist. The cinnamon in the chocolate cake serves as a subtle complement, adding warm and spicy notes similar to the cinnamon found in Mexican chocolates.
a slice of buttermilk texas sheet cake on a white plate and topped with chopped pecans

Make Ahead, Storing, and Freezing

  • Make-ahead: The Texas Sheet Cake can be made up to 2 to 3 days ahead of time. Both the cake and the frosting need to be made at the same time, as the cake should be just slightly cooled when the frosting is poured.
  • Storing: To store, once the cake has cooled, cover it tightly with plastic wrap or store it in an airtight container at room temperature. It will stay fresh for a couple of days.
  • Freezing: For freezing, allow the cake to cool completely, then double wrap it tightly in plastic wrap, and freeze for up to 2 months. When ready to serve, remove the wrapped cake from the freezer and thaw it overnight in the refrigerator.
a slice of buttermilk texas sheet cake on a white plate and topped with chopped pecans

Buttermilk Texas Sheet Cake

Yield: 20 slices
Prep Time: 20 minutes
Cook Time: 18 minutes
Total Time: 38 minutes

This chocolatey, rich Buttermilk Texas Sheet Cake recipe combines moist and tender chocolate cake with a delicious layer of smooth chocolate frosting.

Ingredients

Cake

  • 2 cups all-purpose flour
  • 2 cups granulated sugar
  • ½ cup vegetable shortening
  • 1 cup water
  • ½ cup (1 stick) salted butter
  • ¼ cup unsweetened cocoa powder
  • ½ cup buttermilk, room temperature
  • 1 teaspoon vanilla extract
  • 1 teaspoon baking soda
  • 2 eggs, beaten

Frosting

  • ½ cup (1 stick) salted butter
  • ¼ cup unsweetened cocoa powder
  • 6 tablespoons whole or 2% milk
  • 3 ½ cups (16oz box) powdered sugar, sifted
  • 1 teaspoon vanilla extract
  • 1 cup chopped nuts (optional)

Instructions

Chocolate Cake

  1. Preheat oven to 400°F and grease a 11 x 17-inch pan or similar size and set aside.
  2. In a large bowl add flour and sugar. Mix to combine.
  3. In a small saucepan over medium heat, add vegetable shortening, water, butter, and cocoa. Bring to a boil. Remove from heat and set aside.
  4. Pour chocolate mixture over sugar and flour and mix well.
  5. Add buttermilk, vanilla, baking soda, and eggs and mix well to combine.
  6. Pour batter into prepared pan and bake for 18 minutes or until a toothpick inserted in the center comes out clean.

Frosting

  1. Begin making the frosting once the cake is more than halfway done.
  2. In a small saucepan over medium heat, add the butter, cocoa, and milk. Stir and bring to a boil.
  3. Remove from heat and add powdered sugar, vanilla, and nuts (optional) and stir until smooth.
  4. After the cake has slightly cooled from oven for 3-5 minutes, pour the frosting over the cake, and spread quickly before it sets.

Notes

Ovens and pan sizes may vary so keep an eye on the cake as baking time may vary.

Allow the frosting to set as the cake cools to room temperature before slicing and serving.

Any similar sized or sheet pan or jelly roll pan to a 11x17 will work such as as a 10x15, 11x16 or 12x18. Oven times may slightly vary.

Nutrition Information:
Yield: 20 Serving Size: 1
Amount Per Serving: Calories: 239Total Fat: 10gSaturated Fat: 3gTrans Fat: 0gUnsaturated Fat: 6gCholesterol: 24mgSodium: 108mgCarbohydrates: 33gFiber: 1gSugar: 22gProtein: 4g

This data was provided and calculated by Nutritionix.

© Monique McArthur
Cuisine: American / Category: Desserts
Buttermilk Texas Sheet Cake

The Jason Mimosa (Hawaiian Mimosa with Vodka)

June 15, 2023 by Monique McArthur Leave a Comment

The Jason Mimosa Hawaiian Mimosa With Vodka

This delightful cocktail, the Jason Mimosa, combines champagne, pineapple juice, grenadine, and Meili Vodka, co-created by Hawaiian native Jason Momoa.

A Hawaiian Mimosa with Vodka is a twist on a popular Tik Tok recipe, the Hawaiian Mimosa. Like the original, my version uses the same ingredients except I substitute coconut rum with Meili vodka.

The Jason Mimosa Hawaiian Mimosa With Vodka

What is Meili Vodka?

Meili Vodka (MAY-lee) is positioned as a sustainable vodka brand, with a focus on using 100 percent post-consumer recycled glass for its bottles, resulting in no two bottles looking exactly alike. Popular actor Jason Momoa and Blaine Halvorson, founder of vintage brand Junk Food Clothing and sustainable fashion line MadeWorn, co-founded Meili Vodka.

Produced in Montana, the vodka utilizes locally sourced grains, and the water used in the distillation process comes from springs nourished by snow and rainwater. Additionally, the vodka is allowed to "rest" and "breathe" in the fresh mountain air before being bottled at 40% Alc./Vol. (80 Proof).

Why You'll Love This Cocktail

  1. Easy - This mimosa recipe is delightfully uncomplicated, consisting of only four ingredients and requiring no cocktail shaker. It's an easy-to-make beverage that's perfect for Sunday brunch or even bridal showers.
  2. Visually Appealing - The addition of grenadine creates a beautiful red layer, while the maraschino cherry and pineapple garnish sit atop it all.
  3. Conversation Starter - The name of this cocktail is a playful nod to a well-known actor, and who knew Jason Momoa has his own vodka brand. Moreover, the presentation of this cocktail is bound to spark conversations and leave a lasting impression.

Jason Mimosa Ingredients

  • Champagne or Prosecco - Save the good stuff for a special occasion toast. Any Prosecco, champagne, or sparkling wine that you enjoy will work perfectly with this cocktail.
  • 1½ ounces Meili Vodka (or preferred vodka) - I used Meili Vodka but use any vodka that you prefer, including a coconut-infused vodka similar to the coconut-flavored rum used in the original Hawaiian mimosa. You just may need to consider renaming the cocktail as a Hawaiian Mimosa with Vodka or a Hawaiian Screwmosa.
  • Pineapple Juice - This variation replaces the conventional orange juice in a mimosa with a tropical twist.
  • Grenadine - Grenadine not only enhances the flavor but also lends a vibrant layered effect.
  • Garnish (optional) - Garnish with a fresh pineapple wedge and a maraschino cherry for added visual appeal.

Scroll down to the bottom for the printable recipe card with exact measurements and recipe instructions.

Jason Mimosa Ingredients

How to Make a Hawaiian Mimosa with Vodka

  1. Pour chilled pineapple juice into a champagne flute or wine glass.
  2. Add the vodka.
  3. Top with chilled champagne.
  4. Carefully pour the grenadine along the edge of the glass. Do not mix.
  5. Garnish with a fresh pineapple wedge and maraschino cherry.

Recipe Tips & Variations

Orange juice - Substitute orange juice for a more traditional screwmosa.

Maraschino cherry juice - Substitute grenadine with maraschino cherry juice.

Coconut extract - If you desire a coconut flavor in your mimosa, consider adding coconut extract.

Begin with chilled ingredients - Mimosas are best enjoyed when served cold, and since adding ice is not recommended, using chilled ingredients is the way to go.

Shot Glass - A standard shot glass typically holds 1.5 ounces and can serve as a convenient measurement tool. There are also 2 tablespoons in a liquid ounce.

Adjust amounts - If you find the combination of alcohol and champagne to be overwhelming, or if you wish to vary the sweetness, simply increase or decrease the amount of liquids accordingly.

The Jason Mimosa Hawaiian Mimosa With Vodka

The Jason Mimosa (Hawaiian Mimosa with Vodka)

Yield: 1
Prep Time: 5 minutes
Total Time: 5 minutes

This delightful cocktail, the Jason Mimosa, combines champagne, pineapple juice, grenadine, and Meili Vodka, co-created by Hawaiian native Jason Momoa.

Ingredients

  • 3 ounces (6 tbs) prosecco or champagne chilled
  • 1.5 ounce (1 shot or 3 tbs) Meili Vodka, coconut vodka or preferred vodka
  • 3 ounces (6 tbs) pineapple juice
  • ½ ounce (1 tbs) grenadine
  • 1 pineapple wedge (optional garnish)
  • 1 maraschino cherry (optional garnish)

Instructions

  1. Pour chilled pineapple juice into a champagne flute or wine glass.
  2. Add the vodka.
  3. Top with chilled champagne.
  4. Carefully pour the grenadine along the edge of the glass. Do not mix.
  5. Garnish with a fresh pineapple wedge and/or maraschino cherry.
Nutrition Information:
Yield: 1 Serving Size: 1
Amount Per Serving: Calories: 257Total Fat: 0gSaturated Fat: 0gTrans Fat: 0gUnsaturated Fat: 0gCholesterol: 0mgSodium: 11mgCarbohydrates: 24gFiber: 0gSugar: 17gProtein: 0g

This data was provided and calculated by Nutritionix.

© Monique McArthur
Cuisine: Hawaiian / Category: Drinks
The Jason Mimosa (Hawaiian Mimosa with Vodka)

Try these cocktails next:

  • 30 Champagne Cocktail Recipes
  • Dirty Shirley Cocktail
  • 20 Incredible Moscow Mule Recipes
  • Mezcal Grapefruit Cocktail
  • Cucumber Margarita
  • Candied Jalapeno Cocktails (4 ways)

Olive Oil Iced Shaken Espresso (Starbucks Copycat)

June 15, 2023 by Monique McArthur Leave a Comment

Olive Oil Iced Shaken Espresso Starbucks Copycat

Create your own Starbucks Oleato Iced Shaken Espresso with olive oil in the convenience of your home using this simple Starbucks copycat recipe.

Olive Oil Iced Shaken Espresso Starbucks Copycat

What is the Starbucks Oleato Iced Shaken Espresso?

The Oleato Iced Shaken Espresso is a Starbucks drink infused with Partanna extra virgin olive oil. Starbucks characterizes the combination of olive oil and their coffee as a velvety smooth and deliciously lush experience.

The Oleato Iced Shaken Espresso is made with Blonde Espresso Roast, Partanna extra virgin olive oil, Oatly Barista Edition Oatmilk and has been offered with both toffeenut or hazlenut syrups. Of course, as with any Starbucks drink sizes, types of espresso, milk, and flavors and quantities of add-ins are all customizable. Below are the two Oleato Iced Shaken Espresso varieties Starbucks has announced.

Oleato Iced Shaken Espresso with Toffeenut: This coffee-forward beverage offers layers of flavor sweetened with notes of toffeenut, rich espresso, and creamy oatmilk infused with Partanna extra virgin olive oil.

Oleato Iced Shaken Espresso Hazelnut: This coffee-forward beverage offers layers of flavor sweetened with notes of hazelnuts, rich espresso and creamy oatmilk infused with Partanna extra virgin olive oil.

Starbucks Oleato Iced Shaken Espresso with Oatmilk and Toffeenut

Equipment You'll Need

Espresso Machine & Milk Frother - I used a Nespresso VertuoPlus Coffee and Espresso Machine in conjunction with a Nespresso Aeroccino3 Milk Frother. However, any espresso machine and milk frother would suffice. You can also experiment with alternative methods for making espresso without an espresso maker. Additionally, there are easy techniques available to froth milk without a frother that you can explore.

Olive Oil Iced Shaken Espresso Ingredients

  • Starbucks Espresso Roast: This recipe features the default option at Starbucks, which is the light and sweet Blonde Espresso Roast. However, Starbucks offers other alternatives such as the bolder and more intense Signature Espresso Roast or the Decaf Espresso Roast. Alternatively, you can use your preferred espresso, including other brands of espresso.
  • Oatly Barista Edition Oatmilk: This recipes uses the same unsweetened oatmilk that Starbucks uses but you are welcome to use any oatmilk that you prefer. Moreover, both dairy and non-dairy milk options can be used, whatever best suits your taste and dietary needs.
  • Partanna Extra Virgin Olive Oil: Starbucks states they add a spoonful of EVOO. I used Partanna EVOO where Starbucks uses Partanna Cold-pressed Extra Virgin Olive Oil, which is not yet available in the U.S. You can also use a different brand of high-quality Extra Virgin Olive Oil.
  • Starbucks Toffee Nut or Hazelnut - You can opt for Toffee Nut or Hazelnut syrup, or choose any other syrup that appeals to your taste. Feel free to experiment with different syrups or even combine them and use any syrup brand that you prefer. Make homemade syrup with this Hazelnut Syrup recipe from Starbucks.

Scroll down to the bottom for the printable recipe card with exact measurements and recipe instructions.

Olive Oil Iced Shaken Espresso Starbucks Copycat Ingredients

How to Make Olive Oil Iced Shaken Espresso

  1. Prepare espresso shots or espresso pods.
  2. In a cocktail shaker or mason jar, add espresso, toffee nut or hazelnut syrup and ice, and shake for 20 seconds. Strain into ice-filled glass.
  3. Add the oat milk and extra virgin olive oil to a milk frother and pour on top of espresso.
  4. Top off with more ice if needed.

This coffee recipe comes together in just 5 minutes!

Measurement for Different Sizes

Ingredient measurements are based on a Tall (12 fl oz) Iced Shaken Espresso. See the chart for measurements for Grande (16 fl oz) and Venti (24 fl oz) sizes.

Use this chart to adjust the ingredients measurements for different sizes of Iced Shaken Espressos.

IngredientTall (12 fl oz)Grande (16 fl oz)Venti (24 fl oz)
Milk⅓ Cup½ Cup⅔ Cup
Syrup4 ½ Tsps6 Tsps9 Tsps
Espresso2 Shots3 Shots4 Shots
Olive Oil1 Tbs4 Tsps2 Tbs
Starbucks
Quantities
3 Syrup Pumps, 2 Shots Espresso4 Syrup Pumps, 3 Shots Espresso6 Syrup Pumps, 4 Shots Espresso

1 pump of Starbucks flavored syrup is .25 ounces or 1 ½ teaspoons.

If it's cold outside and you need something warmer try this homemade Starbucks Oleato Caffè Latte made with olive oil.

Olive Oil Iced Shaken Espresso Starbucks Copycat

Olive Oil Iced Shaken Espresso (Starbucks Copycat)

Yield: 1
Prep Time: 5 minutes
Total Time: 5 minutes

Create your own Starbucks Oleato Iced Shaken Espresso with olive oil in the convenience of your home using this simple Starbucks copycat recipe.

Ingredients

  • 2 shots espresso or espresso pods, cooled slightly
  • 3 teaspoons hazelnut or toffee nut coffee syrup
  • ⅓ cup (3 oz) oat milk or milk of choice
  • 1 tablespoon cold -pressed extra virgin olive oil
  • 1 ½ cups ice

Instructions

    1. Prepare espresso shots or espresso pods.
    1. In a cocktail shaker or mason jar, add espresso, toffee nut or hazelnut syrup and ice, and shake for 20 seconds. Strain into ice-filled glass.
    2. Add the oat milk and extra virgin olive oil to a milk frother and pour on top of espresso.
    3. Top off with more ice if needed.

Notes

Ingredient amounts are for a 12 fl oz Iced Shaken Espresso. See the article for ingredient amounts for larger sizes or simply double for a Venti 24 fl oz drink.

Nutrition Information:
Yield: 1 Serving Size: 1
Amount Per Serving: Calories: 674Total Fat: 44gSaturated Fat: 11gTrans Fat: 0gUnsaturated Fat: 31gCholesterol: 38mgSodium: 275mgCarbohydrates: 57gFiber: 3gSugar: 50gProtein: 18g

This data was provided and calculated by Nutritionix.

© Monique McArthur
Cuisine: Italian / Category: Drinks
Olive Oil Iced Shaken Espresso (Starbucks Copycat)

Quick & Crispy Fried Sage Leaves – Easy and Elegant

June 12, 2023 by Kristy Bernardo 13 Comments

Fried Sage Leaves are so simple and an addictive, delicious snack! Use them to top your fall dishes for a sophisticated finish, too!

Crispy Fried Sage Leaves might just be the easiest gourmet touch you can add to any fall dish. Their texture is light and incredibly crisp, with an incredible flavor that blooms in hot oil. And while sage isn't always everyone's go-to herb, frying it changes it from fuzzy and pungent to delicate and nutty. It's prefect for garnishing pasta or topping fall casseroles. My favorite is just snacking on them - they're SO good!

Pile of fried sage leaves coated in salt, overlapping on a black slate platter.

What are Fried Sage Leaves?

Fried sage leaves are exactly what they sound like: whole, fresh sage leaves quickly crisped in hot oil until they're light, crunchy, and full of flavor. Frying mellows the herb's strong, earthy taste and brings out a subtle nuttiness that's both unexpected and delicious. The texture turns beautifully crisp, making them perfect as a snack on their own or as a garnish that adds flavor, crunch, and a gorgeous presentation to everything from pasta and risotto to soups, meats, and roasted vegetables.

Ingredients

You only need a few things to make crispy fried sage leaves:

  • Fresh sage leaves: Whole leaves, washed and thoroughly dried. Look for firm, vibrant green leaves with no brown spots.
  • Extra-virgin olive oil: Just enough to coat the bottom of your skillet. You can use a neutral oil like canola or vegetable oil if preferred.
  • Kosher salt or flaky sea salt: For sprinkling immediately after frying to bring out all that delicious flavor. Don't skip this step!

That's it! A short list with big flavor payoff.

Fried sage leaves spread across a slate serving tray with a rustic wood background.

How to Fry Sage Leaves

Frying sage leaves is quick, simple, and makes your kitchen smell amazing. Here's how to do it:

In a Skillet (recommended)

  1. Prep your sage: Make sure the sage leaves are completely dry (water and hot oil don't mix well). Set them aside on a paper towel.
  2. Heat the oil: Pour just enough olive oil into a skillet to coat the bottom. Heat the oil over medium-high heat until the oil is shimmering but not smoking.
  3. Fry the leaves: Carefully lay the sage leaves in a single layer in the hot oil. They'll sizzle right away and crisp up in about 30 seconds or less. Keep an eye on them; they go from perfect to overdone quickly.
  4. Drain and salt: Use a slotted spoon to remove the leaves and place them on a paper towel-lined plate. While they're still warm, sprinkle with kosher or flaky salt.
  5. Cool and serve: Let them cool for a couple of minutes. They'll crisp up even more as they sit.

Note: Don't toss the oil! Let it cool, strain it, and save it. It's now lightly infused with sage and perfect for drizzling over roasted veggies, pasta, or even scrambled eggs.

In an Air Fryer

A skillet can't be beat if you want the crispiest leaves, but you can absolutely make fried sage leaves in the air fryer. Here's how to do it:

  1. Preheat your air fryer to 350°F.
  2. Lightly spray both sides of your fresh sage leaves with olive oil. Be sure they're completely dry before adding the oil.
  3. Place the leaves in a single layer in the air fryer basket (make sure they don't overlap).
  4. Air fry for 2-3 minutes, checking after 2 minutes. They cook fast and can burn quickly, so checking them early is a good idea. If they're not quite done, add another 30 seconds at a time.
  5. Place them on paper towels and immediately sprinkle with salt while they're still hot.
Extreme close-up of a single crispy sage leaf showing its delicate veins and coarse salt on a dark surface.

Tips

  • Use fresh, whole sage leaves: Look for vibrant green leaves without blemishes. Older or wilted leaves won't crisp up as well or taste as clean.
  • Make sure the leaves are completely dry: Any moisture on the leaves can cause the oil to splatter. Pat them dry with a paper towel before frying.
  • Don't overcrowd the pan: Fry the leaves in small batches so the leaves stay crisp and don't steam.
  • Watch them closely: These fry in seconds. Remove them just as they start to darken slightly, and remember that they'll continue to crisp up as they cool.
  • Salt right away: Sprinkle with salt while they're still warm to help the seasoning stick.
  • Save the sage oil (optional): Once cooled and strained, the leftover oil will have a subtle sage flavor. Use it for everything from frying eggs to tossing with roasted vegetables.

How to Store Fried Sage Leaves

Fried sage leaves are best enjoyed fresh, but if you happen to have leftovers (rare, but it happens!), here's how to keep them crisp:

  • Short-term storage: Place cooled leaves in an airtight container lined with a paper towel. Store at room temperature for up to 3 days. Avoid sealing them while they're still warm, as trapped steam will soften them. To revive them, re-crisp them in a dry skillet for 10-15 seconds over medium heat.
  • Freezing: It's not ideal. While technically possible, freezing tends to dull both the flavor and the crunch, so I don't recommend it.
  • If you're storing the sage oil, strain it through a fine mesh strainer and refrigerate it in a sealed jar for up to a week.
Close-up view of crispy fried sage leaves with visible salt crystals and detailed leaf texture.

Serving Suggestions

Fried sage adds an instant touch of sophistication and flavor. Here are some of my favorite ways to serve them (other than just enjoying immediately!):

  • Fall-inspired dishes: Top creamy pumpkin gnocchi, butternut squash ravioli, or mushroom risotto with a few crisp leaves for added texture, flavor and to make the dish "pop". Just a couple of leaves is enough (see the image below for an example).
  • Soups and stews: Float a couple on bowls of tomato soup, creamy potato leek soup, or a hearty white bean stew just before serving.
  • Roasted meats and fish: Crumble a few over roasted chicken, pork tenderloin, or seared white fish.
  • Cheese boards and charcuterie: This is one of my favorite ways to serve them! I love adding them to my boards, and they're gorgeous next to cheeses, cured meats, nuts, and jam.
  • As a crostini topping: Assemble your crostini then top each with a fried sage leaf or two. Try replacing the arugula with fried sage leaves in this whipped ricotta crostini.
  • On salads or roasted veggies: I like to use them to top a warm grain salad, roasted Brussels sprouts, or even mashed potatoes!
Golden baked pumpkin casserole topped with crispy sage leaves, presented in a white dish on a wooden table.

Frequently Asked Questions

Can I make fried sage leaves ahead of time?
Yes, but they're best enjoyed fresh out of the skillet. If you need to prep ahead, fry them a few hours in advance and store uncovered at room temperature.

How long do fried sage leaves stay crispy?
They're crispiest within the first few hours after frying. You can store them in an airtight container at room temperature for a day, but they may soften slightly.

Can I use dried sage instead?
No, dried sage won't work for this recipe. You need fresh whole sage leaves to get the right crisp texture and flavor when frying.

Do I need to use extra-virgin olive oil?
Extra-virgin olive oil adds great flavor, but you can use a neutral oil like vegetable or canola oil if preferred. Just make sure it has at least a medium-high smoke point.

What if my sage leaves turn brown too quickly?
That usually means your oil is too hot. Fry over medium heat and watch closely as sage leaves only need about 30 seconds to crisp up.

Is this recipe healthy?
Fried sage leaves are fried but they're still a fairly healthy snack.


I've got a few favorite recipes that work perfectly with fried sage leaves. This easy mushroom risotto with gorgonzola is rich and creamy - it's what I make for every holiday. For another holiday dish, try one of my homemade creamed corn recipes (there's a version with cream and one without). When you're in the mood for comfort food, this is the best turkey tetrazzini you'll ever try! And last but not least, this coconut curry with pumpkin and chicken has incredible flavor and is always a hit.

Easy Fried Sage Leaves Recipe

Fried Sage Leaves

Yield: 10 Sage Leaves
Prep Time: 3 minutes
Cook Time: 4 minutes
Total Time: 7 minutes

Fried sage leaves can be used to top all of your fall dishes for a sophisticated finish, or just enjoy them as a snack!

Ingredients

  • Whole sage leaves, as many as you like
  • Extra-virgin olive oil, enough to coat entire bottom of skillet
  • Coarse salt, for sprinkling

Instructions

  1. Coat the bottom of a skillet with extra-virgin olive oil, heat until shimmering then add sage leaves in a single layer. Watch them closely as it only takes about 30 seconds or so for them to crisp up, then remove them with a slotted spoon. Put them on a plate lined with paper towels then transfer them to a serving plate. Sprinkle immediately with salt to taste.
  2. Repeat in batches until all sage leaves are fried.

Notes

Fried sage leaves are best served within three if stored at room temperature. They can be stored in the refrigerator for up to 3 days.

The sage infused oil can strained and saved for later use or to make more fried sage leaves or for use with other dishes.

Nutrition Information:
Yield: 1 Serving Size: 1
Amount Per Serving: Calories: 119Total Fat: 14gSaturated Fat: 2gTrans Fat: 0gUnsaturated Fat: 11gCholesterol: 0mgSodium: 582mgCarbohydrates: 0gFiber: 0gSugar: 0gProtein: 0g

This data was provided and calculated by Nutritionix.

© Kristy Bernardo
Cuisine: American / Category: All Our Recipes
Quick & Crispy Fried Sage Leaves – Easy and Elegant

Balsamic Caramelized Onions

June 11, 2023 by Kristy Bernardo Leave a Comment

These Balsamic Caramelized Onions are fantastic on burgers, pizza, on a salad, over steak...a great summer topping to just about anything! | www.thewickednoodle.com | #summer #recipe #onions #barbecue

Add a touch of sweet and tangy flavor with these delicious balsamic caramelized onions. They make the perfect topping for burgers, pizza, salads, steaks, and more!

This isn't one of those quick recipes that I love to post around here. You'll need at least an hour to slowly cook these caramelized balsamic onions - preferably more - to coax your onions into their perfectly melty, caramelized, sweet place. But they're definitely easy and you can have these in your skillet while you're doing any number of other things.

Balsamic Caramelized Onions Recipe

Caramelized Onions vs Sautéed Onions vs Grilled Onions

This topic is near and dear to me since these terms are frequently interchanged, despite each having different cooking methods and resulting flavors. Before we dive into this delicious balsamic caramelized onions recipe, let's briefly breakdown the differences.

  • Caramelized Onions
    • Cooking Method: Cooked slowly over low heat for a longer period of time until the natural sugars in the onions break down and caramelize.
    • Taste: Rich, sweet, and savory flavor.
  • Sautéed onions
    • Cooking Method: Cooked quickly over medium to high heat in a bit of oil or butter until they are translucent, lightly browned yet still a bit crunchy.
    • Taste: Milder flavor with a slightly caramelized and sweet taste.
  • Grilled onions
    • Cooking Method: Cooked directly on a grill at high heat until outer layers of the onion are charred.
    • Taste: Smoky, slightly charred flavor with a hint of sweetness.

Balsamic Caramelized Onions Ingredients

  • Extra-virgin olive oil - The oil is used for cooking the onions while adding a pleasant flavor.
  • Sweet onions - The high sugar content of sweet onions is ideal for this recipe. Vidalia, Walla Walla, or Maui onions are a few of my favorites.
  • Kosher salt & Freshly ground black pepper - The spice base to most recipes to elevate the flavors.
  • Sugar (optional) - Enhances and aids in the caramelization process and creates a deeper flavor and golden brown color. The results may change slightly but adding sugar is optional or adjust the amount added as preferred.
  • Balsamic vinegar - The vinegar's acidity brings a tangy and subtly sweeter flavor.

You'll find the complete ingredients list with amounts in the recipe card below!

How to Make Caramelized Onions with Balsamic

  1. Slice the onions: Thinly slice the onions into uniform pieces.
  2. Heat the pan or skillet: Add olive oil to a skillet over a medium-low heat.
  3. Add the ingredients: Add the onions and season with salt and pepper, then add the sugar and balsamic.
  4. Cook low and slow: Cook slowly to allow the natural sugars in the onions to break down and caramelize.
Homemade Caramelized Balsamic Onions in a Pan

Tips & Variations

I make so many variations on this recipe. Another favorite is spicy caramelized onions (just add hot sauce to taste at the end instead of balsamic). Spicy sweet caramelized onions...delicious!

You can get sweet, soft caramelized onions in as little as 30 to 40 minutes in the pan but 60 minutes will result in softer, deeper flavored onions.

How to Serve Balsamic Caramelized Onions

Use these delicious balsamic onions as a flavorful topping on burgers, steaks, fish, pizzas, flatbreads, sandwiches, sliders, grilled cheese, vegetables (eggplant strips!) or add them into breakfast dishes like omelets, quiches or tarts.

You could even put some on a salad (mmm...with blue cheese dressing). I've even been known to enjoy some as side dish - they're that good. Cheap, easy, delicious and relatively healthy...pretty close to perfect.

They're especially delicious on a burger topped with blue cheese or on hot dogs or sausages for a gourmet twist.

Risotto or pasta with caramelized onions mixed would be divine!

Make a tasty side dish of balsamic mushrooms and onions by adding mushrooms during the final 10 minutes of cooking. A great steak topping too!

Stir into soups (French onion soup!), stews, and braises for a pop of flavor or serve as an appetizer spread on top of toasted bruschetta or crostini.

Blend into dips or spreads like hummus dip, sour cream-based dips, caramelized onion dip, or cheese spreads for an added savory flavor. Mashed potatoes too!

These Balsamic Caramelized Onions are fantastic on burgers, pizza, on a salad, over steak...a great summer topping to just about anything! | www.thewickednoodle.com | #summer #recipe #onions #barbecue

Make Ahead & Storage

Make them ahead up to 4 days before and tuck them away in an airtight container or Ziploc bag in your fridge (after enjoying a couple of spoonfuls, I never can resist them)!

Caramelized balsamic onions can also be stored in an airtight container or freezer safe Ziploc bag, and frozen for up to 2 months.

They keep very well and are best at room temperature - perfect for a barbecue since you can just set them on the table and not worry about heating them.

These Balsamic Caramelized Onions are fantastic on burgers, pizza, on a salad, over steak...a great summer topping to just about anything! | www.thewickednoodle.com | #summer #recipe #onions #barbecue

Balsamic Caramelized Onions

Yield: 1 cup
Prep Time: 5 minutes
Cook Time: 1 hour
Total Time: 1 hour 5 minutes

Use these delicious balsamic caramelized onions to top just about anything from burgers to pizza to salads to steak.

Ingredients

  • 2 Tablespoons extra-virgin olive oil
  • 3 sweet onions (sliced thickly (about 5-6 slices per onion))
  • 1 teaspoon kosher salt
  • Freshly ground black pepper
  • 2 Tablespoons granulated sugar (optional)
  • ¼-1/2 cup balsamic vinegar (depending on personal preference)

Instructions

  1. Heat oil in a large skillet or pan over medium-low heat.
  2. Meanwhile, slice a ½-inch off the stem and root ends of the onions, then cut in half. Lay the onions cut side down and make angled cuts into each onion. You'll want thick slices so each half should have about 3 slices each.
  3. Add onions and season with salt and pepper. If onions are overflowing from the skillet cook down slightly to reduce in volume.
  4. Once onions are cooked down slightly (if necessary), add sugar and stir gently. Add balsamic and stir again. Reduce heat to low and slowly cook onions, stirring every few minutes, for an hour or so. Vinegar will reduce and coat onions.

Notes

Depending on skillet size, add half the onions, cook down enough that you can stir them all in the skillet without any going overboard, then add other half.

You can get sweet, soft caramelized onions in as little as 30 to 40 minutes in the pan but 60 minutes will result in softer, deeper flavored onions.

Serve immediately or store in the refrigerator for up to 3 days. Can be served at room temperature.

Nutrition Information:
Yield: 4 Serving Size: 1
Amount Per Serving: Calories: 127Total Fat: 7gSaturated Fat: 1gTrans Fat: 0gUnsaturated Fat: 6gCholesterol: 0mgSodium: 540mgCarbohydrates: 15gFiber: 0gSugar: 13gProtein: 0g

This data was provided and calculated by Nutritionix.

© Kristy Bernardo
Cuisine: American / Category: Sides
Balsamic Caramelized Onions

If you love onions try this delicious creamed onions recipe next!

Whipped Goat Cheese Appetizer with Honey

June 10, 2023 by Kristy Bernardo Leave a Comment

Best Whipped Goat Cheese Recipe

This Honey Whipped Goat Cheese Appetizer is very simple yet gorgeous and sophisticated.

Don't you just love recipes that have no need for an actual recipe? This honey whipped goat cheese appetizer is one such "recipe". I've never once measured anything, I just throw it in my blender, taste and adjust, taste again...then eat! Don't sweat it, though, I'm including a recipe in case you forget the ingredients or feel like you still need a little guidance.

Everyone always loves this whipped goat cheese dip, but no one loves it as much as the person who makes it. And only that person will know how simple it was to make yet will still soak up all the accolades. Total win.

Whipped Goat Cheese Appetizer with Honey
★★★★★

"Perfect appetizer"

- Sherri J.

Whipped Goat Cheese Ingredients

Just blend up a few simple ingredients, add some crackers and you've got a sophisticated whipped goat cheese appetizer in less than five minutes!

  • Goat cheese - Use fresh chèvre in its log form rather than in crumbled form. Good quality goat cheese is important.
  • Heavy cream - The addition of heavy cream thins out the consistency and lends a creamier and smoother texture to the goat cheese.
  • Honey - The sweetness of honey magically complements the tanginess of goat cheese.
  • Kosher salt & freshly, course-ground black pepper - To elevate and enhance the flavors of all the ingredients.
  • Fresh thyme leaves (optional) - Thyme adds nice earthy and slightly floral flavor notes.

You'll find the complete ingredients list with amounts in the recipe card below!

How to Make Whipped Goat Cheese

I start with five ounces of goat cheese and a little heavy cream (about a couple of tablespoons). I'll put all of the ingredients in a blender (my Vitamix, of course!) along with a little honey and coarsely-ground black pepper. Oh, and a little salt, if you prefer.

I'll go lighter on the honey if I plan on drizzling a little on the top. And I always plan to drizzle a little on the top; it looks so pretty! You can also add a few fresh thyme leaves if you like.

Easy Whipped Goat Cheese Dip

Whipped Goat Cheese Variations

Goat cheese allows for numerous creative combinations. Here is a variety of ingredients to try with goat cheese.

Fresh or dried fruits - Figs, dates, grapes, pears, pomegranate, cherries, or berries.

Nuts - Walnuts, pecans, or almonds.

Herbs - Thyme, rosemary, basil, oregano, parsley, green onion, chives, tarragon, cayenne pepper or red pepper flakes.

Roasted vegetables - Beets, bell peppers, or zucchini.

Surf & Turf - Prosciutto, candied bacon or smoked salmon.

Oils & Glazes - Olive oil, vinegar, balsamic glaze or reduction.

More Ingredients - Caramelized onions, lemon juice or lemon zest.

Substitutions - Replace the honey with maple or agave syrup or the heavy cream with milk, cream cheese or Greek yogurt.

Best Whipped Goat Cheese Recipe

What to Serve with Whipped Goat Cheese

What do I serve this delicious, whipped goat cheese appetizer with, you ask? Usually just some good crackers (I am very partial to the ones you see in the photo) or, even better, some crostini and a tray of prosciutto & figs along with extra honey and pepper. And be sure to use a good honey! I used some local honey for mine but I've used Tupelo if I've had it on hand. Here are more serving suggestions.

  • Crackers or crostini
  • Crusty bread or baguette
  • Chips, pita chips or pretzels
  • Whipped goat cheese dip with crudités (veggie sticks)
  • Addition to a charcuterie board
  • Spread on roasted vegetables or fruits
  • Dollop on a salad
  • Sandwiches or wrap spread
  • Stuff into mushrooms and bell peppers
  • Topping for grilled meats
  • Add to burgers
  • Pizza topping
  • Stir into pasta sauce
  • Dessert ingredient
  • Add to toast for breakfast

Make Ahead & Storage

This whipped goat cheese recipe can be made in advance up to 5 days.

At room temperature, the whipped goat cheese can be served for up to two hours. If you need to store it, refrigerate it in an airtight container for up to 5 days. However, I advise against freezing this whipped goat cheese dip as it may not retain its airy, light, and soft texture.

Whipped Goat Cheese Appetizer with Honey

Whipped Goat Cheese Appetizer with Honey

Yield: 4
Prep Time: 5 minutes
Total Time: 5 minutes

This easy whipped goat cheese appetizer is whipped with goat cheese, honey, fresh thyme and black pepper. Serve it as an appetizer, dip, spread, topping or on a charcuterie board!

Ingredients

  • 5 ounces goat cheese
  • 2 tablespoons heavy cream
  • 1 tablespoons honey, plus more for drizzling on top
  • ½ to 1 teaspoon freshly, course-ground black pepper, to taste
  • ½ teaspoon salt, optional
  • ¼ teaspoon fresh thyme leaves, optional

Instructions

  1. Place all ingredients in a high-powered blende or food processor and blend until completely smooth. Serve in a pretty dish with crostini or crackers on the side. Drizzle a little more honey on top along with a little more pepper and a sprig of thyme.

Notes

For best results, use good quality goat cheese and fresh thyme.

If the consistency is still too thick, you can add a small amount of olive oil or a little more cream.

This recipe can be mix by hand but be certain you really get it mixed up and “whipped”.

Nutrition Information:
Yield: 4 Serving Size: 1
Amount Per Serving: Calories: 136Total Fat: 10gSaturated Fat: 7gTrans Fat: 0gUnsaturated Fat: 3gCholesterol: 25mgSodium: 429mgCarbohydrates: 5gFiber: 0gSugar: 5gProtein: 7g

This data was provided and calculated by Nutritionix.

© Kristy Bernardo
Cuisine: American / Category: Appetizers
Whipped Goat Cheese Appetizer with Honey

More Goat Cheese Recipes

  • Baked Goat Cheese
  • Crostini with Goat Cheese
  • Roasted Red Pepper Goat Cheese Bruschetta
  • Cracked Pepper and Goat Cheese Zucchini Roll-Ups
  • Asparagus, Goat Cheese & Tomato Tart

Make-Ahead Easy Pea Salad for Parties

June 9, 2023 by Kristy Bernardo 61 Comments

a white dish with scalloped edges, filled with an easy pea salad that's topped with chopped parsley on a wooden table

This Easy Pea Salad has been made in my family for years! It always goes fast and is perfect to take to a barbecue or summer potluck.

Yep, this is my mom's recipe. And her mom's before her. And even her mom's mom before her! It's one of those easy-yet-delicious recipes that she keeps in her head, ready to be made at a moment's notice.

Don't let the short list of ingredients fool you, though. This easy pea salad is really flavorful without much effort, and it keeps well, too. It's the first thing I make when I get my hands on fresh peas, and I also keep a bag of frozen peas on hand for an easy side dish anytime!

a white dish with scalloped edges, filled with an easy pea salad that's topped with chopped parsley on a wooden table

This is a great recipe to keep on hand to take to a backyard barbecue. It pairs really well with or smoked pork butt or toss some chicken wings on the smoker.

Ingredients

  • Green Peas: Fresh peas are delicious in this easy pea salad but frozen peas will do the trick just fine, too. I don't recommend using canned; they'd be a bit too soft. But if you can get fresh, use them as they make this even better (just give them a quick blanch before adding to the recipe).
  • Mayonnaise: I use regular mayo, but you can also use light mayo to cut down on some calories.
  • Balsamic vinegar: The addition of sweet and tangy balsamic vinegar helps cut through the richness of the other ingredients.
  • Sugar: The sugar won't make it sweet, it just helps to balance the flavors.
  • Sweet onion: Red onions are more commonly used in a pea salad, so use those if you like, but I prefer the milder and sweeter flavor of sweet onions in this recipe.
  • Shredded cheddar cheese: I use sharp cheddar, but use a mild or medium cheddar if you prefer. You can also dice the cheese, just be sure to keep it small so it doesn't overpower the other flavors.
  • Kosher salt & freshly ground black pepper: Remember: SALT = FLAVOR. 🙂
a closeup of an old fashioned pea salad that's topped with chopped parsley

How to Make This Easy Pea Salad

This easy salad really is fast and easy to make! Here are the steps to do it:

  1. In another a medium-sized mixing bowl, mix together the mayo, vinegar, sugar and sweet onion. Mix in the cheese, then season to taste with salt & pepper.
  2. Gently fold in the peas until they're completely coated with the dressing.
  3. Serve immediately or leave it in fridge for up to 12 hours before serving. It will taste even better the longer it sits.

Variations

This easy pea salad needs just a few key ingredients, but of course there are always a few more that can be added! Here are a few ideas:

  • Bacon or ham: Crumbled bacon is a great addition, just sprinkle it on top right before serving so it retains it's crunch. Diced ham can be mixed right in.
  • Hard-Boiled Eggs: Eggs will bulk it up, and will add a little creaminess (and some protein).
  • Celery or red bell pepper: Either of these will add a crunchy texture along with a pop of color from the red bell peppers.
  • Sunflower Seeds: Sunflower seeds would be delicious!
  • Pickles or Pickle Relish: The briny flavor of pickles will change the flavor quite a bit, but it's a delicious addition.
  • Sour Cream or Greek Yogurt: Replacing some of the mayo with either sour cream or yogurt to keep it lighter.
  • Vinegar: Balsamic vinegar is definitely best here, but feel free to use white wine vinegar or apple cider vinegar.
  • Dijon Mustard: A dollop of Dijon is really good - I've added it many times!
  • Seasonings & herbs: Try adding garlic powder or fresh herbs like dill, chive, basil tarragon or parsley.
a white dish with scalloped edges, filled with an easy pea salad that's topped with chopped parsley

Related

Looking for more ideas to take to a pot luck or barbecue? Try these:

  • loaded cheddar, chive & bacon mashed potatoes
    Loaded Mashed Potatoes
  • Fall Fruit Salad
    Fall Fruit Salad with Crunchy Pecans and Creamy Dressing
  • This Sugar Snap Pea Salad has just five ingredients and so much flavor! Super fast and healthy!
    Sugar Snap Pea Salad with Poblanos & Corn
  • Easy Honey Chipotle Baked Beans
    Honey Chipotle Baked Beans

Pairings

These are my favorite dishes to serve with this easy pea salad:

  • Closeup of Smoked Mac And Cheese
    The BEST Smoked Mac and Cheese (Easy and Creamy!)
  • a closeup of three cilantro lime chicken breasts with visible grill marks resting on a wooden cutting board
    Cilantro Lime Chicken (Grilled, Baked, or Air Fried!)
  • Mexican Gourmet Hot Dogs - cheesy, a little spicy and SO delicious!
    Cheesy Mexican Gourmet Hot Dogs
  • a baking dish filled with baked beans just off the smoker
    The Best Smoked Baked Beans with Bacon & Chipotle
a white dish with scalloped edges, filled with an easy pea salad that's topped with chopped parsley on a wooden table

Easy Pea Salad

Yield: 8 servings
Prep Time: 10 minutes
Total Time: 10 minutes

A wonderfully easy salad with peas, sweet onions and cheddar cheese. It's perfect to take to a pot luck or barbecue!

Ingredients

  • 32 ounces (4 cups) of fresh or frozen peas (lightly blanched if fresh; thawed if frozen)
  • ½-¾ cup mayo (start with ½ cup and add more if you need it)
  • 1 tablespoon balsamic vinegar
  • 1 teaspoon granulated sugar
  • ¼ cup minced sweet onion
  • 1 cup shredded cheddar cheese (or cut into very small pieces)
  • kosher salt & freshly ground black pepper, to taste

Instructions

  1. Mix together the mayo, vinegar, sugar and sweet onion in a medium-sized mixing bowl. Mix in the cheese, then gently fold in the peas.
  2. Season to taste with salt & pepper.
  3. Serve the salad immediately or leave it in the fridge for up to 12 hours.

Notes

    1. Substitute some of the mayo for sour cream or yogurt for a lighter version.

Nutrition Information:
Yield: 8 Serving Size: 1
Amount Per Serving: Calories: 304Total Fat: 30gSaturated Fat: 7gTrans Fat: 0gUnsaturated Fat: 23gCholesterol: 28mgSodium: 356mgCarbohydrates: 3gFiber: 1gSugar: 2gProtein: 4g

This data was provided and calculated by Nutritionix.

© Kristy Bernardo
Cuisine: American / Category: Salads
Make-Ahead Easy Pea Salad for Parties

Imitation Crab Salad

June 9, 2023 by Monique McArthur Leave a Comment

Imitation Crab Salad

This California roll-inspired imitation crab salad is fresh, filling, and crunchy. Better yet, this nutritious salad option will keep you full for hours.

Imitation crab is a versatile ingredient. You can use it to make rangoons, pasta dishes, sushi, ceviche, and more. I like to use imitation crab in salads, and this one is my favorite. I used imitation crab, cucumber, avocado, carrot, and quinoa to make it extra hearty. The main ingredients offer a delicious variety of textures and flavors made better with the soy vinaigrette. It adds a tangy, salty touch that's also a bit sweet with some heat.

Imitation Crab Salad

Why You'll Love Imitation Crab Salad

Easy to make - Seriously, the hardest part is prepping the vegetables, which isn't difficult.

Nutritionally sound - Imitation crab salad is packed with healthy whole foods and quinoa for an extra dose of protein. As for imitation crab, it isn't as nutritionally valuable as real crab meat but is low in fat and calories.

Affordable - This recipe is a cheap, cheerful option for lunch, a light dinner, or a side. Cucumber, avocado, and carrot are inexpensive, a bag of quinoa will set you back $5, and eight ounces of imitation crab is only $2-3. That sounds like a money-saving option to me!

Tasty at any temperature - Slightly warm, room temperature, chilled - you name it, the salad is delicious, so don't worry if you don't have the patience to cool the quinoa thoroughly.

Imitation Crab Salad Ingredients Notes

To make imitation crab salad, you need the following:

  • Imitation crab: There are several imitation crab options, including imitation crab legs, chunks, flakes, and shreds. Choose whatever you like.
  • Cucumber: The cucumber's light, refreshing crunch is unmatched.
  • Avocado: It adds a cool, creamy element to the salad. Ensure that it is ripe.
  • Quinoa: As mentioned, the salad is inspired by California rolls, so a rice-like element is needed, and quinoa is a healthier rice alternative. Stick with white or tri-colored.
  • Soy sauce: The saltiness ensures the salad is seasoned well and adds rich umami flavor. 
  • Lemon juice: Fresh lemon juice adds a bright acidity to the dressing.
  • Maple syrup: Since the soy sauce is relatively salty, maple syrup's sweetness balances the vinaigrette's flavor.

You'll find the complete ingredients list with amounts in the recipe card below!

How to Make Imitation Crab Salad

Making imitation crab salad is a simple process that takes almost no time. To make it:

  1. Rinse the quinoa: Add quinoa to a strainer and rinse it under cold water to remove the bitter-tasting saponin from the exterior. Even if the packaging states that the quinoa has been washed, washing is still suggested.
  2. Cook the quinoa: Transfer the quinoa to a pot with broth, salt, and black pepper, and boil until all the liquid is absorbed.
  3. Cool the quinoa: Speed up the process by spreading it on a plate or platter, then transfer it to a large salad bowl with the other ingredients.
  4. Toss the salad: Toss the imitation crab salad ingredients together until they are well combined.
  5. Prepare the dressing: Whisk the soy sauce, lemon juice, oil, maple syrup, garlic, and chili flakes together in a small bowl until well combined.
  6. Dress and serve: Drizzle the dressing over the salad and give it another toss to distribute the vinaigrette evenly.
Imitation Crab Salad Ingredients

Variations, Substitutions, and Cooking Tips

Use rice - Swap the quinoa for white or brown rice if you're not a fan of quinoa or happen to have leftover rice available.

Try real crab - If you have real crab meat, use it. Give it a rough chop and add it to the rest of the salad. 

Swap crab for another protein - Chicken, fish, or tofu will do just fine.

Garnish with sesame seeds - They add a light, crisp crunch to the salad. You can use them as is, or toast them first.

Make it low carb - Replace the quinoa (or rice) in this imitation crab salad with greens, mushrooms, riced cauliflower, or broccoli.

Go creamy - If light vinaigrettes aren't your thing, make a creamy dressing. A spicy kewpie mayo-based one isn't a bad idea.

Make Ahead

You can make imitation crab salad ahead of time. To make ahead, instead of storing any that happens to be left over, assemble before serving (with the dressing and all) or brush the avocado with a bit of lemon juice instead of dressing the salad to prevent browning.

Storage and Freezer Tips

Imitation crab salad can be stored in an airtight container and refrigerated for up to 3 days, but I suggest eating it within a day or so when flavors and textures are at their peak. Although it will taste fine if you store the salad longer, the avocado will start to brown, and the cucumber will make the other ingredients soggy. The longer cucumber is refrigerated, the more moisture they release, and that excess moisture will water down the imitation crab salad.

Imitation Crab Salad

Imitation Crab Salad

Yield: 4-6 Servings
Prep Time: 12 minutes
Cook Time: 20 minutes
Total Time: 32 minutes

This California roll-inspired imitation crab salad is fresh, filling, and crunchy. Better yet, this nutritious salad option will keep you full for hours.

Ingredients

Salad

  • 1 cup quinoa, rinsed and drained
  • 2 cups reduced-sodium chicken or vegetable broth
  • ¼ teaspoon fine sea salt
  • ⅛ teaspoon black pepper
  • ½ ripe avocado, diced
  • ½ cup julienned cucumber
  • ½ cup julienned carrot
  • 2 green onions, thinly sliced
  • 8 ounces imitation crab meat, chopped
  • 2 sheets of nori, thinly sliced
  • 1 tablespoon sesame seeds, for garnish

Vinaigrette

  • 1 tablespoon soy sauce
  • 1 tablespoon fresh lemon juice
  • 1 tablespoon vegetable oil or neutral oil of choice
  • 1 teaspoon maple syrup
  • 2 garlic cloves minced
  • ⅛ teaspoon red chili flakes

Instructions

  1. Pour the quinoa into a small saucepan with the broth. Add a pinch of salt and black pepper. 
  2. Bring to a boil, reduce to a simmer, cover, and simmer for 15-20 minutes. Remove the quinoa from the heat once all the liquid is absorbed, and the tiny seeds have popped. 
  3. Transfer the quinoa to a plate, fluff it with a fork, spread it out, and set it aside to cool. 
  4. Add the quinoa to a large salad bowl once cooled. Follow with the avocado, cucumber, carrots, green onion, crab meat, and nori. Toss to combine. 
  5. Whisk the dressing ingredients together in a small bowl. 
  6. Drizzle the dressing over the salad, toss again, garnish with sesame seeds, and serve.
Nutrition Information:
Yield: 6 Serving Size: 1
Amount Per Serving: Calories: 194Total Fat: 9gSaturated Fat: 1gTrans Fat: 0gUnsaturated Fat: 7gCholesterol: 19mgSodium: 767mgCarbohydrates: 19gFiber: 3gSugar: 5gProtein: 11g

This data was provided and calculated by Nutritionix.

© Monique McArthur
Cuisine: American / Category: Salads
Imitation Crab Salad

Try these recipes next!

  • Asian Ramen Noodle Salad
  • Instant Pot Quinoa Spinach Salad With Sausage
  • Classic Pasta Salad With Italian Dressing
  • Sugar Snap Pea Salad with Poblanos & Corn
  • Skinny Chopped Veggie Salad
  • Spam Musubi

Salami and Cheese Puff Pastry Appetizer

June 8, 2023 by Monique McArthur Leave a Comment

Salami And Cheese Puff Pastry Appetizer

This Salami and Cheese Puff Pastry appetizer brings together the best of flavors and textures and is one of my favorite hors d'oeuvres to bring to a party!

This recipe was inspired by a visit to a local restaurant called The Hobbit where I first discovered this delicious appetizer. The experience starts with drinks upstairs, a journey to the wine cellar for a bottle selection accompanied by delicious hor d'oeuvres, and ends with a pre fixe meal in the dining room. Guests are even invited to tour the kitchen and engage in conversations with the chefs. If you find yourself in Orange County, CA, The Hobbit is an absolute must-visit!

Salami And Cheese Puff Pastry Appetizer

Why You'll Love this Puff Pastry Recipe

Bursting with Flavor - This light and airy puff pastry appetizer offers a flakiness and buttery undertone. The sharpness and subtle spiciness of the country mustard adds a tangy kick, while the pepper jack cheese brings a tangy, slightly spicy note that perfectly complements the other ingredients. The rich and salty Genoa salami provides a savory and salty flavor that blends well with the overall combination. Together, these ingredients are packed with an explosion of taste that will leave your guests craving for more.

Easy Salami Appetizer - Made with store-bought puff pastry, these appetizers are incredibly easy to prepare and yield a sophisticated result. They boast a wonderful crispness, golden brown hue, and irresistible flavor that will vanish from the plate in no time.

Unique Presentation - This appetizer is served as a whole piece and then sliced into bite-sized triangles. It is an attractive centerpiece for any party and will leave your guests impressed.

Appetizer for a Crowd - Whether you're hosting a party or tasked with bringing an appetizer for a large group, this dish is equally delicious to devour as it is visually appealing.

Salami and Cheese Puff Pastry Ingredients

With just 4 ingredients, if you don't count the egg wash and flour, this recipe comes together quickly!

  • Puff pastry dough - Puff pastry dough can be found in the frozen section of most grocery stores. Pepperidge Farm Puff Pastry dough is a common brand you'll find and what I often use. They also have a few quick and easy tips for working with puff pastry.
  • Genoa salami - Genoa salami offers a savory, salty, and slightly tangy flavor. Opt for thinly sliced, premium Genoa salami from a reputable deli, such as Boar's Head. Avoid pre-packaged salami for the best flavor and quality.
  • Pepper jack cheese - The cheese adds a zesty taste with a hint of heat from the spicy jalapeño peppers. If you can't find shredded pepper jack cheese, order a block of pepper jack from the deli counter and shred at home. Personally, I prefer the higher quality from the deli and freshly grated cheese.
  • Country Dijon mustard - The coarsely ground mustard seeds lend this appetizer a unique texture and pleasant crunch compared to a smoother Dijon mustard. I use Grey Poupon Country Mustard.
  • Egg & water - Used to make an egg wash glaze to seal the edges and brush over the top of the puff pastry dough to create a rich, golden sheen when baked.
  • Flour - Not an actual ingredient, but a helpful tool for rolling puff pastry sheets.

Scroll down to the bottom for the printable recipe card with exact measurements and recipe instructions.

Salami And Cheese Puff Pastry Crust

How to Make a Salami and Cheese Puff Pastry

Here are the basics to making this puff pastry sandwich appetizer.

  1. Roll the sheets - On a lightly floured surface, roll out the puff pastry sheets to be slightly larger than the sheet pan.
  2. Create the layers - Place one sheet of puff pastry on the pan, spread a thin layer of mustard, then arrange the Genoa salami in overlapping rows, sprinkle the pepper jack cheese on top and finally add the second puff pastry sheet to cover.
  3. Decorate the edges - The edges can be simply crimped with your fingers or decoratively fluted or pressed together with a fork.
  4. Bake - Bake until the pastry becomes golden brown and steaming hot.
Salami And Cheese Puff Pastry Layers

Tips & Variations

Mix up the cheese - If pepper jack cheese isn't to your taste, feel free to choose your preferred shredded cheese variety, such as Monterey Jack, Cheddar, Colby, Mozzarella, or a blend.

Substitute the salami variety - While I recommend Genoa salami for its flavor profile, you can also try using Sopressata, Cotto or hard salami for a different twist. For those seeking plant-based options, vegan salami is an alternative. Additionally, if you prefer a salami without pork, turkey or beef salami are great choices.

Go with another meat altogether - There are several other meats that would complement this hot appetizer, such as thinly sliced ham, pepperoni, Capocollo, Prosciutto, or even bacon or pancetta crumbles. Ensure that the chosen meat is sliced thinly for optimal taste and texture.

Puff pastry dough is best cold - Puff pastry dough works best when cold including colds hands, run your hands under cold water, if necessary.

Puff pastry cracks - If any cracks form, just rub with a little water and press to seal the dough together.

Storage & heat - This salami and cheese appetizer is best served hot, right out of the oven. However, you can store it in an airtight container in the refrigerator for up to 2 days. Reheat in the oven to make them crispy again.

Salami And Cheese Puff Pastry Appetizer

Salami and Cheese Puff Pastry Appetizer

Yield: 18
Prep Time: 30 minutes
Cook Time: 20 minutes
Total Time: 50 minutes

This Salami and Cheese Puff Pastry appetizer brings together the best of flavors and textures and is one of my favorite hors d’oeuvres to bring to a party!

Ingredients

  • 2 sheets frozen puff pastry, thawed
  • 4 oz Country Dijon mustard
  • ½ pound Genoa Salami, sliced paper-thin
  • 1 pound Pepper Jack Cheese or 4 cups, shredded
  • 1 egg
  • 1 teaspoon water

Instructions

    1. Preheat oven to 400°F.
    2. Grease an 11" x 16" sheet pan or a similar size with cooking spray.
    3. Allow 2 sheets of puff pastry dough to thaw according to package instructions, bringing them to room temperature.
    4. On a lightly floured surface, roll out the puff pastry sheets to be slightly larger than the sheet pan.
    5. Place one sheet of puff pastry onto the greased sheet pan, allowing the excess dough to hang over the edges.
    6. Spread a thin layer of mustard over the entire bottom of the pastry dough.
    7. Arrange the Genoa salami in overlapping rows, covering the bottom of the pan completely.
    8. Evenly sprinkle the pepper jack cheese over the salami.
    9. Place the second sheet of pastry dough over the pan, allowing the excess dough to hang over the sides.
    10. Using your fingers, roll up and inward the two layers of excess dough along the edge of the pan.
    11. In a small bowl, create the egg wash by combining the egg and water together and whisk vigorously until well combined and very smooth.
    12. Seal the edges by pinching them together with egg wash. For a decorative touch, flute the edges or use the tines of a fork to press together.
    13. Lightly brush the remaining egg wash over the top layer of pastry dough, including the edges.
    14. Bake the pastry in the center of the oven for approximately 20 minutes, until it becomes puffy and golden brown.
    15. Once baked, cut the pastry with a large knife or pie cutter diagonally and in two opposite directions to create bite-sized triangle pieces.

Notes

A small amount of flour is needed to aid in rolling the puff pastry sheets.

I used a 11” x 16” half sheet pan but there is enough dough to use a slightly larger half sheet pan if that is what is on hand.

Apply a thin layer of mustard, adjusting the amount to suit your taste preferences. If using a larger sheet pan, you may need to increase the quantity accordingly.

Serve on a cutting board as a serving platter or in the sheet pan (it just won't be as fancy).

Nutrition Information:
Yield: 18 Serving Size: 1
Amount Per Serving: Calories: 180Total Fat: 15gSaturated Fat: 7gTrans Fat: 0gUnsaturated Fat: 7gCholesterol: 45mgSodium: 571mgCarbohydrates: 2gFiber: 0gSugar: 0gProtein: 10g

This data was provided and calculated by Nutritionix.

© Monique McArthur
Cuisine: French / Category: Appetizers
Salami and Cheese Puff Pastry Appetizer

Try these party appetizer recipes next!

  • Ahi Tuna Sashimi
  • Baked Goat Cheese
  • Spanakopita
  • Shrimp Ceviche
  • Smoked Queso Dip

Roasted Red Pepper Goat Cheese Bruschetta

June 8, 2023 by Kristy Bernardo Leave a Comment

Roasted Red Pepper Goat Cheese Bruschetta Recipe

Roasted Red Pepper Goat Cheese Bruschetta with fried capers is a flavorful and tangy appetizer that combines the smoky sweetness of roasted peppers, the creamy richness of goat cheese, and the briny pop of capers, all served on toasted bread for a delightful bite.

Roasted Red Pepper Goat Cheese Bruschetta Recipe

Roasted Red Pepper Goat Cheese Bruschetta Ingredients

  • Baguette - I use a traditional French baguette which has a neutral flavor that allows the toppings to shine. If desired, opt for a sourdough, whole wheat, or flavored baguette, such as garlic or herbed.
  • Extra-virgin olive oil  - For the best results, use high-quality extra-virgin olive oil.
  • Kosher salt and black pepper - To elevate the flavors of the other ingredients.
  • Log goat cheese and heavy cream - The addition of heavy cream lends a creamier and smoother texture to the goat cheese. Use fresh chèvre in its log form rather than in crumbled form.
  • Roasted red peppers - Adds a delicious smoky, sweet and slightly charred flavor.
  • Vegetable or canola oil - Used to lightly brown the capers.
  • Capers - Provides a refreshing and zesty, lemon element.
  • Lemon zest - The citrusy and tangy flavors complement the other ingredients.

Scroll down to the bottom for the printable recipe card with exact measurements and recipe instructions.

How to Make Goat Cheese Bruschetta

  1. Prepare and bake the bread - Brush olive oil lightly over one side of bread and sprinkle lightly with kosher salt and freshly ground black pepper. Bake until until lightly browned.
  2. Prepare the Capers - Fry the capers in a small skillet until lightly browned.
  3. Mix goat cheese and heavy - Until smooth and creamy.
  4. Assemble bruschetta - Slice the baguette diagonally into ½ inch slices, place goat cheese onto crostini; add red peppers, capers and lemon zest.
Easy Bruschetta with Goat Cheese Recipe

Goat Cheese Bruschetta Tips

Serve immediately - Bruschetta is best enjoyed fresh! Assemble and serve it immediately after topping the toasted bread with the goat cheese and other ingredients.

Use high-quality ingredients - Fresh goat cheese, herbs and lemons and high quality olive oil will enhance the taste and overall quality.

Easy Goat Cheese Appetizer

Goat Cheese Bruschetta Optional Ingredients

If you're looking for a creative twist or addition to your Goat Cheese Bruschetta, here are few ideas. Keep in mind, any adjustments may alter the flavor and texture for better or worse!

Carnivore bruschetta - Adds some protein to your bruschetta with thinly sliced prosciutto or roast beef, bacon crumbles, grilled chicken, salami, pancetta or chorizo.

Underwater edibles - If you enjoy seafood try adding grilled shrimp, smoked salmon, crab meat, fresh or canned tuna, tinned fish such as anchovies or seared scallops.

Vegetarian additions - Add a burst of healthiness with sliced cherry tomatoes, caramelized onions, sliced avocado, arugula or baby spinach, sliced strawberries, grilled zucchini or eggplant, or sliced fig.

Spices and herbs - Enhance the flavor profile with fresh basil leaves, chives or rosemary, roasted garlic, smoked paprika or dried herbs like oregano, thyme, or Italian seasoning.

Bring the heat - If you enjoy a bit of heat, sprinkle some crushed red pepper flakes or add thinly sliced jalapeño peppers.

Switch up the cheese - A few goat cheese substitutes with a similar texture and flavor profile include feta, cream cheese, ricotta, Boursin and quark cheese.

Dress it up - Drizzle a touch of balsamic glaze for added depth and sweetness. Add some pesto.

Whipped Goat Cheese - If desired you can flavor the goat cheese with ingredients such as herbs (thyme, oregano, basil, parsley, rosemary, chives, or dill), spices (salt, black pepper), olive oil, garlic, lemon juice, or honey. Simply mix the goat cheese with the flavorings.

I also have this delicious bruschetta recipe with Peaches, Lemon Ricotta and Honey.

Roasted Red Pepper Goat Cheese Bruschetta Recipe

Roasted Red Pepper Goat Cheese Bruschetta

Yield: 4-6 Servings
Prep Time: 15 minutes
Cook Time: 15 minutes
Total Time: 30 minutes

Roasted Red Pepper Goat Cheese Bruschetta with fried capers is a flavorful and tangy appetizer that combines the smoky sweetness of roasted peppers, the creamy richness of goat cheese, and the briny pop of capers, all served on toasted bread for a delightful bite.

Ingredients

  • 1 baguette, sliced on the bias
  • Extra-virgin olive oil
  • Kosher salt and freshly ground black pepper
  • 5 oz. log goat cheese
  • ½ cup heavy cream
  • ½ cup diced roasted red peppers
  • ¼ cup vegetable or canola oil
  • ½ capers
  • Lemon zest

Instructions

    1. Preheat oven to 350°F.
    2. Brush olive oil lightly over one side of bread. Sprinkle lightly with kosher salt and freshly ground black pepper. Bake until lightly browned, about 15 minutes or so.
    3. Meanwhile, heat vegetable oil in a small skillet over med-high heat until shimmering. Pat capers dry with paper towels, add to skillet (they should be just covered with oil) and fry until lightly browned and they open like flowers, about 1-2 minutes. Drain on paper towels.
    4. Mix goat cheese and heavy cream together until smooth and creamy.
    5. Assemble bruschetta: Slice the baguette diagonally into ½ inch slices, place a tablespoon of goat cheese onto crostini; add red peppers, capers and lemon zest.
Nutrition Information:
Yield: 6 Serving Size: 1
Amount Per Serving: Calories: 333Total Fat: 18gSaturated Fat: 9gTrans Fat: 0gUnsaturated Fat: 8gCholesterol: 33mgSodium: 508mgCarbohydrates: 32gFiber: 2gSugar: 4gProtein: 11g

This data was provided and calculated by Nutritionix.

© Kristy Bernardo
Cuisine: Italian / Category: Appetizers
Roasted Red Pepper Goat Cheese Bruschetta

Try these Goat Cheese Appetizers next!

  • Crostini with Goat Cheese, Slow-roasted Tomatoes & Balsamic Syrup
  • Whipped Goat Cheese Appetizer with Pepper and Honey
  • Quinoa Stuffed Bell Peppers with Goat Cheese
  • Cracked Pepper and Goat Cheese Zucchini Roll-Ups
  • Baked Goat Cheese

Affogato Recipe - Italian Dessert

June 7, 2023 by Kristy Bernardo Leave a Comment

Homemade Affogato Recipe with Ice Cream and Coffee

Affogato is an Italian dessert that's perfect for coffee lovers! It's incredibly simple to make - just ice cream and coffee or espresso.

My love for affogato runs long and deep. It's a dessert that is seemingly too simple to possibly deserve the strong devotion it has from food-lovers everywhere.

And yet, affogato does just that.

It's the first spoonful of cold ice cream with still-hot espresso, down to the last bits, when all that's left is luscious coffee-cream that just begs to be poured directly into your mouth so as not to waste a drop.

All of this from just two ingredients: ice cream and espresso.

Homemade Affogato Recipe with Ice Cream and Coffee

What is affogato?

Authentic Affogato is a delicious Italian dessert that consists of a combination of espresso and gelato. It is traditionally made by pouring a shot of hot, freshly brewed espresso over a scoop of high-quality vanilla gelato. pouring a shot of hot, freshly brewed espresso over a scoop of high-quality vanilla gelato. To preserve the chill of the ice cream, affogato is typically served in a chilled glass or bowl.

In American versions of affogato, it is common to substitute gelato with ice cream and espresso with strong coffee, aka affogato coffee. There are also numerous creative affogato variations that build upon the simplicity of the original two ingredients.

It's the perfect ending to an Italian-themed meal. We usually start with arancini rice balls, then seafood mac and cheese as the main course, and you already know the dessert!

What Does affogato mean?

The Italian meaning for the word affogato is "drowned" or "drowned in." The dessert is therefore aptly named since the ice cream or gelato is "drowning" in espresso.

Easy Affogato Dessert Recipe

Affogato Ingredients

The Italians know how to keep things simple. Affogato is no different. Use high-quality ingredients without any fluff. Your taste buds will thank you for it.

  • Vanilla ice cream or gelato: Vanilla gelato or ice cream offers a smooth and velvety texture to this dessert.
  • Espresso or very strong coffee: The espresso infuses the dessert and provides a robust and aromatic foundation that intertwines with the creamy gelato.

How to Make Affogato Coffee

  1. First, be sure to chill your glass and make sure your ice cream is very cold. You don't want the hot espresso to drown your ice cream too quickly.
  2. Don't use too much espresso. The ratio of ice cream to espresso should roughly be one large scoop of vanilla ice cream to an ounce of espresso or strong coffee.
  3. Just as you want your ice cream to be very cold, be sure your espresso is very hot. Make it immediately before pouring over the ice cream or gelato for the best results.
Best Affogato Coffee Recipe

Affogato Variations

Many creative variations have emerged, offering exciting flavor combinations and unique twists. Here are a few optional ingredients:

  • Flavor-infused Gelato/Ice Cream: Instead of vanilla, you can use different flavors of gelato or ice cream such as chocolate, salted caramel, hazelnut, cookie dough, dulce de leche, or fruit flavors. Spumoni is another unique twist.
  • Affogato Toppings: Elevate this dessert with a range of affogato toppings like crushed cookies, chocolate shavings, a sprinkle of cocoa powder, whipped cream, cotton candy, nuts, toasted coconut, dried fruits or sprinkles.
  • Affogato Sauces: Drizzle it with sauces like chocolate syrup, fudge, caramel, or fruit compotes for added texture and flavor.
  • Affogato Cookies: Serve with Amaretti, Savoiardi (Ladyfingers), Baci di Damaor Biscotti cookies.
  • Liqueur Additions: Consider adding a splash of liqueur such as amaretto, Baileys Irish Cream, or Kahlua.
  • Beer & Liquor: For an adult twist, add Guinness, chocolate stout, vodka, bourbon or whiskey.
  • Unique Coffee Blends: Try using flavored or specialty coffees like mocha, caramel, or nut-infused blends to complement the gelato or ice cream.
  • Add a Base: Crumble cake, cookie, brownie, pie or pudding into the bottom of the glass or dish. Perfect use for leftover desserts.
  • Kids Version: Just substitute the espresso with hot chocolate.
  • Seasonal Inspirations: Add seasonal elements by adding spices like cinnamon, pumpkin spice, or peppermint to your affogato, depending on the time of year. Enjoy a seasonal twist on the classic dessert!
Homemade Affogato Recipe with Ice Cream and Coffee

Affogato Recipe - Italian Dessert

Yield: 1 serving
Prep Time: 5 minutes
Total Time: 5 minutes

Affogato is an Italian dessert that's perfect for coffee lovers! It's incredibly simple to make - just ice cream and coffee or espresso.

Ingredients

  • 1 large scoop vanilla ice cream or gelato, very cold
  • 1 oz freshly-brewed espresso or very strong coffee

Instructions

  1. Chill a glass, small bowl or mug until very cold.
  2. Scoop the ice cream into the chilled glass, then immediately pour the hot espresso on top.
  3. Enjoy with a spoon or slowly sip it.

Notes

Make sure to use high-quality ingredients.

Nutrition Information:
Yield: 1 Serving Size: 1
Amount Per Serving: Calories: 501Total Fat: 29gSaturated Fat: 17gTrans Fat: 0gUnsaturated Fat: 10gCholesterol: 201mgSodium: 220mgCarbohydrates: 52gFiber: 1gSugar: 48gProtein: 9g

This data was provided and calculated by Nutritionix.

© Kristy Bernardo
Cuisine: Italian / Category: Drinks
Affogato Recipe - Italian Dessert

Mini Oreo Cheesecake Bites

June 6, 2023 by Kristy Bernardo Leave a Comment

Individual Oreo Cheesecake Bites

These Mini Oreo Cheesecake Bites use a whole Oreo for the crust - fun to make and sooo delicious! One of our most popular recipes!

Oreo cheesecake was inevitable. Once cookies and cream ice cream became "a thing" it would only be a matter of time before Oreos found their way into classic dessert recipes including cheesecake. Is this a bad thing? Not at all, but if you aren't sure how to get started experiencing this amazing desert, know that it only has seven ingredients and takes only 22 minutes to bake.

Mini Oreo Cheesecake Bites Recipe

Mini Oreo Cheesecake Bites Ingredients

  • Oreos: You'll need a combination of whole Oreos for the bottom layer and Oreo cookie crumbs for the filling.
  • Cream cheese: For the best results, use softened and full-fat cream cheese. You'll need a total of four 8-ounce packages of cream cheese. Use bricks of cream cheese rather than cream cheese spread, which is thinned out with other ingredients.
  • Sugar: Granulated sugar balances out the tanginess of the cream cheese filling.
  • Vanilla extract: Adds a subtle, aromatic sweetness that complements the Oreo and cheesecake filling.
  • Whole eggs: The addition of eggs to the cheesecake filling contributes to a smooth and creamy texture.
  • Sour cream: Adds a touch of tanginess and thins out the filling to create a smoother and creamier texture.

You'll also need standard muffin tins with paper liners. You can use a mini cheesecake pan as well but not everybody has one in their kitchen.

Scroll down to the bottom for the printable recipe card with exact measurements and recipe instructions.

How to Make Oreo Cheesecake Bites

Prepare base - Place 1 whole Oreo cookie in the bottom of each lined cup.
Make Oreo cheesecake filling - Gradually add in all other ingredients and mix.
Add filling & bake - Fill each lined cup almost to the top and bake.
Refrigerate - Refrigerate at least 4 hours or overnight.

Individual Oreo Cheesecake Bites

Oreo Cheesecake Bites Tips & Variations

Room Temperature Everything - Cheesecake baking science dictates that, for best results, all ingredients in this recipe should be at room temperature before you start preparing the dessert.

Mini Oreo Toppings - Decorate the top of your cheesecake with mini Oreo cookies. You can arrange them in patterns, create a border, or even spell out words.

Oreo Whipped Cream - Use store bought whipped cream or whip up some heavy cream and fold in crushed Oreo cookies. Use this Oreo whipped cream as a delicious topping for your Oreo cheesecake bites. A creamy buttercream frosting with Oreos works nicely too!

Oreo Ganache Drizzle - Make a simple ganache by heating heavy cream and pouring it over chopped Oreo cookies and chocolate. Drizzle the ganache over the cheesecake.

Chopping Oreos - This recipe calls for "coarsely chopped" Oreos, but you might want to experiment with different approaches. Try crushed or coarsely ground Oreos only, but a combination of the two might be visually pleasing.

Incorporate More Flavors - Add a bit of extra flavoring by throwing some citrus zest or herbs into the mix. Not all additional flavors are right for a dish like Oreo cheesecake, but if you are feeling adventurous you could try adding some mint or a chocolate-friendly berry flavoring.

Full-Fat Ingredients - Remember the "fat-free" craze of the 90s? You will want to ignore the urge to go low-fat with this recipe. Cheesecake in general requires the fat in the cream cheese, sour cream, and eggs. Without it, your recipe may not turn out with the consistency you expect.

Let It Cool First - To fully enjoy the flavors and texture of Oreo Cheesecake, it's important to let it cool completely before serving. Unlike other desserts like chocolate chip cookies or brownies, which can be enjoyed warm or cold, cheesecake is best when chilled. So, resist the temptation to dive right in and allow your Oreo Cheesecake to cool down to its optimal cold temperature for the ultimate taste experience.

Storage - Store any leftovers in an airtight container in the refrigerator for up to 1 week. You can also freeze the cheesecake for up to 3 months. Simply let it defrost at room temperature for 2-4 hours until it reaches the desired consistency.

Swap Out Oreos - Have fun and experiment with different Oreo flavors like double stuff, birthday cake, toffee crunch, dark chocolate, peanut butter, churro, or fudge.

Seasonal Oreo flavors are fun too:

  • Love Oreo for Valentine's Day
  • Mint St Patrick's Day
  • Peeps, Easter Egg or Hop! Oreo for Easter
  • Firework Oreo for 4th of July or New Years Eve
  • Pumpkin Spice or Apple Cider, Caramel Apple Oreo for Fall
  • Glow-in-the-Dark, Candy Corn, Boo! Oreo for Halloween,
  • Apple Pie Oreo for Thanksgiving
  • Candy Cane or Gingerbread Oreo for Christmas
  • Winter Oreo for Winter, of course

The choices are endless!

Try making these OREO Pops next!

Individual Oreo Cheesecake Bites

Mini Oreo Cheesecake Bites

Yield: 42 cheesecakes
Prep Time: 10 minutes
Cook Time: 22 minutes
Additional Time: 4 hours
Total Time: 4 hours 32 minutes

Mini Oreo cheesecake bites are delicious, but the mini version is easier to eat and serve. Make a double batch and freeze some to enjoy anytime!

Ingredients

  • 42 Oreos, almost 1 whole package, 30 left whole, & 12 coarsely chopped
  • 2 pounds cream cheese, softened (room temperature)
  • 1 cup sugar
  • 1 teaspoon vanilla extract
  • 4 large eggs, room temperature, lightly beaten
  • 1 cup sour cream
  • Pinch of salt

Instructions

  1. Preheat oven to 275 degrees F (yes, that’s the correct temperature!). Line standard muffin tins with paper liners. Place 1 whole cookie in the bottom of each lined cup.
  2. With an electric mixer on medium high speed, beat cream cheese until smooth, scraping down sides of bowl as needed. Gradually add sugar, and beat until combined. Beat in vanilla.
  3. Drizzle in eggs, a bit at a time, beating to combine and scraping down the sides of the bowl as needed. Beat in sour cream and salt. Stir in chopped cookies by hand.
  4. Divide batter evenly among cookie-lined cups, filling each almost to the top. Bake, rotating pan halfway through, until filling is set, about 22 minutes. Transfer to wire racks to cool completely.
  5. Refrigerate at least 4 hours (or up to overnight). Remove from tins just before serving. (Note: If you can’t wait to eat one until they’re chilled – I know I couldn’t – keep in mind that they’ll taste MUCH better after they chill).
Nutrition Information:
Yield: 42 Serving Size: 1
Amount Per Serving: Calories: 165Total Fat: 11gSaturated Fat: 6gTrans Fat: 0gUnsaturated Fat: 3gCholesterol: 43mgSodium: 124mgCarbohydrates: 15gFiber: 0gSugar: 10gProtein: 2g

This data was provided and calculated by Nutritionix.

© Kristy Bernardo
Cuisine: American / Category: Desserts
Mini Oreo Cheesecake Bites

More delicious cheesecake recipes:

  • Mini Cheesecakes with Chocolate-Stuffed Raspberries
  • Sopapilla Cheesecake Bars
  • Mini Pumpkin Cheesecakes with Bourbon Pecan Caramel Sauce
  • Grilled Pineapple No-Bake Cheesecakes
  • Lemon Instant Pot Cheesecake
  • Pumpkin Instant Pot Cheesecake with a Granola Crust

Homemade Lemon Curd

June 6, 2023 by Kristy Bernardo Leave a Comment

Homemade Lemon Curd Recipe

This easy lemon curd recipe requires only 4 ingredients and takes approximately 30 minutes to prepare. The result is a lemon curd that bursts with a refreshing and lively lemon flavor, striking the perfect balance between sweetness and tanginess.

I've also included a recipe to make it in the microwave. It won't be as silky smooth, but it will still be delicious and miles better than store-bought.

Easy Lemon Curd Recipe

Lemon Curd Ingredients

One of the keys to making lemon curd is starting with high-quality ingredients!

  • Salt - Unsalted butter is used to control the amount of salt added to this lemon curd recipe.
  • Lemon Juice & Zest - Use fresh, ripe lemons.. Meyer lemons can be used but the flavor will be slightly sweeter and less acidic.
  • Sugar - Basic granulated sugar works fine.
  • Eggs - The eggs thicken the curd and this recipes uses two whole eggs plus two egg yolks.

Scroll down to the bottom for the printable recipe card with exact measurements and recipe instructions.

How to Make Lemon Curd

  1. Beat: Combine all ingredients except the lemon zest and mix.
  2. Cook Low & Slow: Slowly cook the curd while continuously stirring until the mixture thickens.
  3. Add Lemon Zest & Chill: Remove the curd from the heat, stir in lemon zest and cover and refrigerate for at least 1 hour.

Lemon Curd Tips & Variations

Consider a double boiler to ensure that the lemon curd doesn't burn during the cooking process and don't stop stirring.

To achieve the perfect consistency and ensure the lemon curd is properly cooked without burning, it should be heated low and slow until it is just below the boiling point. The curd is considered ready when it visibly thickens, coats the back of a wooden spoon, and reaches a temperature of approximately 170 ºF.

I highly recommend using a digital thermometer as it is a worthwhile investment when it comes to cooking.

You can make all sorts of curds using different fruits such as orange, lime, grapefruit, mango, cranberry or any berry variety curd.

Creaming the butter and sugar together initially will help prevent the formation of any cooked egg pieces. If you happen to notice any, I recommend straining them out with a fine mesh strainer.

Homemade Lemon Curd Recipe

How to Use Lemon Curd

Lemon curd is a versatile ingredient that can be used in many ways including as a topping, filling, layer or in a recipe. Here are some ideas for using lemon curd:

  1. Create a tasty lemon curd cheesecake.
  2. Make lemon curd bars.
  3. Fill tart shells with lemon curd and top with fresh berries or a dusting of powdered sugar.
  4. Mix lemon curd into whipped cream or cream cheese for a creamy frosting.
  5. Dollop onto angel food cake, shortcake or pound cake.
  6. Use as a filling for cookies, cakes, cream puffs, or even donut holes.
  7. Bake into flaky pastries.
  8. Create lemon curd tarts or try this raspberry lemon tart with a pecan crust.
  9. Heap curd in spoonfuls on top of ice cream or sorbet.
  10. Topping for a cheesecake or pavlova.
  11. Add as a dip on a dessert charcuterie board.
  12. Create a lemon curd smoothie by blending it with yogurt, ice, and your favorite fruits. A milkshake would be a refreshing treat too.
  13. Spread on pancakes, waffles or French toast or use as crepes filling.
  14. Use anywhere you use jam and butter such as toast, bagels, croissants, crumpets, and muffins.
  15. Dollop on top of biscuits or scones.
  16. Make a delicious lemon curd pie or lemon meringue pie.
  17. Whip up a batch of lemon curd cookies or macarons.
  18. Swirl curd into yogurt, parfait, or oatmeal.
  19. Fruit salad "sauce."
  20. Craft a cocktail.
  21. Serve as a side dish with a main meal such as roasted chicken.
  22. Enjoy it right out of the jar or freeze first.

Flavors I like with lemon curd: Berries, lemon, cheesecake, cream cheese, whipped cream, granola, vanilla, white chocolate, coconut, almonds, ginger, lavender, cinnamon, cardamom, mint, basil, rosemary and thyme.

If you need a fantastic recipe for your Lemon Curd, try this Lemon Tiramisu. It's one of the only reasons I make this easy lemon curd recipe in the first place!

Homemade Lemon Curd Recipe

Homemade Lemon Curd

Yield: 1 - 1.5 cups
Prep Time: 15 minutes
Cook Time: 15 minutes
Additional Time: 1 hour
Total Time: 1 hour 30 minutes

This lemon curd's texture is smooth and creamy, making it a versatile addition for cake fillings, tarts, scones, and more. Get ready to indulge in the sweet, tart goodness of this lemon curd!

Ingredients

Homemade Lemon Curd Ingredients

  • 3 oz. (6 Tbs.) unsalted butter, softened at room temperature
  • 1 cup sugar
  • 2 large eggs (egg white + egg yolk)
  • 2 large egg yolks
  • ⅔ cup fresh lemon juice
  • 1 tsp. grated lemon zest

Easy Microwave Lemon Curd Ingredients

  • 3 tablespoons lemon zest
  • ½ cup fresh lemon juice, strained to remove any pulp (2 to 4 lemons)
  • 1 ½ cups sugar
  • 8 tablespoons butter, softened
  • 3 eggs, lightly beaten
  • 2 egg yolks, lightly beaten (together with the whole eggs)

Instructions

Homemade Lemon Curd

  1. In a large bowl, beat the butter and sugar with an electric mixer, about 2 min. Slowly add the eggs and yolks. Beat for 1 min. Mix in the lemon juice. The mixture will look curdled, but it will smooth out as it cooks.
  2. In a medium, heavy-based saucepan or double boiler, cook the mixture over low heat until it looks smooth. (The curdled appearance disappears as the butter in the mixture melts.) Increase the heat to medium and cook, stirring constantly, until the mixture thickens, about 15 minutes. It should leave a path on the back of a spoon and will read 170°F on a thermometer. Don’t let the mixture boil.
  3. Remove the curd from the heat; stir in the lemon zest. Transfer the curd to a bowl. Press plastic wrap on the surface of the lemon curd to keep a skin from forming and chill the curd in the refrigerator for at least 1 hour. The curd will thicken further as it cools.

Easy Microwave Lemon Curd

  1. Mix butter with the sugar, lemon zest and lemon juice.   Add the whole eggs and yolks and blend well.
  2. Cover with parchment paper and microwave on high for 3 minutes, stirring well after each minute.  Continue until mixture thickens and coats the spoon.  You might need more or less time depending on your microwave.
  3. Cover and refrigerate at least an hour.

Notes

Covered tightly, it will keep in the refrigerator for up to a week and in the freezer for 3-5 months.

Nutrition Information:
Yield: 6 Serving Size: 1
Amount Per Serving: Calories: 243Total Fat: 10gSaturated Fat: 5gTrans Fat: 0gUnsaturated Fat: 4gCholesterol: 170mgSodium: 95mgCarbohydrates: 36gFiber: 0gSugar: 34gProtein: 5g

This data was provided and calculated by Nutritionix.

© Kristy Bernardo
Cuisine: American / Category: Desserts
Homemade Lemon Curd

How To Smoke Meat Without A Smoker

June 6, 2023 by Monique McArthur Leave a Comment

How To Smoke Meat Without A Smoker

Most people believe they have to forgo the joy of smoking meat at home if they don't own a smoker or if the weather isn't cooperating, but that couldn't be further from the truth. Even in the confines of a tiny apartment kitchen, there are alternative options that can still deliver that earthy, smoky punch you desire.

You can smoke meat at home - ribs, brisket, chicken wings-anything you desire. You just need to learn how to smoke meat without a smoker including some incredibly easy ways to infuse your dishes with a touch of irresistible smokiness!

How To Smoke Meat Without A Smoker

The Charcoal Grill Method

A basic charcoal grill paired with wood chips or chunks is one of the best alternatives to smoking meats without a smoker. Like a smoker, this method involves creating a fire and incorporating smoking wood to infuse complex flavors into the meat.

How to smoke meat without a smoker using a charcoal grill

  1. Prepare the coals: There are two ways to do this. Option one is to light a full chimney of charcoal and stack it on either side of the grill, leaving the center empty. Place a foil pan filled with hot water in the center space. For option two, arrange unlit charcoal in two rows around three-fourths of the edge of the grill, creating a "C" shape. Light 6-7 coals in the chimney, place them at one end of the "C," and position a water pan in the center. Whichever option you choose, nestle wood chunks among the charcoal.
  2. Wait for the smoke: Cover the grill with the lid and wait for the smoke. The goal is to achieve a consistent stream of blue smoke, indicating that the coals are hot and burning evenly.
  3. Transfer the meat to the grates: Once the grill temperature reaches 225-250 degrees Fahrenheit, place the meat on the grates directly above the water pan. Close the lid and allow the meat to smoke. If the temperature exceeds 250 degrees Fahrenheit, close the vents slightly; if it falls below 225 degrees, open the vents to increase airflow.
  4. Maintain the fire: This is crucial when smoking larger cuts, such as brisket and ribs, which require hours of cooking. You'll need to replenish the coals periodically. Add unlit coals alongside the lit ones, allowing them to ignite gradually. If you need to increase the temperature quickly, use tongs to add lit coals. Additionally, you may want to add more wood chunks to maintain a steady supply of smoke throughout the cooking process.

Always soak wood chips or chunks in water for an hour before using them.

The Gas Grill Method

The second-best method is using a gas grill. Gas grills are not designed for smoking meats due to the gaps around the lid and burners. However, it is still possible to achieve great results, and temperature maintenance is much simpler. Like the charcoal grill method, the focus is on setting up the grill for indirect heat and generating smoke using wood.

How to smoke meat without a smoker using a gas grill

  1. Create a two-zone setup: The method for achieving this depends on the number of burners on your gas grill. The number of burners is a crucial factor to consider when smoking meats without a smoker using a gas grill. Here's how you should adjust the burners based on the number of burners on your grill:
    • Turn on one burner for a two-burner grill and leave the other off.
    • Keep the center burner off and turn on the left and right for a three-burner grill.
    • Turn on the outer two burners on a four-burner grill and leave the two center burners off.
  2. Monitor grill temperature: As mentioned, you need to maintain a temperature between 225-250 degrees Fahrenheit. Adjust the burners as necessary to achieve and maintain this temperature range.
  3. Add wood: There are two options for adding wood. You can place wood chips in a smoker box and position the box in the hot zone of the grill, or wrap wood chips in a foil pouch, poke holes in the pouch, and place it in the hot zone. If you prefer wood chunks, place them over the flavorizer bars or heat plates, ensuring they do not come into direct contact with the flames.
  4. Cook: Transfer the meat to the grates in the indirect heat zone and cook until the desired internal temperature is reached. Monitor the temperature throughout the cooking process.

Oven Method

Now that you know how to smoke meat without a smoker using two of the most popular outdoor cooking methods, let's explore how to achieve similar results indoors using the oven. Before we delve into the process, ensure you have a deep roasting pan fitted with a roasting rack, heavy-duty foil, and smoking wood.

How to smoke meat in the oven

  1. Soak the wood chips: It's essential to soak the wood chips for an hour. This safety measure ensures a smooth smoking process.
  2. Prepare the oven: Position an oven rack directly on the floor of your oven and preheat it to 275 degrees Fahrenheit.
  3. Set up the pan: Drain the soaked wood chips and spread them in the bottom of the roasting pan, reserving about ½ cup of the soaking water. Pour half of the reserved water over the wood chips. Place the roasting rack inside the pan and arrange the meat you intend to smoke on the rack. Tent the pan with heavy-duty foil, ensuring a tight seal to retain the smoke.
  4. Cook: Place the pan into the oven and smoke the meat until it reaches the desired internal temperature. For foods like ribs and large cuts of beef, this process will typically take approximately 3 hours. Check the food periodically and reseal the pan as needed. You may also need to add a bit more of the reserved water during the cooking process.

Now that you know how to smoke meat without a smoker, which method will you choose? All of them produce fantastic results, so enjoy the delicious smoky flavors!

Smoking Gun Smoke Infuser

A smoking gun is a great tool for imparting a smoky flavor to your dishes without the need of a smoker. These compact handheld devices allow you to infuse smoke into various foods and cocktails and beverages too! These smoking guns generate smoke from wood chips, herbs, and spices, and release the aromatic smoke through a hose, allowing you to precisely control the amount and intensity of smoke in your culinary creations.

It's important to note that while smoking guns provide convenience and versatility, they excel in imparting a subtle touch of smokiness to smaller portions or individual ingredients. However, if you're seeking a deep and intense infusion of smoke flavor, a traditional smoking method is recommended. Smoking guns may not replicate the full-bodied smoky experience that other smoking methods offer.

Best way to smoke food using a smoking gun

  1. Begin by cooking your meat to your desired level of doneness. Then, place the cooked meat in a plastic bag or a pan that can be covered with plastic wrap.
  2. Load your desired wood chips into the smoking gun and activate the fan to draw in fresh air from the outside. Switch on the heating element of the smoking gun, which will heat up the wood chips and produce aromatic smoke.
  3. Insert the end of the smoking gun's hose into the plastic bag or tightly cover the pan with plastic wrap, ensuring a secure seal. Turn on the smoking gun and allow it to infuse the food with a delightful smoky flavor for a duration of 3 to 5 minutes.

Please note that the longer you keep the smoking gun running, the more it will intensify the smoky taste in your food.

Seasonings & Ingredients For a Smoky Flavor

Another method to elevate the flavor of your food is by incorporating smoky ingredients. This approach is ideal for those seeking a convenient way to achieve a delicious smoky taste without have to fire up the smoker. Most smoked infused foods and spices will work including smoked paprika, chipotle peppers, liquid smoke or smoked bourbon. Here is a complete list of Ingredients to Use for a Smoky Flavor including the best recipes to utilize each ingredient.

More Ways to Smoke Food without a Smoker

  • Harness the power of a kettle smoker for use on an indoor stove or outdoor grill.
  • Infuse the smoky goodness with an indoor electric smoker and slow cooker or countertop digital smoker that allows you to cold smoke, hot smoke, and combine both cold/hot smoke methods.
  • Use a Smoke Box on your grill to add a smoky flavor.
  • Smoke food on a plank, perfect for seafood and commonly used for salmon.
  • Smoke year round by splurging on a commercial grade indoor smoker.
  • Be on the lookout for the release of the Arden Indoor Smoker featuring a "smoke-elimination system" that ensures the smoke stays inside the smoker. We can't wait to try!

Types of Smoking Wood

Before you dive into smoking meats without a smoker, let's discuss the types of smoking wood. It's important to consider the wood you want to use and purchase it before proceeding with any of the methods.

  • Apple - Applewood is light, fruity, and subtly sweet. It works best with poultry, seafood, and pork.
  • Cherry - This one is a bit more intense than applewood but still fruity and sweet. In addition to poultry, seafood, and pork, cherry works nicely with beef. It also darkens the surface of light-colored meats. Depending on the duration of the cook, this color ranges from a light rosy hue to a darker burgundy.
  • Maple - Maple wood is mild and sweet. Use it to smoke poultry and seafood as well as vegetables and cheeses.
  • Oak - Although oak has a more robust flavor than the woods listed previously, it falls under the medium category. Moreover, oak is versatile, so it goes great with poultry, pork, and beef.
  • Pecan - Pecan wood joins oak in the medium category. Like oak, it goes well with poultry, pork, and beef. The flavor is nutty and slightly sweet.
  • Hickory - Hickory imparts a smoky, bacon-like flavor. It is more intense than the other smoking woods, so hickory is best suited for beef and pork. Moreover, it darkens the color of the meat.
  • Mesquite - Mesquite wood is intensely smoky with subtle notes of sweetness. In fact, it is one of the most intense woods, making it ideal for adding big smoke flavor to large cuts of beef or pork.

Other types of smoker woods:

Acacia, Alder, Almond, Apricot, Ash, Bay, Beech, Birch, Butternut, Cedar, Chestnut, Coconut husk, Cottonwood, Crabapple, Fig, Grapefruit, Grapevine, Guava, Hackberry, Kiawe, Lemon, Lilac, Madrone, Manzanita, Mulberry, Nectarine, Olive, Orange, Peach, Pear, Persimmon, Pimento, Plum, Sassafras, Walnut, Willow

Try these smoker recipes with your favorite smoking method!

Basil Pesto Recipe (and 25 unique ways to use it)

June 5, 2023 by Kristy Bernardo Leave a Comment

Easy Basil Pesto Recipe

Basil Pesto is easy to prepare and a wonderful way to use up fresh summer basil. Below you'll find an easy pesto recipe plus unique ways to use it beyond pasta.

When a recipe or restaurant menu mentions "pesto," it is widely understood that it refers to the classic and renowned variation known as Basil Pesto, also referred to as Genoese pesto or Pesto alla Genovese. This delightful combination of fresh basil leaves, pine nuts, Parmesan cheese, garlic, and olive oil is the epitome of traditional pesto!

Easy Basil Pesto Recipe

Why You'll Love This Basil Pesto Recipe

  • If you haven't made basil pesto from scratch, let me just tell you right now that it just doesn't compare to what you buy at the supermarket. I've used the jarred stuff in a pinch and it's really not too bad but it's not fresh homemade pesto.
  • Basil pesto is one of those things that is easy to make and great on the taste buds but - aside from pasta - a lot of folks just don't know what to do with it. And there are so many wonderful ways in which to use it!
  • In the middle of summer when you can get loads of fresh basil just about anywhere and it takes just minutes to whirl it in your food processor with just a few other ingredients...there's really no reason not to make it simply because nothing else can compare. It just tastes FRESH.
How to make Basil Pesto

Basil Pesto Ingredients

This is an authentic basil pesto recipe however different types of pesto incorporate ingredients like spinach, arugula, salami, walnuts, almonds, tomatoes or sun dried tomatoes, for added flavor and texture.

Basil: Fresh basil adds a fragrant and refreshing touch to the basil pesto sauce.
Pine nuts: The creamy and nutty element that compliments the rest of the ingredients.
Garlic: Provides a savory and zingy notes.
Extra-virgin olive oil (EEVO): The base that also contributes its own flavors of grassiness, bitterness, and a subtle peppery finish.
Kosher salt and black pepper: Elevates and enhances the other ingredients.
Parmesan: Parmigiano-Reggiano adds a savory and umami element to the basil pesto sauce.

Scroll down to the bottom for the printable recipe card with exact measurements and recipe instructions.

How to Make Basil Pesto

This easy basil pesto recipe takes just five minutes to prepare!

  1. Add all the ingredients except parmesan to a food processor or high-powered blender. Blend on high until it's very smooth.
  2. Add the parmesan and blend it again until it's smooth.
Basil Pesto Sauce Recipe

Difference Between Pistou And Pesto

Pistou and pesto are two distinct sauces used in Mediterranean cuisine where pistou is often used as a finishing touch or stirred into dishes, while pesto is a versatile sauce used in various recipes like pasta dishes and spreads.

Pistou has origins from the Provence region of France and is made with fresh basil, garlic, and olive oil. While Pesto hails from Italy's Liguria region and is typically made with the same base ingredients while also incorporating additional ingredients such as pine nuts and Parmesan cheese.

25 Unique Ideas for Using Pesto

As promised, here's a list of 25 delicious basil pesto ideas. My favorites are tossing it with hot, roasted or grilled vegetables, adding to a steak or mixing into hot cannellini beans for an easy side dish. Or as a dip for garlic bread!

  1. Mix some into softened butter then use it as a delicious topping for grilled fish or steak.
  2. As a sandwich spread (alone or mixed with mayonnaise) for a flavorful twist.
  3. As a topping for hot, grilled chicken to add an extra layer of flavor.
  4. Add a spoonful to hot soup (especially tomato or minestrone).
  5. Roast or grill vegetables, then toss them with pesto.
  6. Pesto mashed potatoes or mac and cheese! Just stir some in before serving.
  7. Toss it with fresh pasta then top with freshly-grated Parmigiano-Reggiano for a quick and delicious meal.
  8. Use it as a topping for baked potatoes for burst of freshness and zing.!
  9. Mix some into plain greek yogurt or sour cream for an easy and tasty dip.
  10. Use it as a base for pizza instead of traditional pizza sauce. Finish it with fresh tomatoes and mozzarella.
  11. Slice an avocado and toss it with a tablespoon of pesto for an easy snack.
  12. Toss it with hot cannellini beans for an easy side dish.
  13. Use it as a sauce for seared scallops.
  14. Or as a dip for hot jumbo shrimp!
  15. Spread some on puff pastry, add sliced tomatoes, then bake it for an easy tart.
  16. Slather it on fresh corn on the cob for a unique twist.
  17. OR...remove the kernels from freshly cooked corn and toss it with pesto for an easy side dish.
  18. Roast some fingerling potatoes, gently crush then spoon pesto over the top.
  19. Spread softened goat cheese in a shallow dish and top it with pesto. Serve with crackers.
  20. It makes a fantastic burger topping! You can even mix it in with the burger meat before grilling.
  21. Mix it with mayonnaise and use that for your next potato salad.
  22. Stir it into hummus and serve it with crunchy vegetables and pita chips.
  23. Make pesto croutons: toss stale bread cubes with olive oil, then a few tablespoons of pesto. Bake at 350°F for about 20 minutes.
  24. Mix some with a small amount of heated heavy cream and pour it over pasta or rice. This is amazing over cauliflower rice!
  25. Stir some into whisked eggs before cooking or use a topping for your eggs once they're finished!

If you liked this post, you might also enjoy 20 things to do with a Balsamic Reduction and 25 things to do with Roasted Garlic.

basil pesto can be turned into a fast, delicious dinner or appetizer in no time! Includes recipe plus downloadable pdf for 25 things to make with pesto! | www.thewickednoodle.com | @thewickednoodle

Basil Pesto Recipe

Yield: 2 cups
Prep Time: 5 minutes
Total Time: 5 minutes

Basil Pesto is easy to prepare and a wonderful way to use up fresh summer basil.

Ingredients

  • 2 cups basil (lightly packed)
  • ⅓ cup pine nuts
  • 2 cloves garlic
  • ⅔ cup high quality extra-virgin olive oil
  • ½ teaspoon kosher salt (more to taste)
  • ½ teaspoon freshly ground black pepper
  • ¾ cup shredded parmesan

Instructions

    1. Add all the ingredients except parmesan to a food processor or high-powered blender. Blend on high until it's very smooth.
    2. Add the parmesan and blend it again until it's smooth.
Nutrition Information:
Yield: 8 Serving Size: 1
Amount Per Serving: Calories: 231Total Fat: 24gSaturated Fat: 4gTrans Fat: 0gUnsaturated Fat: 19gCholesterol: 5mgSodium: 260mgCarbohydrates: 1gFiber: 0gSugar: 0gProtein: 4g

This data was provided and calculated by Nutritionix.

© Kristy Bernardo
Cuisine: Italian / Category: Sauces
Basil Pesto Recipe (and 25 unique ways to use it)

Takis Powder Seasoning

June 4, 2023 by Monique McArthur 2 Comments

Takis Powder Seasoning

This homemade Takis powder seasoning is an essential addition to any spice rack for those who appreciate a touch of spiciness in their creations.

My son is a huge fan of Takis, not only the spicy tortilla chips but also the Takis Fuego Sunflower seeds. He also enjoys spicy combinations like spicy ramen and mac and cheese.

When he recently asked me if there was such a thing as Takis Mac and Cheese, I immediately went on a search and found out that there is no pre-made Takis Mac and Cheese available, nor surprisingly can you buy Takis powder separately. That's when I decided to create my own homemade Taki Seasoning recipe. I really hope you enjoy it as much as my son does!

Takis Powder Seasoning

What Is Takis Seasoning Made of?

Takis offers a wide range of flavors, such as Takis Original, Takis Fuego, Takis Blue Heat, plus seasonal and limited edition flavors. The purple bags of Takis Fuego are widely believed to be the most popular flavor and are described as having "an intense flavor combination of hot chili pepper and lime."

While the specific ingredients in Takis powder may differ across flavors, here are the ingredients for Takis Fuego, as well as the rolled tortilla chip ingredients:

Takis Fuego Ingredients: Salt, maltodextrin, citric acid, sugar, monosodium glutamate (msg), hydrolyzed soy protein, onion powder, yeast extract, red 40 lake, yellow 6 lake, natural and artificial flavors, sodium bicarbonate, soybean oil, chili pepper (chile), disodium inosinate, disodium guanylate, tbhq (antioxidant)

Takis Rolled Tortilla Chips Ingredients: Corn flour (processed with lime), vegetable oil (palm and/or soybean and/or canola oil)

Where To Buy Takis Powder

Although Barcel, the producer of Takis, does not officially sell Takis Powder, there are several online companies that strive to create their own copycat Takis powder including Chilito Loco. Personally, I prefer this homemade version!

Homemade Takis Seasoning Ingredients

  • Lemon Lime or Lemonade Kool-Aid - Kool-Aid mimics the authentic citrus flavors and provides the sugary sweetness noted in the original ingredient list.
  • Sea Salt & MSG - Coarse sea salt is suitable for this recipe, but if you want to enhance the umami flavor to replicate the original taste, you can also incorporate MSG (monosodium glutamate).
  • Chili powder - Chili powder is typically made from dried chili peppers, combined with other complementary spices and herbs.
  • Onion powder - Like the original recipe, onion powder adds a savory and slightly sweet taste that complements the spiciness and tanginess of the other seasonings.
  • Maltodextrin (optional) - With its mild and neutral taste, Maltodextrin acts as a filler, allowing you to customize the seasoning to your liking without overpowering the flavors. Feel free to experiment with the amount of Maltodextrin based on your personal taste preferences and spice tolerance.
  • Red food color powder (optional) - To achieve a vibrant red color reminiscent of Takis Fuego, you can follow their approach and incorporate red color #40 or a comparable red color powder.

Scroll down to the bottom for the printable recipe card with exact measurements and recipe instructions.

How To Make Takis Powder Seasoning

  1. Combine Ingredients: In a small bowl, combine all the ingredients: Kool-Aid, chili powder, onion powder, salt, and MSG (if using).
  2. Mix: You can use a whisk or simply stir all the ingredients with a spoon, until well combined.

For seasoning dry foods, enhance the binding of the seasoning by squeezing fresh lime juice. A convenient method is to sprinkle the lime juice on top, place the food and seasoning in a Ziploc bag, and give it a good shake. This ensures even distribution and a flavorful outcome.

To achieve a vibrant red color reminiscent of Takis Fuego, you can follow their approach and incorporate red color #40 or a comparable red color powder.

Takis Seasoning Blend

How To Make Blue Takis Powder

Making Blue Heat Taki Powder is as simple as adding blue food coloring and adjusting the amount and combination of chili powder used. Takis Blue Heat share the same ingredients as Takis Fuego, with the only distinction being the use of blue food coloring (Blue 1 Lake) instead of red and yellow coloring used in Takis Fuego.

While opinions may vary regarding spice levels and taste preferences, the likely discrepancy, besides the color, lies in the specific quantities and blend of chili powders used.

Uses for Taki Seasoning

The possibilities for using homemade Takis seasoning are endless including making healthy Takis alternative snacks! Here are some delicious ways to add this spicy, tangy, and savory flavor. For optimal flavor, I suggest gradually adding Takis dust to your dish, adjusting according to your personal preference.

Seasoning for Chips: Tortilla chips are the most obvious use for Taki seasoning, while adding on potato chips transforms ordinary chips into a flavorful snack.

Snack Mix Addition: Add a generous dusting of Takis seasoning to popcorn, pretzels, crackers, seeds, nuts, or cereal to create a spicy and crunchy snack mix.

Seasoning for Meat and Seafood: Use the seasoning as a rub or coating for chicken, steak, chicken wings, shrimp, or fish to add a spicy and flavorful coating.

Dips, Dressings, Sauces, Marinades: Add a unique twist to your favorite dips, dressings, sauces, and marinades for a spicy and tangy flavor.

Sandwich or Wrap Enhancer: Add a sprinkle your sandwiches or wraps for an extra burst of flavor.

Roasted Vegetable Seasoning: Add a touch of magic Takis dust on vegetables like Mexican street corn, asparagus, okra, sweet potatoes, Brussels sprouts, or cauliflower adds a delicious kick.

Fruit Enhancer: Create a sweet and spicy healthy Takis snack by sprinkling the Takis powder on mango, pineapple, dragon fruit, avocado, watermelon, fruit cups, apple chips or your favorite fruit.

Salad Topper: Dash a small amount over your Mexican or Tex-Mex inspired salads.

Mexican Fiesta: Spice up your favorite Mexican dish by sprinkling on tacos, nachos, taquitos, burritos, tostadas and more.

Drink Liner: Rim your glasses with Takis seasoning for a must-try twist on Bloody Marys, Micheladas, margaritas, or frozen cocktails.

More Seasoning Ideas: The possibilities are truly limitless! Here are a few more ideas to get you inspired: Eggs, yogurt, grilled cheese, mac n cheese, rice, beans, pasta, mashed potatoes, French fries, ceviche, ice cream, and candy.

For those seeking a flavor profile reminiscent of Takis, but with its own distinct twist, This Tajín seasoning recipe is a great option. Tajín features a delightful blend of chili peppers, lime, and salt, resulting in a tangy, spicy, and subtly sour taste sensation. I also have this Copycat Flamin Hot Cheetos Seasoning.

Takis Powder Seasoning

Takis Powder Seasoning

Yield: 8 teaspoons
Prep Time: 5 minutes
Total Time: 5 minutes

This homemade Takis powder seasoning is an essential addition to any spice rack for those who appreciate a touch of spiciness in their creations.

Ingredients

  • 1 packet of Lemon Lime or Lemonade Kool-Aid
  • 4 teaspoon chili powder
  • 2 tsps sea salt or 1 teaspoon sea salt & 2 teaspoon MSG
  • ½ teaspoon onion powder

Instructions

    1. In a small bowl, combine all the ingredients: Kool-Aid, chili powder, onion powder, salt, and MSG (if using).
    2. Whisk or simply stir all the ingredients with a spoon, until well combined.

Notes

Substitute 1 teaspoon chili powder with cayenne pepper, if desired for a spicier kick.

To achieve a vibrant red color reminiscent of Takis Fuego, you can follow their approach and incorporate red color #40 or a comparable red color powder.

Nutrition Information:
Yield: 8 Serving Size: 1
Amount Per Serving: Calories: 22Total Fat: 0gSaturated Fat: 0gTrans Fat: 0gUnsaturated Fat: 0gCholesterol: 0mgSodium: 912mgCarbohydrates: 6gFiber: 1gSugar: 4gProtein: 0g

This data was provided and calculated by Nutritionix.

© Monique McArthur
Cuisine: Mexican / Category: Seasonings
Takis Powder Seasoning

Easy Shrimp Ceviche

June 1, 2023 by Monique McArthur Leave a Comment

Easy Shrimp Ceviche

A quick and easy shrimp ceviche recipe that is made with pre-cooked shrimp instead of raw shrimp, avocado and marinated in Pico de Gallo.

Shrimp Ceviche

Why You'll Love This Recipe

Perfect Last Minute Appetizer - By using cooked shrimp, and store bought pico de gallo, or make your own if you prefer, this recipe comes together in less than 10 minutes. Simply cut the avocado and combine all three ingredients and you're ready to serve!

Fresh and Refreshing - Shrimp ceviche is a light and refreshing appetizer, perfect on a warm summer day, at a holiday cocktail party or as a healthy snack.

Beautiful Presentation - With its vibrant colors and fresh ingredients, this appetizer will instantly stand out at any party or summer BBQ.

Versatile - The beauty of ceviche is that you can make it any way you like by adjusting the spice level and experimenting with different ingredients like adding red onion, mango or cucumber to enhance the taste and texture.

Shrimp Ceviche Ingredients

  • Cooked Shrimp - By using cooked shrimp you can skip having to "cook" raw shrimp in acidic citrus juices, safer too. Use any shrimp that you prefer including medium already cooked chopped shrimp or whole bay shrimp. Frozen or straight from the seafood market works too.
  • Pico de Gallo - Use store bought pico de gallo or make your own Pico de Gallo. Store bought is perfect when you need a last minute appetizer. Look for fresh pico de gallo at a supermarket, local Mexican restaurant (order to go!) or grocery store.
  • Avocado - This creamy addition really puts this shrimp ceviche over the top.

Scroll down to the bottom for the printable recipe card with exact measurements and recipe instructions.

How To Make Shrimp Ceviche

  1. Chop the avocado and shrimp, unless they are small bay shrimp.
  2. Combine avocado, shrimp and pico gallo in a bowl and refrigerate until ready to serve.
How To Make Shrimp Ceviche

Shrimp Ceviche Tips & Variations

Here are some delicious ways to experiment and customize this ceviche to your liking. Keep in mind, if using store bought pico de gallo some of these ingredients may already be present. The beauty is you can adjust the ceviche ingredients to your taste preference.

Bring the heat - Add finely chopped jalapeño or other chili peppers depending on your spice preference.

Make it crunchy - Diced cucumber or thinly sliced radishes can provide a refreshing crunch and additional freshness to the ceviche.

Sweeten it up - For a touch of sweetness and tropical flavor, add diced mango or pineapple to the ceviche.

Extra flavor - If you enjoy garlic, you can add minced garlic for extra flavor.

Adjust the citrus - Fresh lime juice is a classic ceviche citrus but lemon, orange juices or a combination can produce great results too.

Seafood medley - You can substitute or use a combination of firm white fish, scallops, octopus, lobster or crab meat.

Vegan ceviche - Mushrooms are a common vegan substitute and hearts of palm is a tasty vegan alternative as well.

Additional seasoning - Add salt and pepper to taste and preference.

How To Serve Ceviche

The classic way to serve ceviche is with tortilla chips but there are so many more ways to serve ceviche. Here are a few serving ideas.

  • In a small appetizer cup or shot glasses
  • Scoop with potato chips, toasted bread, rice cakes or crackers
  • Serve in lettuce cups
  • On top of cucumber slices or just dip
  • Mix into guacamole
  • Eat with white, brown, Mexican, cauliflower or cilantro rice
  • Enjoy with beans or quinoa
  • Taco, burrito, or tostada topping
  • As a salad topping or use as a side salad with steaks or sandwiches
  • As a soup garnish
  • As a topping on toast or avocado toast
  • On top of an omelet, perfect for leftovers the next day!

Storing & Making Ahead

Shrimp ceviche is best enjoyed the same day it is prepared but can be stored in the refrigerator for up to 1 day in a covered container.

Shrimp ceviche can be prepared earlier in the day or even the night before. However, if making it ahead, add the avocado right before serving for freshness and to prevent browning.

Try this Imitation Crab Ceviche recipe. It's perfect if you're looking for a ceviche that can be stored longer, up to 3 to 5 days.

Easy Shrimp Ceviche

Easy Shrimp Ceviche

Yield: 8
Prep Time: 10 minutes

A quick and easy shrimp ceviche that is made with pre-cooked shrimp instead of raw shrimp, avocado and marinated in pico de gallo.

Ingredients

  • 2 Avocados, Chopped
  • 1 lb cooked shrimp, chopped
  • 2 cups pico de gallo (16 oz), store bought or make your own
  • Salt and pepper (optional), to taste

Instructions

  1. Chop the avocado and shrimp, unless they are small bay shrimp.
  2. Combine avocado, shrimp and pico gallo in a bowl and refrigerate until ready to serve.

Notes

If making ahead, add the avocado right before serving for freshness and to prevent browning.

Nutrition Information:
Yield: 8 Serving Size: 1
Amount Per Serving: Calories: 162Total Fat: 9gSaturated Fat: 1gTrans Fat: 0gUnsaturated Fat: 6gCholesterol: 120mgSodium: 735mgCarbohydrates: 8gFiber: 4gSugar: 2gProtein: 15g

This data was provided and calculated by Nutritionix.

© Monique McArthur
Cuisine: Seafood / Category: Appetizers
Easy Shrimp Ceviche

Try these Delicious Seafood Recipes Next:

  • Crab Tacos
  • Beer Battered Fish Tacos
  • Ahi Tuna Sashimi
  • Ahi Tuna Steaks
  • Gambas al Ajillo

Strawberry Icebox Cake

May 31, 2023 by Kristy Bernardo

No Bake Strawberry Icebox Cake Recipe

This no bake Strawberry Icebox Cake with Graham Crackers is so easy and delicious you won't believe it. Color the whipped cream to serve at any holiday, too!

No Bake Strawberry Icebox Cake Recipe

It's no secret that I'm a huge fan of the Icebox Cake. What's not to love about how easy it is to assemble just six ingredients in a mere few minutes yet have it turn out something this pretty?

If you've never tried a Strawberry Icebox Cake with Graham Crackers, you're in for a treat. It might sound strange - isn't it just whipped cream, strawberries with graham crackers? Yes, but because it's refrigerated the graham crackers will soften and develop a cake-like texture. It turns out a rather stunning dessert for very little effort (and you know I'm a huge fan of those types of recipes)! You could also use raspberries if you like; I prefer the Strawberry Icebox Cake simply because I always have a strawberry surplus! But make this easy recipe your own - I know you'll enjoy it any way you make it!

Strawberry Icebox Cake Recipe

Strawberry Icebox Cake Ingredients

  • Fresh strawberries - Juicy and vibrant strawberries bring a fresh and naturally sweet flavor to this icebox cake.
  • Whipping cream - The "frosting" that creates the fluffy filling. Cool Whip can be substituted in a pinch.
  • Powdered sugar - The confectioners' sugar sweetens the whipping cream.
  • Graham crackers - I normally use chocolate wafers in my Icebox Cakes but a graham cracker icebox cake goes really well with strawberries.
  • Dark chocolate - The rich, intense, and slightly bitter flavor of dark chocolate pairs wonderfully with the natural sweetness and slight tartness of the strawberries.
  • Whole milk, half & half or cream - Adding warm cream to the dark chocolate will create a smooth, creamy chocolate drizzle.

Scroll down to the bottom for the printable recipe card with exact measurements and recipe instructions.

How to Make Strawberry Icebox Cake

  1. Prepare the Strawberries - Take out a few of the best-looking strawberries and set them aside for the garnish. Hull the remainder of the strawberries and slice each berry into thin slices.
  2. Make the Whipped Cream - Whip the cream and confectioners' sugar until a stiff peak forms.
  3. Layer the Wafer Cookies and Whipped Cream
    • Spread a small spoonful of whipped cream on the bottom of a 9×13 inch baking pan, or a similarly-sized platter.
    • Lay down six graham crackers.
    • Lightly cover the top of the graham crackers with more whipped cream, and then a single layer of strawberries.
    • Repeat three times, until you have four layers of graham crackers.
    • Spread the last of the whipped cream over the top and swirl it lightly with a spoon.
    • Add a few more strawberries and some mint leaves for garnish, if desired.
  4. Prepare chocolate drizzle - Heat the whole milk, half & half or cream until bubbles form around the edges, then pour over the chopped chocolate. Let it stand for a few minutes, then whisk until the mixture is thick and glossy. Drizzle this over the layered dessert with a spoon, or transfer to a squeeze bottle and use that to drizzle.
  5. Refrigerate - Refrigerate for at least four hours or overnight to allow the layers to meld together.
Easy Strawberry Icebox Cake with Graham Crackers

Recipe Variations

Food coloring - Add food coloring to serve at any holiday such as blue for a red, white and blue theme for the 4th of July, Veterans Day or Memorial Day. Pink whipped cream would be perfect for Valentine's Day too!

Mix up the berries - You can easily substitute the strawberries or create a mixed berry version with raspberries, blueberries, cranberries or blackberries.

Try different crackers - Vanilla wafers, (strawberry) shortcake, shortbread cookies, ladyfingers, gingersnaps or animal crackers would all be interesting twists on this recipe.

Choose a topping - Use chocolate syrup for a quick and easy version of chocolate drizzle. Crushed cookies or candy, shaved chocolate, chocolate chips would work too.

Speaking of Icebox Cake variations, try these versions next: Peanut Butter Chocolate Icebox Cake, Chocolate Mint Icebox Cake, Chocolate Raspberry Icebox Cake.

Strawberry Icebox Cake Recipe

Strawberry Icebox Cake

Yield: 10
Prep Time: 15 minutes
Additional Time: 4 hours
Total Time: 4 hours 15 minutes

This no bake Strawberry Icebox Cake with Graham Crackers is so easy and delicious you won’t believe it. Color the whipped cream to serve at any holiday, too!

Ingredients

  • 2 pounds fresh strawberries
  • 4 cups whipping cream
  • ½ cup powdered sugar
  • 24 whole graham crackers
  • 2 ounces dark chocolate, finely chopped
  • ¼ cup whole milk, half & half or cream

Instructions

  1. Take out a few of the best-looking strawberries and set them aside for the garnish. Hull the remainder of the strawberries and slice each berry into thin slices.
  2. Whip the cream and confectioners sugar until it holds stiff peaks.
  3. Spread a small spoonful of whipped cream on the bottom of a 9×13 inch baking pan, or a similarly-sized platter. Lay down six graham crackers. Lightly cover the top of the graham crackers with more whipped cream, and then a single layer of strawberries. Repeat three times, until you have four layers of graham crackers. Spread the last of the whipped cream over the top and swirl it lightly with a spoon. Add a few more strawberries and some mint leaves for garnish, if desired.
  4. Heat the whole milk, half & half or cream until bubbles form around the edges, then pour over the chopped chocolate. Let it stand for a few minutes, then whisk until the mixture is thick and glossy. Drizzle this over the layered dessert with a spoon, or transfer to a squeeze bottle and use that to drizzle.
  5. Refrigerate for at least four hours, or until the crackers have softened completely.
Nutrition Information:
Yield: 10 Serving Size: 1
Amount Per Serving: Calories: 576Total Fat: 42gSaturated Fat: 24gTrans Fat: 1gUnsaturated Fat: 14gCholesterol: 113mgSodium: 198mgCarbohydrates: 47gFiber: 3gSugar: 25gProtein: 6g

This data was provided and calculated by Nutritionix.

© Kristy Bernardo
Cuisine: American / Category: Desserts
Strawberry Icebox Cake

Chocolate Peanut Butter Icebox Cake

May 31, 2023 by Kristy Bernardo Leave a Comment

Chocolate Peanut Butter Icebox Cake Recipe

There is nothing like the ease and indulgence of this Chocolate Peanut Butter Icebox Cake recipe. With just six ingredients, it will become your go-to dessert!

Icebox cakes are just so simple to throw together, so darn tasty and so incredibly versatile. It would be so fast and easy to make even four or five of these cakes - all different flavors - for a party and let everyone choose their favorite flavor to enjoy. They're easy to make into individual cakes; fun to serve in different shapes yet always, always delicious. I'm just not sure there's another dessert out there that can claim all of those qualities.

Chocolate Peanut Butter Icebox Cake Recipe

Chocolate Peanut Butter Icebox Cake Ingredients

  • Whipping cream - Creamy whipping cream combined with sweet sugar results in a light and airy whipped cream frosting.
  • Peanut butter - I love the addictive combination of rich and creamy peanut butter with the sweetness and depth of chocolate.
  • Sugar - Sweetens the whipped cream.
  • Chocolate wafer cookies - The chocolatey cookies provide a rich and slightly bittersweet contrast to the sweet and peanut buttery filling in this icebox cake.
  • Honey-roasted peanuts - The addition of honey-roasted peanuts adds a delightful crunch to the texture and contrast of the soft icebox cake.
  • Hot fudge - Adds a gooey, rich, intense chocolate flavor to the cake.

Scroll down to the bottom for the printable recipe card with exact measurements and recipe instructions.

How to Make Chocolate Peanut Butter Icebox Cake

  1. Make the Whipped Cream - Whip the whipping cream, sugar and peanut butter until a stiff peak forms.
  2. Layer the Wafer Cookies and Whipped Cream
    • Pour ⅓ of the peanut butter whipped cream into pan, spreading to the edges.
    • Layer ⅓ of the wafer cookies over whipping cream, leaving an inch border on the outside.
    • Pour in ⅓ more whipped cream, spreading to edges then add another layer of cookies.
    • Finish with a final layer of whipped cream.
  3. Refrigerate - Cover the icebox cake with foil and freeze for at least four hours or overnight to allow the whipped cream to moisten and flavor the wafer cookies.
  4. Add finishing touches - Unmold the cake from the pan and place on a serving plate. Add coarsely chop remaining chocolate wafer cookies and peanuts on top of icebox cake. Serve immediately.
No Bake Chocolate Peanut Butter Icebox Cake

Recipe Variations

I used a square cake pan for the one I made in the photos but I wrote the recipe using a springform pan; I've found it's the easiest way to throw this together. If you like the look of the square icebox cake, however, simply use the same instructions; you'll just have to pull it out which is slightly more difficult less easy.

Flavored whipped cream is one of my favorite "tricks"; you can even use it to frost a regular cake or use it to top any number of desserts. This Chocolate Peanut Butter Icebox Cake definitely leads the pack in terms of my favorite flavors, not to mention I love how pretty the finished product looks!

The Chocolate Icebox Cake (made with chocolate wafer cookies versus graham crackers) tends to be the type I lean toward; Simply switch up the flavor that accompanies it.

Here are some my other tasty Icebox Cake recipes that are definitely worth trying: Strawberry Icebox Cake, Chocolate Mint Icebox Cake, Chocolate Raspberry Icebox Cake.

Chocolate Peanut Butter Icebox Cake Recipe

Chocolate Peanut Butter Icebox Cake

Yield: 10
Prep Time: 15 minutes
: 4 hours
Total Time: 4 hours 15 minutes

There is nothing like the ease and indulgence of this Peanut Butter Chocolate Icebox Cake. With just six ingredients, it will become your go-to dessert!

Ingredients

  • 4 cups whipping cream
  • 1 cup creamy peanut butter
  • ⅓ cup sugar
  • 1 9oz package chocolate wafer cookies
  • 1 cup honey-roasted peanuts, chopped
  • ½ cup hot fudge, softened

Instructions

  1. In a large bowl of a standing mixer, add whipping cream, sugar and peanut butter. Whip until stiff peaks form.
  2. Line a medium-sized springform pan with saran wrap. Pour ⅓ of the peanut butter whipped cream into pan, spreading to the edges. Layer ⅓ of the wafer cookies over whipping cream, leaving an inch border on the outside. Pour in ⅓ more whipped cream, spreading to edges then add another layer of cookies. Finish with a final layer of whipped cream.
  3. Cover "cake" with saran wrap or foil and freeze for at least four hours or overnight.
  4. Unmold cake and carefully remove saran wrap, then place cake on serving plate. Coarsely chop remaining chocolate wafer cookies and peanuts, then use them to top your cake. Drizzle with hot fudge (slightly warm is better than hot if drizzling in advance; hot should be added immediately before serving the cake).
  5. Serve immediately.

Notes

This dessert can also be refrigerated instead of frozen, however you'll want to serve it in the dish you refrigerate it in.

Nutrition Information:
Yield: 10 Serving Size: 1
Amount Per Serving: Calories: 660Total Fat: 56gSaturated Fat: 26gTrans Fat: 1gUnsaturated Fat: 25gCholesterol: 108mgSodium: 266mgCarbohydrates: 32gFiber: 3gSugar: 20gProtein: 13g

This data was provided and calculated by Nutritionix.

© Kristy Bernardo
Cuisine: American / Category: Desserts
Chocolate Peanut Butter Icebox Cake

Chocolate Raspberry Icebox Cake

May 31, 2023 by Kristy Bernardo Leave a Comment

Chocolate Raspberry Icebox Cake - just six ingredients and you'll have a show-stopping dessert that everyone will rave over!

Chocolate Raspberry Icebox Cake - just six ingredients and you'll have a show-stopping dessert that everyone will rave over!

What is an Icebox Cake?

An icebox cake is one of the easiest "cakes" you can make. Typically made with chocolate wafers and sweet whipped cream, the cake is made by layering the two ingredients in pan. The outside of the cake is then covered in more whipped cream and place in the freezer (or "icebox"). The chocolate wafers will soften and become easy to slice into individual pieces.

Best Chocolate Raspberry Icebox Cake Recipe

Chocolate Raspberry Icebox Cake Ingredients

  • Whipping cream - To create the fluffy filling for this cake.
  • Seedless raspberry jam & fresh raspberries - The raspberry flavors add a fruity and slightly tart flavor that contrasts with the rich, sweet taste of chocolate.
  • Powdered sugar - To sweeten the whipped cream to your liking.
  • Chocolate wafer cookies - Chocolate graham crackers will work too.
  • Hot fudge - Adds a gooey, rich, intense chocolate flavor to the cake.
  • Fresh mint - Adds a refreshing and cool flavor plus it's a wonderful garnish on a mint cake.

Scroll down to the bottom for the printable recipe card with exact measurements and recipe instructions.

How to Make Chocolate Raspberry Icebox Cake

  1. Make the Whipped Cream - Whip the raspberry jam and whipping cream until a stiff peak forms. Cool Whip will work in a pinch. Taste halfway through whipping and add powdered sugar, to taste, if not sweet enough for you.
  2. Layer the Wafer Cookies and Whipped Cream
    • Pour ⅓ of the raspberry whipped cream into pan, spreading to the edges.
    • Layer ⅓ of the wafer cookies over whipping cream, leaving an inch border on the outside.
    • Pour in ⅓ more whipped cream, spreading to edges then add another layer of cookies.
    • Finish a with final layer of whipped cream.
  3. Freeze - Cover the cake in saran wrap foil and freeze for at least four hours or overnight to allow the layers to meld together.
  4. Add finishing touches - Unmold cake from the pan and place cake on serving plate and top with fresh raspberries. Drizzle with hot fudge (slightly warm is better than hot if drizzling in advance; hot fudge should be added immediately before serving the cake). Garnish with fresh mint leaves, if desired.

Serve immediately or allow to thaw slightly then serve.

How to Make Icebox Cake with Graham Crackers?

It's just as easy to make icebox cake with graham crackers as it is to make one with chocolate wafers. You'll prepare the icebox cake the same way, but keep in mind that you might need more flavorings. This Chocolate Raspberry Cake would be a good choice to use because the whipped cream is flavored with jam and will be a nice complement to the graham crackers. This Strawberry Icebox Cake with Graham Crackers is a great recipe to try, too!

Freezing Icebox Cake

You not only can freeze icebox cake, but you should! Because whipped cream is used for the "frosting", it won't hold up as well in the refrigerator. The cake will need to be thawed slightly once removed from the freezer to make it sliceable and to give it a better texture.

Easy Raspberry Chocolate Icebox Cake Recipe

Endless Variations

I am so infatuated with the Icebox Cake, regardless of which flavor you choose. I've shared my personal favorites with you: Peanut Butter and Chocolate Icebox Cake, Chocolate Mint Icebox Cake and now this Chocolate Raspberry Icebox Cake. But the flavors are endless; anything that goes well with chocolate (or graham crackers) and can be turned into a flavored whipped cream can be turned into an easy, tasty summer treat. Or anytime, really...I've been known to make an Icebox Cake in the middle of winter if the mood strikes.

For this raspberry version, I used seedless raspberry jam to sweeten the fresh whipping cream. For the peanut butter version I used...wait for it...peanut butter (plus a little something to sweeten it up). Mint extract did the trick for the chocolate mint icebox cake, so use your imagination...the options are endless! Not that you'll need more than these delicious three...they're the best of the best. In my humble opinion, of course 🙂

An easy twist to this recipe is to swap out the fruit and jam flavors such as strawberries, peaches, blackberries, apricots or even lemons with lemon curd.

Chocolate Raspberry Icebox Cake - just six ingredients and you'll have a show-stopping dessert that everyone will rave over!

Chocolate Raspberry Icebox Cake

Yield: 10
Prep Time: 15 minutes
Additional Time: 4 hours
Total Time: 4 hours 15 minutes

Chocolate Raspberry Icebox Cake – just six ingredients and you’ll have a show-stopping dessert that everyone will rave over!

Ingredients

  • 4 cups whipping cream
  • 1 8 oz jar seedless raspberry jam
  • Powdered sugar, to taste (to sweeten whipped cream to your liking)
  • 1 9 oz package chocolate wafer cookies (use about ⅔)
  • 2 cups fresh raspberries
  • ½ cup hot fudge, softened
  • Fresh mint, for garnishing (optional)

Instructions

  1. In a large bowl of a standing mixer, add raspberry jam and whipping cream. Whip until stiff peaks form. Taste halfway through whipping and add powdered sugar, to taste, if not sweet enough for you.
  2. Line a medium-sized springform pan with saran wrap. Pour ⅓ of the raspberry whipped cream into pan, spreading to the edges. Layer ⅓ of the wafer cookies over whipping cream, leaving an inch border on the outside. Pour in ⅓ more whipped cream, spreading to edges then add another layer of cookies. Finish with a final layer of whipped cream.
  3. Cover "cake" with saran wrap or foil and freeze for at least four hours or overnight.
  4. Unmold cake from the pan and carefully remove saran wrap, then place cake on serving plate and top with fresh raspberries. Drizzle with hot fudge (slightly warm is better than hot if drizzling in advance; hot fudge should be added immediately before serving the cake). Garnish with fresh mint leaves, if desired.
  5. Serve immediately or allow to thaw slightly then serve.

Notes

If desired, chop up and add the remaining chocolate wafters to the top of the cake with fresh raspberries.

Nutrition Information:
Yield: 10 Serving Size: 1
Amount Per Serving: Calories: 553Total Fat: 38gSaturated Fat: 23gTrans Fat: 1gUnsaturated Fat: 12gCholesterol: 113mgSodium: 125mgCarbohydrates: 51gFiber: 3gSugar: 37gProtein: 4g

This data was provided and calculated by Nutritionix.

© Kristy Bernardo
Cuisine: American / Category: Desserts
Chocolate Raspberry Icebox Cake

More scrumptious dessert recipes:

  • Chocolate Covered Pretzel Rods
  • Coconut Rum Balls
  • Chocolate Truffles
  • Peppermint Bark Recipe
  • Easy Chocolate Fudge
  • Easy Christmas Cookies with Holiday Pretzels

Chocolate Mint Icebox Cake

May 31, 2023 by Kristy Bernardo Leave a Comment

Chocolate Wafer Icebox Cake with Whipped Cream

This Chocolate Mint Icebox Cake is SO simple you won't believe it. Creamy mint whipped cream with chocolate wafers and chopped Andes mints - amazing!

The icebox cake is an amazing thing. I've made more versions of this easy dessert more times than I can count in more variations than I can recall. It's basically just graham crackers or chocolate wafer cookies surrounded by a flavored whipped cream then topped with whatever you like. My favorite icebox cake flavors are chocolate mint, peanut butter and hot fudge or raspberry - but the options are endless!

Best Chocolate Mint Icebox Cake Recipe

What Is an Icebox Cake?

An icebox cake is an infinitely customizable no-bake dessert that is made by layering cookies or crackers with a creamy filling, usually sweetened whipped cream or pudding. The chilled environment of the freezer allows the layers to set and meld together, resulting in a cake-like texture without the need for baking. They are a popular choice for easy, refreshing desserts!

Why Is It Called Icebox Cake?

The term "icebox cake" originated in the early 20th century when refrigerators were not yet common in households. An icebox, which was essentially a precursor to the modern refrigerator and freezer, was a non-electric cooling device that used ice to keep food cold. Thus, the name "icebox cake" stuck even as modern refrigerators and freezers replaced iceboxes.

Easy Chocolate Mint Icebox Cake Recipe

Chocolate Mint Icebox Cake Ingredients

  • Whipping cream - To create the fluffy filling for this cake.
  • Peppermint extract - The cool, minty taste creates a pleasant contrast to the chocolate flavors. A classic combination!
  • Sugar - To sweeten the whipped cream.
  • Green food coloring - Adding green coloring to the whipped cream adds a pop of color and enhances the visual appeal.
  • Chocolate wafer cookies - Chocolate graham crackers will work too.
  • Andes Mints - Crushed Andes mints on top for that extra chocolate and peppermint flavor. Peppermint Patties, mint chocolate chips, homemade mint chocolate, crushed candy cane, crushed Mint Oreos or even Girl Scout Thin Mints will work as substitute, in a pinch.

Scroll down to the bottom for the printable recipe card with exact measurements and recipe instructions.

How to Make Chocolate Mint Icebox Cake

  1. Make the Whipped Cream - Whip the cream, extract, sugar and green food coloring until a stiff peak forms. Cool Whip will work in a pinch.
  2. Layer the Wafer Cookies and Whipped Cream
    • Pour ⅓ of the mint whipped cream into pan, spreading to the edges.
    • Layer ⅓ of the wafer cookies over whipping cream, leaving an inch border on the outside.
    • Pour in ⅓ more whipped cream, spreading to edges then add another layer of cookies.
    • Finish with a final layer of whipped cream.
  3. Freeze - Cover the icebox cake in foil and freeze for at least four hours or overnight to allow the layers to meld together.
  4. Add finishing touches - Unmold the cake from the pan and place on a serving plate. Add coarsely chop remaining chocolate wafer cookies and Andes Mints on top of cake. Serve immediately or allow to thaw slightly then serve.
Chocolate Wafer Icebox Cake with Whipped Cream

Freeze or Refrigerate Icebox Cake?

The purpose of chilling icebox cake is to allow the layers to meld together and soak up the whipped cream while creating a cohesive texture. Most icebox cake recipes instruct to refrigerate rather than freeze. However, I prefer to freeze my icebox cakes as the whipped cream holds up better by freezing and it helps with making nice clean slices. I can also control how frozen it is by allowing it to thaw for 10 - 20 minutes to my desired softened state.

So easy. And so delicious. And so perfect for a unique and fun treat! I make my icebox cakes mostly in the summertime but even throughout the winter I'll throw one together when the mood strikes; I just let it thaw a bit more which only gives it a creamier texture. This Chocolate Mint Icebox Cake would be a perfect dessert for St. Patrick's Day, too!

Easy Chocolate Mint Icebox Cake Recipe

Chocolate Mint Icebox Cake

Yield: 10
Prep Time: 15 minutes
Additional Time: 4 hours
Total Time: 4 hours 15 minutes

This Chocolate Mint Icebox Cake is SO simple you won't believe it. Creamy mint whipped cream with chocolate wafers and chopped Andes mints - amazing!

Ingredients

  • 4 cups whipping cream
  • 1 teaspoon peppermint extract
  • ⅓ cup sugar (add a bit more if you prefer it sweeter)
  • Green food coloring (optional)
  • 1 9oz package chocolate wafer cookies (divided (you’ll find these either with the cookies or by the ice cream condiments))
  • Andes Mints (for topping (use however many you want; I use about 15))

Instructions

    1. In a large bowl of a standing mixer, add cream, extract, sugar and green food coloring (if using). Whip until stiff peaks form.
    2. Line a medium-sized springform pan with saran wrap. Pour ⅓ of the mint whipped cream into pan, spreading to the edges. Layer ⅓ of the wafer cookies over whipping cream, leaving an inch border on the outside. Pour in ⅓ more whipped cream, spreading to edges then add another layer of cookies. Finish with a final layer of whipped cream.
    3. Cover “cake” with saran wrap or foil and freeze for at least four hours or overnight.
    4. Unmold the cake from the pan and carefully remove saran wrap or foil, then place cake on serving plate. Coarsely chop remaining chocolate wafer cookies and Andes Mints, then use them to top your cake. Serve immediately or allow to thaw slightly then serve.
Nutrition Information:
Yield: 10 Serving Size: 1
Amount Per Serving: Calories: 461Total Fat: 38gSaturated Fat: 23gTrans Fat: 1gUnsaturated Fat: 12gCholesterol: 108mgSodium: 174mgCarbohydrates: 28gFiber: 1gSugar: 19gProtein: 4g

This data was provided and calculated by Nutritionix.

© Kristy Bernardo
Cuisine: American / Category: Desserts
Chocolate Mint Icebox Cake

Love icebox cake? I have two more icebox cake flavors you'll have to try: Chocolate Raspberry Icebox Cake and Peanut Butter & Hot Fudge Icebox Cake. I can never decide which one is my favorite so I'll let you be the judge.

30 Korean Taco Recipes

May 26, 2023 by Monique McArthur Leave a Comment

Korean Taco Recipes

Whether you prefer your Korean tacos meaty, packed with seafood, or vegetarian, we have a wealth of Korean Taco recipes for you to try.

Korean fusion tacos are an amazing collision of food cultures. You do not need to be very well versed in the cuisines of Mexico or South Korea to appreciate or even make food inspired by both cultures.

Scroll Down for the Korean Taco Recipes ⬇

Korean Taco Recipes

What are Korean Tacos?

Korean fusion tacos are an amazing collision of Korean cuisine with the concept of Mexican tacos. You don't need to be very well versed in the cuisines of Mexico or South Korea to appreciate or even make food inspired by both cultures.

Here are some of the common ingredients you'll find in Korean tacos:

Taco Shells - Korean Tacos are commonly held together with corn or flour tortillas but creative recipes also include lettuce shells, fried wonton wrappers and more.

Protein - You'll typically find grilled, marinated or braised meats such as bulgogi (marinated and grilled beef), dak galbi (spicy grilled chicken), galbi (marinated and grilled short ribs), or spicy tofu in Korean Tacos.

Korean Marinade/Sauce - The meat is typically marinated in a Korean taco sauce in order to fuse it with authentic Korean flavors. Sauces may include gochujang sauce, sesame sauce or soy sauce with ingredients such as garlic, ginger, sesame oil, brown sugar, and Korean chili paste (gochujang).

Korean Taco Toppings - Common Korean toppings include cabbage, cucumbers, sesame seeds, red onion, pickled daikon radish, carrots, ginger, kimchi (spicy fermented cabbage). Mexican inspired toppings may also be fused with tacos such as jalapeños, cilantro, avocado, salsa, onions or lime juice or wedges.

What do you serve with Korean tacos?

  • Cucumber salad
  • Mango salsa
  • Kimchi
  • Steamed rice
  • Daikon radish salad
  • Sweet and sour radish salad
  • Korean pickled radish
  • Spicy Korean rice cakes
  • Squid jerky
  • Korean corn cheese
  • Korean braised potatoes
  • Potstickers
  • Seasoned green beans
  • Korean fried zucchini
  • Korean seasoned spinach

Korean Taco Recipes

Whether you prefer your Korean tacos meaty, packed with seafood, or vegetarian, we have a wealth of Korean Taco recipes for you to try.

Korean Beef Tacos (Bulgogi) Recipe

Korean Beef Tacos (Bulgogi) Recipe

Photo Credit: natashaskitchen.com

These  Korean Beef Tacos are loaded with Bulgogi steak, cabbage cilantro, avocado and drizzled with a Sriracha-lime crema taco sauce.

Spicy Korean Pork Tacos

Spicy Korean Pork Tacos

Photo Credit: hipfoodiemom.com

These spicy Korean pork tacos are bursting with Korean flavors including Korean gochujang (hot pepper paste), hoisin sauce, soy sauce and sesame oil.

Slow Cooker Korean Street Tacos

Slow Cooker Korean Street Tacos

Photo Credit: beyondmeresustenance.com

Ginger, garlic, sriracha, beef, and tomatoes simmer in the slow cooker until ready to be topped with napa cabbage slaw and kimchi.

Caramelized Ribeye Tacos

Caramelized Ribeye Tacos

Photo Credit: www.kogisauce.com

No Korean Taco recipe list would be complete without including a Roy Choi Kogi BBQ recipe complete with his renowned Kogi BBQ sauce.

BBQ Korean Chicken Tacos

BBQ Korean Chicken Tacos

Photo Credit: www.sugarlovespices.com

This taco is the perfect blend of sweet and savory from the juicy, succulent chicken, Korean BBQ sauce and other tasty ingredients.

Korean-Mexican Fusion Blackened Salmon Tacos

Korean-Mexican Fusion Blackened Salmon Tacos

Photo Credit: www.beyondkimchee.com

Blackened salmon tacos meets Korean-Mexican fusion with the addition of a Korean radish salad made with Korean chili flakes, fish sauce, sugar, toasted sesame seeds, garlic, and vinegar.

Korean Fried Chicken Tacos

Korean Fried Chicken Tacos

Photo Credit: www.theflouredcamera.com

Korean fried chicken tacos is a fusion of sticky, spicy double-fried popcorn chicken (dakgangjeong) with Korean coleslaw and kimchi. 

Korean Style Smoked Pork Belly Burnt Ends Tacos

Korean Style Smoked Pork Belly Burnt Ends Tacos

Photo Credit: www.smokedmeatsunday.com

This Korean taco recipe adds a nice twist with smoked pork belly burn ends and a spice rub with Korean red chili flakes (gochugaru).

Korean Steak Tacos

Korean Steak Tacos with Kimchi & Gojuchang Aioli

Photo Credit: sharedappetite.com

Korean-Inspired Steak Tacos with Gojuchang Aioli!

Spicy Korean Pork Taco with Soy Lime Vinaigrette

Spicy Korean Pork Taco with Soy Lime Vinaigrette

Photo Credit: www.beyondkimchee.com

This Spicy Korean Pork Taco is made with thinly sliced pork in a Korean chili paste, Korean chili flakes, soy sauce, garlic, ginger, and sesame oil sauce.

Korean Tacos with Kalbi and Napa Cabbage Slaw

Korean Tacos with Kalbi and Napa Cabbage Slaw

Photo Credit: kimchimari.com

Korean kalbi is a special-cut beef short rib that is boneless and comes from a different cut than the traditional bone-in short ribs.

Orange Fried Lobster Tacos

Orange Fried Lobster Tacos

Photo Credit: www.kogisauce.com

Another Kogi BBQ recipe complete with a recipe for their Secret Weapon Slaw and tasty fresh lobster meat.

Bulgogi Taco Bar

Bulgogi Taco Bar

Photo Credit: mykoreankitchen.com

This recipe shows you how to create your own DIY Bulgogi Taco Bar using authentic Korean ingredients.

Korean Chicken Tacos

Korean Pork Belly Tacos

Photo Credit: tiffanyangela.com

This easy Korean taco recipe is made with pork belly and topped with corn cheese and kimchi.

Korean Chicken Tacos

Korean Chicken Tacos

Photo Credit: www.kogisauce.com

This Kogi BBQ recipe has fried chicken strips topped with a sweet garlic teriyaki slaw on top of fried wonton shells.

Korean Shrimp Tacos

Korean Shrimp Tacos

Photo Credit: balancewithjess.com

These Korean Shrimp Tacos are loaded with spicy gochujang marinaded shrimp, homemade lime crema, and delicious toppings.

Korean Ground Beef Tacos

Korean Ground Beef Tacos

Photo Credit: www.modernfarmhouseeats.com

 These easy Korean Ground Beef Tacos are made with ground beef, cilantro lime slaw and a Sriracha crema.

Korean Vegan Tacos with "Beef"

Korean Vegan Tacos with "Beef"

Photo Credit: www.thissavoryvegan.com

The vegan beef is a combo of soy crumbles and lentils that are cooked in a gochujang sauce with onions and garlic. Add pickled zucchini, crunchy slaw and spicy mayo and you've got a simple, but so good vegan taco.

Galbi Taco

Galbi Taco (Korean-Style Taco with Beef Short Ribs)

Photo Credit: www.koreanbapsang.com

These tacos pair Korean BBQ short ribs with a refreshing salsa made with kimchi, Korean pear and other crunchy vegetables.

Korean Style Mahi Tacos

Korean Style Mahi Tacos

Photo Credit: www.sizzlefish.com

Korean Style Mahi Mahi Tacos are made with mahi mahi, spicy kimchi, and drizzled with a slightly sweet, silky taco sauce wrapped with a warm flour tortilla.

Sweet & Spicy Korean Bulgogi Tacos

Sweet & Spicy Korean Bulgogi Tacos

Photo Credit: spicysouthernkitchen.com

These sweet and spicy Korean Bulgogi Tacos are made with spicy beef strips, a creamy Gochujang sauce, coleslaw mix, and fresh cilantro.

Instant Pot Korean Beef Tacos

Instant Pot Korean Beef Tacos

Photo Credit: hungerthirstplay.com

Instant Pot Korean Beef Tacos are a quick and easy way to create these street tacos.

Calamari Tacos

Calamari Tacos

Photo Credit: www.kogisauce.com

From the mind of Roy Choi, these delicious calamari tubes are lathered in a citrus teriyaki marinade over corn tortillas.

Not Your Traditional Korean Asian-Fusion Tacos Recipe

Not Your Traditional Korean Asian-Fusion Tacos Recipe

Photo Credit: food52.com

With ingredients like jalapeños, cilantro, lime juice, cabbage, soy sauce and sesame oil, this recipe takes fusion tacos to another level.

Korean Tofu Tacos

Korean Tofu Tacos

Photo Credit: hostthetoast.com

These Korean Tofu Tacos are made with crispy tofu, a crunchy slaw and quick pickles.

Crispy Fish Tacos with Kimchi

Crispy Fish Tacos with Kimchi

Photo Credit: www.soyconnection.com

A simple crispy Korean Fish Taco recipe made with crispy cod, Kimchi and hard shell corn tortillas.

Korean BBQ Lamb Tacos

Korean BBQ Lamb Tacos Recipe

Photo Credit: www.chefdehome.com

There is no shortage of creativity here with these Korean BBQ Lamb Tacos made with delicious Korean and Mexican flavors and an Asian marinade.

Korean BBQ Duck Tacos

Korean BBQ Duck Tacos

Photo Credit: mapleleaffarms.com

A delicious mix of Korean and BBQ flavors topped off with Kim Chi Slaw.

Korean Fusion Taco Hacks

One of the best things to do when making any type of tortilla? Crisp them a bit in a hot pan so that they are slightly caramelized.

This helps for flavor but also to avoid a soggy tortilla. Fusion food can be tricky in the earliest stages; it's a smart move to pick two or three flavors to play off one another--garlic and lime, for example, with a splash of Hoisin sauce could be an instant classic with your fellow diners no matter what the taco filling. The idea is to give one flavor from each culture a chance to work together in the taco.

If you decide to use kimchi as a taco filling, your experience level with it will help in food prep. Those who eat it on a regular basis know that it's typically a good idea to open the kimchi container for the first time over the sink as some of the fish sauce in the jar may spill out.

The sauce is pungent enough to want to keep it off your clothes and countertops, but kimchi is delicious and the strong smell is one you eventually grow to love IF you are inclined to love this amazing South Korean staple.

Some fusion food can be a bit more challenging to newcomers. If you are cooking for others, it may be difficult to pair certain food culture classics with the food from elsewhere. For example, pozole is an amazing soup, but it likely works better as a standalone paired with fusion tacos. The same is true for the South Korean spicy soup Yukaejang.

That said, taking the meat cooked in either soup and using that as a taco filling could be an amazing experience. The trick to making tacos work in this case? Let the flavor of that meat be front and center; use more flavor-neutral fillings like cabbage or lettuce to round out a "pozole taco" or "Yukgaejang taco".

Fusion tacos can be at their most effective when there is an overall combination of sweet, savory, crunchy, and soft. Finding the balance can be tricky at first, but as you experiment with these flavors and textures you'll find things that work for you. The key is to start with small batches and expect to adjust your recipes as you go. Fusion food requires experimentation, and it really does pay off over time.

More Delicious Korean-Inspired Dishes To Try:

  • Korean Chicken Wings
  • Korean Meatball Sliders
  • Korean Cold Noodle Soup

Try these taco recipes too!

How to Reheat Fried Chicken

May 24, 2023 by Monique McArthur Leave a Comment

How To Reheat Fried Chicken

Discover the best methods for reheating fried chicken with this step-by-step guide. These expert tips will teach you how to reheat fried chicken in no time.

There's nothing quite like the hot, crispy, crackling goodness of fried chicken. Every bite is an experience. A satisfying crunch greets you, and tender, juicy meat follows, accompanied by a bit of steam (if you're lucky). Before you know it, you're going in for seconds and thirds. Unfortunately, leftover fried chicken (unless eaten cold) leaves much to be desired; especially when the chicken is reheated incorrectly. Reheating fried chicken improperly can lead to soggy breading and dried-out meat resulting in a less-than-satisfactory experience. You may also get chicken that is warm on the outside and cold in the middle, but fear not!

You can return leftover fried chicken to its original state with the proper technique and a little care. In this guide, we'll explore how to reheat fried chicken, ensuring that you end up with tender, juicy chicken that's just as crunchy and satisfying as it originally was.

How To Reheat Fried Chicken

Fried Chicken Storage

Before we delve into the various reheating methods, let's address the crucial step of proper storage. Improperly stored fried chicken can lose its texture and flavor more rapidly, making it challenging to achieve the desired results when reheating. To preserve the quality of your leftover fried chicken, follow these storage guidelines.

  • Cool the chicken: Before storing leftover fried chicken, cool it to room temperature. Otherwise, the chicken will steam in the foil or container you put it in. Do not leave the chicken at room temperature for over 2 hours, or 1 hour on a hot day.
  • Strive for an airtight seal: This can be done in a shallow airtight container (you don't want a lot of space at the top) or individually wrapping each piece of chicken in foil or reusable food wrappers. If using foil or food wrappers, it is best to pop them in a freezer bag and remove as much air as possible before sealing.

From there, refrigerate the chicken for up to 5 days or freeze the fried chicken for up to 3 months. By properly storing your fried chicken, you're setting the stage for successful reheating.

How to Reheat Fried Chicken: Top Three Methods

Now that we've covered the importance of proper storage let's dive into how to reheat fried chicken. After years of eating fried chicken and extensive testing, I've found that three methods work best. The methods include the oven, air fryer, and stovetop.

Oven

Reheating fried chicken in the oven is a popular method that yields excellent results. The reason the oven works so well is the even heat distribution. It quickly crisps up the skin and heats the meat thoroughly without drying it out. To reheat fried chicken in the oven:

  1. Preheat your oven to 400 degrees Fahrenheit and place the chicken pieces on a baking sheet, preferably fitted with a wire rack. A wire rack allows the heat to circulate, which crisps the top and underside of each piece without needing to flip it.
  2. Place into the oven for 15-17 minutes or until the internal temperature reaches 165 degrees Fahrenheit and the exterior is crisp. If reheating boneless, skinless fried chicken like chicken tenders, reduce reheating time by about 5 minutes.
  3. Plate and serve.

In addition to your standard oven range, you can reheat fried chicken in a countertop convection oven as well as a toaster oven as long as there is a "convection" or "bake" setting. Convection ovens are particularly effective at reheating fried chicken due to the hot air circulation it provides. This results in even crispness, plus no hot and cold spots. Overall, it's much more efficient. Due to that efficiency, you want to watch the fried chicken closely. It will probably reheat faster.

Air Fryer

If you own an air fryer, you're in luck! The air fryer is an excellent tool for reheating fried chicken as it helps revive the crunchiness of the breading. It's my go-to method when I have a few pieces left over since air fryers are efficient, so easy to use, and cleanup is even easier. Air fryers use circulating heat to cook food, and that heat circulation prevents the chicken from sogging. Instead, it removes any moisture absorbed during refrigeration to return fried chicken to its original state. As for how to reheat fried chicken in an air fryer, follow these steps:

  1. Preheat the air fryer to 370 degrees Fahrenheit and place the chicken in a single layer in the fryer basket.
  2. Reheat the chicken for about 10 minutes, flipping halfway through, until it reaches an internal temperature of 165 degrees Fahrenheit.
  3. Plate and enjoy.

Stovetop

Reheating fried chicken using the pan frying method yields super crispy chicken making it great for those who love the big crunch. You know how twice-fried fries are next-level delicious? So is twice-fried chicken. The stovetop method also allows for precise temperature control and easy monitoring. All you need is a pan with high sides and oil for frying. You can use new oil or reserved fry oil from when you first cooked the chicken as long as you strain the oil through a cheesecloth-lined fine mesh strainer. Fry oil can be reused up to three times. Once you have everything you need:

  1. Fill a large, deep pan with a little over ¼-inch of oil.
  2. Heat the oil to 300 degrees Fahrenheit.
  3. Place the leftover fried chicken into the oil. Do not overcrowd the pan.
  4. Reheat for 2-3 minutes per side.
  5. Transfer the chicken to a plate lined with paper towels to drain excess oil.
Reheating Fried Chicken

Can I Reheat Fried Chicken in the Microwave?

One popular reheating method that did not make the list is microwaving. Avoid it unless you love soggy, soft, borderline gummy breading and rubbery chicken. The microwave is a quick and convenient option for many other foods, but it does not work with fried chicken. Microwaves cause water molecules in food to vibrate, which produces heat that cooks the food. Although this is a great way to heat food fast, vibrating water molecules do not promote crispness.

Now that you know how to reheat fried chicken, you'll never be faced with underwhelming leftovers again. What method will you choose?

Check out these other cooking tips!

  • How To Reheat Pasta
  • How To Reheat Ramen
  • How To Reheat Steak
  • How To Reheat Sushi

The Best Vanilla Extract Substitutes for Baking and Cooking

May 24, 2023 by Monique McArthur Leave a Comment

The Best Vanilla Extract Substitutes

From vanilla bean and paste to more creative options like almond extract and maple syrup, I'm sharing the best vanilla extract substitutes for every situation.

Although used in small amounts, vanilla extract is quite impactful. It adds a sweet, warm, fragrant touch to various recipes, from cookies and cakes to custards and ice creams. The extract enhances the flavor of ingredients like butter, sugar, and milk, plus it takes the edge off the smell of raw eggs, which is why it's in chocolate mousse, tiramisu, and other desserts that use uncooked eggs.

Despite being a staple, there may come a time when you find yourself without vanilla extract in your pantry. Fortunately, several substitutes can save the day (and save you a trip to the store), so let's explore some of the best vanilla extract substitutes.

a small jar of homemade vanilla extract next to three vanilla beans on a marble countertop as a substitute for vanilla extract

Vanilla Bean

If you don't have vanilla extract, you might not have vanilla bean pods lying around, but if you do, use them! They are one of the best vanilla extract substitutes. In fact, they're even better.

As you know, vanilla extract is made by steeping vanilla beans in alcohol and water, so if you have the essential part, you're good to go. To use a vanilla bean, cut down the length of the pod with a sharp knife, then use the blade to scrape out the seeds.

Half a vanilla bean replaces 1 teaspoon of vanilla extract. Also, do not dispose of the empty pods. They can be used in numerous infusions since they are so potent.

Vanilla Bean Paste

Vanilla bean paste comes in second on the list of best vanilla extract substitutes because it is very similar to extract. The main difference in taste is that vanilla bean paste is more concentrated in flavor.

The paste consists of vanilla bean, vanilla extract, sugar, and other ingredients like pectin and carrageenan, which help achieve the desired consistency. Vanilla bean paste offers a rich vanilla flavor and is a regular purchase for those who bake frequently, so the chance of having some on hand is pretty high. Substitute 1 teaspoon of vanilla paste for every teaspoon of vanilla extract.

vanilla beans on a marble countertop as a substitute for vanilla extract

Imitation Vanilla

We've all purchased a bottle or two in our lifetime. Despite the ever-present emphasis on using REAL vanilla extract in cookbooks, food blogs, and instructional baking videos, imitation vanilla does have its place in the kitchen.

To start, it is much cheaper than vanilla extract. It's also available in larger quantities, and some excellent imitation vanillas are out there. Imitation vanilla is made with vanillin, after all.

For those unfamiliar, vanillin is the primary flavor component of vanilla. Generally, imitations have higher vanillin levels than extracts, so it has a more robust vanilla flavor. Unfortunately, the vanilla flavor lacks complexity, which isn't an issue in most cases. To compensate for the lack of complexity, replace 1 teaspoon of extract with 2 teaspoons of imitation vanilla.

Maple Syrup

Real maple syrup is another of the best vanilla extract substitutes because the syrup's scent and subtle sweetness are reminiscent of vanilla. Although the flavor differs, maple syrup is delicious.

There's something about the rich sweetness with caramel undertones that can enhance specific dessert recipes beautifully. Use an equal amount of maple syrup - the replacement ratio is 1:1. Remember, it will add a distinct maple flavor and sweetness.

Vanilla-Flavored Milk

This option is fantastic for recipes that require a fair amount of milk. The substitution will impart vanilla flavor throughout the dessert or baked goods. In most cases, the vanilla will be more subtle, but this will vary depending on the selected milk brand.

Choose milk flavored with real vanilla bean or extract for the best result. Otherwise, the vanilla flavor may come off as unpleasantly artificial. If you choose this substitute, use as much milk as your recipe requires. This swap works particularly well in cakes and cookies.

Almond Extract

With almond extract, you have the same product with a different flavor. Like vanilla extract, almond extract adds something special to recipes and does an excellent job of removing any egginess. The replacement ratio is 1:1.

a closeup of a small pile of orange zest next to an orange as a vanilla extract substitute

Citrus Zest

Citrus zest also made the list of best vanilla extract substitutes because zests are delicious, versatile flavorings. When you want to add a vibrant and refreshing twist to your recipes, citrus zest can be an excellent substitute for vanilla extract.

Like extract, the zest of citrus fruits like oranges, lemons, and limes adds flavor and fragrance. When replacing vanilla extract with zest, stick with a 1:1 replacement ratio.

Cinnamon

When you don't have vanilla extract, head to your spice cabinet and grab the cinnamon. Like vanilla extract, the sweet aromatic spice adds a lovely flavor and aroma to food. Just remember that cinnamon has a robust, more distinguishable flavor than vanilla, meaning you want to use ¼ to ½ teaspoon ground cinnamon to replace each teaspoon of vanilla extract.

It might sound strange to substitute cinnamon for vanilla extract since the flavors are so different, but consider something like homemade chocolate pudding. Replacing the vanilla with cinnamon will certainly change the flavor significantly, but cinnamon and chocolate go wonderfully together!

a closeup of cinnamon sticks and a small dish of ground cinnamon next to a spoonful of ground cinnamon as a vanilla extract substitute

Make Homemade Vanilla Extract

If you're tired of paying far too much for 1-2 ounce bottles of vanilla extract (the bottles are gone before you know it), make a larger bottle or two at home so you never run out. Vanilla beans need time to work their magic, so you will likely put one or more of the replacements mentioned to use before the homemade stuff is ready, but you have to start somewhere, right? To make vanilla extract, you will need the following:

  • ½ ounce vanilla beans
  • 8 fluid ounces vodka, 80 proof
  • Sharp knife
  • One (8-ounce) glass bottle or jar with a tight-fitting lid
  • Funnel (optional but helpful)

Then, once you have your ingredients gathered:

  1. Slit each vanilla bean open to reveal the seeds. There is no need to split the bean in half entirely.
  2. Place the beans in the bottle or jar.
  3. Pour the vodka over the top of the beans. You want them fully submerged, so depending on the jar/bottle selected, you may need more vodka. A funnel makes this step easier when using a bottle.
  4. Close the bottle or jar and shake a few times, then store the bottle in a cool, dark place away from sunlight. It will be ready in 2 months, but extending that time to 6 months will yield an even better, more potent extract.

Vanilla extract will last several years, so make as much as you like.

Now you know these vanilla extract substitutes, which is your favorite? While vanilla extract is a staple ingredient, the replacements mentioned can elevate your recipes and add unique flavors and aromas. Whether you prefer natural alternatives or are open to exploring others, there's a substitute to suit your preferences.

Cottage Cheese Egg Bake – Easy High-Protein Breakfast Casserole

May 24, 2023 by Kristy Bernardo Leave a Comment

a top-down view of a cottage cheese egg bake on a rustic wooden table

This Cottage Cheese Egg Bake is the kind of breakfast that's equal parts delicious, flexible, and incredibly easy to make. It's a basic recipe, but in the best way, as you can serve it just as it is or load it up with your favorite proteins and vegetables!

The real star here is the cottage cheese. It might sound unusual if you haven't tried it in an egg casserole before, but it adds a rich, creamy texture and a big boost of protein.

Small curd cottage cheese melts into the egg mixture, giving it a light, fluffy consistency. If you're trying to sneak in more protein, eat low-carb, or just want a delicious breakfast that actually keeps you full, this egg bake checks all the boxes!

a top-down view of a cottage cheese egg bake on a rustic wooden table

Why Cottage Cheese Works So Well in an Egg Bake

If you've never added cottage cheese to your egg bake before, you're in for a surprise. It's the secret ingredient that makes this simple breakfast casserole stand out from the rest.

Cottage cheese adds moisture without making the bake watery, and the small curds melt into the eggs to create a texture that's creamy and tender, almost like a cross between a soufflé and a frittata. It also packs in extra protein, which helps keep you full longer and makes this a smart choice for low-carb or high-protein diets.

Even if you're not a fan of eating cottage cheese on its own, don't skip it here. It doesn't overpower the flavor, it actually blends in and gives a nice richness to the finished dish. Once you try it, there's a good chance you won't want to make a breakfast casserole without it again!

Ingredients You'll Need

This recipe is intentionally simple, which makes it easy to build on. Here's what you'll need for the base:

  • Eggs (6 large): The foundation of any good egg bake. You can use whole eggs or substitute with liquid eggs or egg whites if preferred.
  • Hash Browns (4 cups): You can use store-bought frozen hash browns (thawed), leftovers, or grate your own fresh potatoes.
  • Shredded Cheese (3 cups): Cheddar works great, but you can mix in other melty cheeses like mozzarella, Monterey Jack, Gruyère, or Swiss.
  • Small Curd Cottage Cheese (1½ cups): The star of the show! It melts into the casserole, making it creamy and adds protein. Use full-fat for the best texture and flavor.
  • Salt & Pepper: seasoning is important! 🙂

The base recipe is delicious all on its own, but you can add anything you like to make it your own. The cottage cheese egg bake in the image below has sausage and veggies.

a top-down view of a cottage cheese egg bake on a rustic wooden table with a grey cloth towel

Add-Ins: Proteins, Veggies & More

One of the best things about this cottage cheese egg bake is how endlessly customizable it is. You can keep it simple or go all-out - it's hard to go wrong! Just be sure to cook or drain any moisture-heavy ingredients (like mushrooms or spinach) before mixing them in to avoid a soggy casserole.

Whether you're using up leftovers or planning for a special brunch, here are some delicious ways to mix things up:

Proteins

  • Cooked and crumbled bacon: always a solid choice
  • Cooked and crumbled breakfast sausage: Mild, hot, or try maple
  • Diced ham: Great for using up holiday leftovers. Gruyère or Swiss cheese goes particularly well with ham.
  • Shredded chicken: adds lean protein
  • Chorizo or turkey sausage: go for extra spice or a lighter option
  • Crab, shrimp, or smoked salmon: this is a more elegant choice and it's perfect for brunch

Veggies

  • Spinach or kale: wilted or sautéed first to prevent too much water in the egg bake
  • Bell peppers and onions: diced then sautéed until tender before adding
  • Mushrooms: cook these down first to release their moisture before adding
  • Tomatoes: herry tomatoes (halved or quartered) or chopped, sun-dried tomatoes
  • Zucchini or broccoli: roast or saute first

Herbs & Seasonings

  • Fresh herbs: parsley, chives, basil, or dill
  • Dried spices: garlic powder, onion powder, paprika, or Italian seasoning
  • For heat: jalapeños, red pepper flakes, or a dash of hot sauce

How to Make Cottage Cheese Egg Bake

This breakfast bake couldn't be easier to throw together. It's a simple mix-and-bake process, which is why it's ideal for meal prep, holiday mornings, or busy weekdays.

  1. Preheat the oven to 350°F and grease a 9×13-inch baking dish with butter or cooking spray.
  2. Mix the base ingredients in a large bowl: eggs, shredded hash browns, cottage cheese, shredded cheese, and a good pinch of salt and pepper. Stir until everything is evenly combined.
  3. Add any extras: stir in your favorite cooked proteins, veggies, herbs, or spices at this point.
  4. Pour into the baking dish and spread it into an even layer.
  5. Bake uncovered for 30 to 40 minutes, or until the center is set and the edges are golden and bubbly.
  6. Let it rest for 5-10 minutes before slicing. This helps the casserole firm up and makes it easier to serve.

That's it! Minimal prep, no fuss, and maximum flavor!

Tips for Success

  • Use full-fat cottage cheese: it gives the casserole a creamier texture and richer flavor. Small curd cottage cheese blends in best.
  • Don't skip seasoning: eggs and potatoes need salt!
  • Precook veggies: If you're adding any vegetables like mushrooms, spinach, or zucchini that release water as they're cooking, give them a quick roast or saute before adding to the dish.
  • Don't overbake: Keep an eye on it and make sure you pull it out when there's still a very slight amount of wetness. No need to stress over it though, as the cottage cheese helps keep things moist.
  • Let it rest before slicing: 5-10 minutes is all it takes for the egg bake to firm up, making it easier to slice and serve.

Serving Suggestions

This cottage cheese egg bake is delicious on its own, but it also pairs perfectly with all your favorite breakfast and brunch sides. Here are a few delicious ways to serve it:

  • Fresh fruit or fruit salad: Something sweet and juicy like berries, melon, or citrus balances the richness of the egg bake.
  • Toasted English muffins or crusty bread: Great for mopping up cheesy, eggy goodness.
  • A light green salad: Especially nice if you've added sausage or bacon to the bake and want something fresh on the side.
  • Yogurt parfaits: Layered with granola and fruit for something sweet with a bit of crunch.
  • Avocado slices or guacamole: Always a hit!
  • Hot sauce or salsa: If you like your eggs with a little kick, these are must-haves on the table.
a close up, top-down view of a cottage cheese egg bake on a rustic wooden table

Storage & Reheating

One of the best things about this cottage cheese egg bake is how well it holds up, making it perfect for meal prep, holiday leftovers, or grab-and-go breakfasts all week long.

How to Store

In the fridge: Let the casserole cool completely, then store it in an airtight container or wrap the dish tightly with foil or plastic wrap. It will keep well in the refrigerator for up to 4 days.

In the freezer: Cut into portions, wrap each piece individually in plastic wrap, and place them in a freezer-safe bag or container. Freeze for up to 2 months.

How to Reheat

From the fridge: Reheat individual slices in the microwave for about 30-60 seconds, or warm the whole dish in a 325°F oven until heated through.

From the freezer: Thaw overnight in the fridge for best results, then reheat as above. Or microwave frozen slices in 1-minute intervals until warmed through.

It's a total lifesaver on busy mornings when you just need something hot, filling, and ready to go!

Frequently Asked Questions

Can I make this cottage cheese egg bake ahead of time?
Yes! You can fully assemble the casserole, cover it, and refrigerate overnight. Just bring it to room temperature for 20-30 minutes before baking the next morning.

Does the cottage cheese make it taste "cheesy"?
Not in the traditional sense. Cottage cheese melts into the eggs and adds creaminess and richness, but it doesn't have a strong flavor. Even people who don't love cottage cheese on its own usually enjoy it in this dish.

Can I use egg whites or a plant-based egg substitute?
Absolutely. You can swap the whole eggs for liquid egg whites or a vegan egg alternative. Just keep in mind that the texture may vary slightly.

Can I make this recipe without hash browns?
Yes! The hash browns add structure and texture, but you can leave them out for a more frittata-style egg bake or substitute cooked quinoa, diced potatoes, or even more leftover roasted veggies.

How do I know when it's done baking?
The casserole is done when the center is set and no longer jiggles. You can insert a knife or toothpick into the center, it should come out mostly clean. The edges will be golden and slightly bubbly.


If you love a hearty breakfast as much as I do, there are a few more recipes you've got to try! Start with my sausage hash brown breakfast casserole - it's a crowd-pleaser and perfect for holidays or meal prep. If you're into crispy potatoes and creamy eggs, the easy breakfast quiche with potatoes is a great twist with a golden hash brown crust. For something a little different (and with a bit of heat), these baked eggs with tomato and chipotle is smoky, spicy, and seriously satisfying! And for a quick and easy lunch, don't miss these Mediterranean cottage cheese bowls!

a top-down view of a cottage cheese egg bake on a rustic wooden table

Cottage Cheese Egg Bake

Yield: 10 servings
Prep Time: 10 minutes
Cook Time: 30 minutes
Total Time: 40 minutes

This delicious cottage cheese egg bake is delicious! You'll love this easy dish that can be made for almost any occasion.

Ingredients

  • 6 eggs, beaten
  • 4 cups shredded hash browns (or store-bought)
  • 3 cups shredded cheese
  • 1 ½ cups whole-milk cottage cheese (small curd is best)
  • ½ teaspoon salt
  • ¼ teaspoon black pepper

Instructions

    1. Preheat the oven to 350°F.
    2. Mix all the ingredients together in a large bowl, then pour it into a greased 9×13" baking dish.
    3. Bake it uncovered for 30 – 40 minutes or until the eggs are set and it’s nice and bubbly around the edges. Let it rest for a few minutes before cutting so it can set.

Notes

See article for suggestions on more ingredients you may want to add!

Nutrition Information:
Yield: 10 Serving Size: 1
Amount Per Serving: Calories: 460Total Fat: 31gSaturated Fat: 11gTrans Fat: 0gUnsaturated Fat: 18gCholesterol: 151mgSodium: 949mgCarbohydrates: 30gFiber: 2gSugar: 3gProtein: 16g

This data was provided and calculated by Nutritionix.

© Kristy Bernardo
Cuisine: American / Category: Breakfast and Brunch
Cottage Cheese Egg Bake – Easy High-Protein Breakfast Casserole

Hatch Chile Queso Dip (Creamy, Cheesy & So Easy!)

May 24, 2023 by Kristy Bernardo 73 Comments

Best Green Chile Queso Recipe

If you love cheesy, smoky dips with a little kick, you're going to love this Hatch Chile Queso Dip! It's made with flame-roasted Hatch green chiles and a melty blend of cheeses. This queso is creamy, rich, and loaded with New Mexican flavor. Dipped into with tortilla chips or spooned over nachos or tacos, this green chile queso is as versatile as it is delicious. And it's ready in under 20 minutes!

a closeup of a bowl of hatch chile queso dip with cilantro leaves for a garnish

Why You'll Love This Hatch Chile Queso Dip

Not Too Spicy - It's got just a hint of spice but has a good amount of flavor. Some hatch chiles are spicier than others, however, so make it as spicy as you like!

Creamy and Cheesy - The combination of cheeses and green chiles make for one incredibly creamy dip. I like to make mine really thick first, then use half & half or whole milk to thin it to the consistency that I like. It's just easier to control the consistency this way and I prefer the flavor, too.

Quick and easy - Queso dip takes only minutes to make and, if you haven't tried making it yourself before, you'll be presently surprised at how easy and tasty it is.

Versatile - Green chile queso isn't just a dip. Spread this cheese sauce on top of tacos, nachos, grilled veggies or salads, or serve it alongside guacamole, salsa or pico de gallo.

Customizable - Tailor this cheese dip to your liking by mixing in ingredients such as black beans, diced tomatoes, Rotel, spinach, or pobalno peppers. For something extra rich and flavorful, add some cooked Mexican chorizo - it's incredible!

Use any green chile - If you can't find hatch chiles, either fresh or frozen, you can substitute with poblanos or Anaheim peppers. We've put together a full guide that answers the most common Hatch chile questions, plus it includes our best Hatch chile recipes.

Green Chile Queso Ingredients

  • Extra-virgin olive oil
  • White onion
  • Garlic clove
  • All-purpose flour
  • Evaporated milk
  • Salt & freshly ground black pepper
  • Mexican-blend shredded cheese - Half and half Monterey and cheddar cheese will work too
  • Half & half
  • Hatch chiles (Can also use poblano or Anaheim)

Step-by-Step Instructions

  1. Sauté the onion and garlic in olive oil
  2. Whisk in in the flour, evaporated milk, salt and black pepper.
  3. Stir in the cheese while slowly adding the half and half until you reach your desired consistency.

Serve it immediately with crunchy tortilla chips and garnish with whatever you like: more green chiles, diced tomatoes, chopped cilantro, parsley, or green onions. Serving it in a bread bowl works wonderfully too!

a bowl of hatch chile queso dip with cilantro leaves for a garnish next to a bowl of blue and yellow corn tortilla chips and a fresh bunch of cilantro

Variations

One of the best things about queso dip is how easy it is to customize! Here are some tasty ways to switch things up:

  • Add Protein: Stir in cooked, crumbled Mexican chorizo, crispy bacon, or seasoned ground beef for a heartier dip.
  • Make it Spicy: Kick up the heat by using pre-roasted hatch chiles that are labeled "hot". You could also add some minced jalapeños, serranos, or even a dash or two of cayenne pepper. A minced chipotle pepper from a can in adobo sauce will add both spice and a smoky flavor.
  • Switch the Cheese: Try mixing in pepper jack, Monterey Jack, sharp cheddar, or even cream cheese for a richer texture.
  • Veggies: Stir in sautéed spinach, fire-roasted tomatoes, or finely diced red bell peppers for added color and flavor. You can also add black beans, corn, or a can of drained Rotel tomatoes.
  • Use Different Chiles: If Hatch chiles aren't available, sub in roasted poblanos, Anaheim peppers, or even canned green chiles.
  • Queso Fundido Style: Skip the milk and serve your dip thick and bubbling hot straight from the oven in a cast iron skillet, topped with fresh cilantro and crumbled queso fresco.

How to Serve Hatch Chile Queso Dip

This creamy queso is way more than just a chip dip (though it's perfect for that too). Try these serving ideas for more ways to enjoy it:

  • Classic: Serve warm with sturdy tortilla chips, pretzel bites, crostini, or pita wedges.
  • Tacos & Burritos: Drizzle it over tacos, burritos, or even enchiladas.
  • Nachos: Layer it on a sheet pan of tortilla chips with beans, jalapeños, and toppings for the ultimate hatch chile nachos.
  • Veggies: Spoon it over grilled or roasted vegetables: broccoli, cauliflower, and zucchini pair especially well.
  • Breakfast: Spoon it over eggs, breakfast burritos, or breakfast bowls.
  • Burgers: Use it as a topping for burgers with fresh avocado, tomato, and crispy lettuce to help cut its richness.
  • Fondue: Keep it warm in a fondue pot and dip bread cubes, sausage slices, roasted potatoes, or veggies!
  • Baked Potatoes: It's incredible spooned over piping-hot baked potatoes!
an overhead shot of a bowl of hatch chile queso dip with cilantro leaves for a garnish

Storage and Reheating Tips

  • Storage: Store any leftover queso dip in an airtight container in the refrigerator for up to 4 days. As it cools, it will thicken - this is completely normal!
  • Reheating: To reheat hatch chile queso dip, place it in a saucepan over low heat, stirring frequently until it's hot. If it's too thick, add a splash of half & half, milk, or even a bit of chicken broth to loosen it to your desired consistency.
  • Microwave Option: You can also reheat it in the microwave in 30-second intervals, stirring between each until heated. Again, add a small amount of liquid if needed to smooth it out.
  • Freezing: Because this queso dip contains dairy, freezing is not recommended. It may separate or become grainy once thawed.

If you're as obsessed with Hatch chiles as we are, don't stop at queso! Try our Hatch chile chicken tortilla soup for something comforting, or cozy up with a creamy roasted chile and corn soup. Our homemade Hatch chile sauce is perfect for enchiladas, and the spicy tomato soup is perfect for dipping with a grilled cheese.

a closeup of a bowl of hatch chile queso dip with cilantro leaves for a garnish

Roasted Hatch Chile Queso Dip

Yield: 6 servings
Prep Time: 5 minutes
Cook Time: 12 minutes
Total Time: 17 minutes

A creamy green chile queso dip recipe with just the perfect amount of flavor and spice!

Ingredients

  • 2 tablespoon extra-virgin olive oil
  • ½ medium white onion, minced
  • 1 large garlic clove, minced
  • 1 tablespoon all purpose flour
  • 1 5-oz can evaporated milk
  • 1 large pinch salt
  • freshly ground black pepper
  • 3 cups mexican-blend shredded cheese
  • ¼-1/2 cup half & half
  • 3 hatch chiles, roasted, stemmed and seeded, minced (or poblano or anaheim)

Instructions

  1. Heat the olive oil in a medium-sized saucepan. Add the onion and garlic, sauté for approximately 5 minutes or until starting to soften.
  2. Sprinkle the flour over the onion mixture; stir and cook for two minutes. Whisk in evaporated milk and continue to cook until thickened and heated through, about 3-5 minutes. Add a large pinch of salt (a pinch is three fingers and a thumb) and freshly ground black pepper.
  3. Add the cheese and stir until incorporated (mixture will be very thick). Add half & half a few tablespoons at a time, stirring to incorporate, until you reach your desired consistency. Stir in the minced hatch chiles and stir until the dip is very hot.
  4. Serve immediately.
Nutrition Information:
Yield: 6 Serving Size: 1
Amount Per Serving: Calories: 359Total Fat: 29gSaturated Fat: 15gTrans Fat: 1gUnsaturated Fat: 12gCholesterol: 74mgSodium: 440mgCarbohydrates: 10gFiber: 1gSugar: 6gProtein: 16g

This data was provided and calculated by Nutritionix.

© Kristy Bernardo
Cuisine: Southwestern / Category: Appetizers
Hatch Chile Queso Dip (Creamy, Cheesy & So Easy!)

Hawaiian Roll Ham Sliders

May 23, 2023 by Monique McArthur Leave a Comment

Hawaiian Roll Ham Sliders

Looking for an easy appetizer? These Hawaiian roll ham sliders are loaded with ham, two types of cheese, and finished with garlicky herb butter.

These Hawaiian roll sliders with garlic butter have me hooked. The balance of sweet and savory is so addictive. The top of each slider is lightly crispy, while the inside is warm and fluffy. As you make your way further, the sweetness of the rolls comes through, the smokiness of the ham follows, then melted cheese, and the herby garlic flavor of the butter ties everything together.

Hawaiian Roll Ham Sliders

Why You'll Love These Hawaiian Roll Ham Sliders

  • Sweet and savory flavor - The combination of the slightly sweet rolls, ham, two types of cheese, and the herby garlic butter create a perfect balance of sweet and savory flavors.
  • Easy to make - In just a few steps, you can have these sliders ready and waiting to be devoured.
  • Ideal for entertaining - This recipe is made to feed a crowd! Best of all, you can prepare them in advance, refrigerate, and pop them in the oven when it's almost time for your guests to arrive.
  • Great leftovers - The sliders make convenient lunches or snacks if you have any left. Enjoy cold or reheat them.

Hawaiian Roll Ham Sliders Ingredients Notes

To make Hawaiian roll ham sliders, you'll need the following:

  • Hawaiian sweet rolls: Pick up a 12-count package from the grocery store. They are easy to find and inexpensive. If you have the time, you can even bake the rolls from scratch. King's Hawaiian rolls or your favorite brand will work.
  • Deli ham: Use high-quality deli ham that you enjoy eating. Something smoky works best because smoked deli ham tends to have a nice balance of sweetness and depth that doesn't mask all the delicious pork flavor ham offers. The thinner the slices, the better.
  • Cheese: This version uses a combination of smoked provolone and cheddar cheese. Smoked provolone has a smoky, earthy flavor that compliments the sweetness of the ham quite well. It is an excellent melting cheese, and cheddar cheese brings a classic element to this batch of ham sandwiches.
  • Garlic Butter: A combination of butter, garlic, and herbs is poured over the sandwiches before they go into the oven. The added fat infuses each Hawaiian roll slider with flavor and promotes browning.
Making Hawaiian Roll Sliders

A complete ingredients list with amounts is in the recipe card below!

How to Make Hawaiian Roll Ham Sliders

  1. Preheat the oven: Preheat the oven to 350 degrees Fahrenheit.
  2. Assemble the sliders: Cut the Hawaiian rolls in half horizontally, keeping them connected. Place the bottom half of the rolls in the baking pan. Top with half of the ham, add the cheese, then add another layer of ham.
  3. Make the herby garlic butter: Melt the butter in a small saucepan, add the garlic, toss in the herbs, and it's ready in no time!
  4. Pour on the butter: You want to pour the butter over the sandwiches instead of brushing the butter on so it soaks into the bread.
  5. Bake: Cover the pan with foil and place into the oven to bake until the cheese melts, then cook uncovered for a final few minutes to develop golden brown tops.
  6. Serve: Cut the sliders into individual servings and enjoy warm.

Variations, Substitutions, and Cooking Tips

Customize the sauce - Add a dash of hot sauce or cayenne pepper if you prefer spicier Hawaiian roll ham sliders. Other options include mustard for a bit of zip or playing up the sweetness of ham with honey or brown sugar for a sweet buttery sauce.

Try different types of cheese - You can't go wrong with Swiss, all cheddar, or whatever melting cheese you like.

Add toppings - Poppy or sesame seeds will add texture.

Baked Hawaiian Roll Ham Sliders

What Are Hawaiian Sweet Rolls?

Hawaiian sweet rolls are fluffy dinner rolls made with flour, sugar, butter, yeast, eggs, and sometimes pineapple juice. It is inspired by Portuguese bread called pao doce. Like the rolls, pao doce is made with an enriched dough that requires a fair amount of rise time to achieve an airy texture. King's Hawaiian rolls are the most well known brand but many brands make these rolls.

Storage and Freezer Tips

Store Hawaiian roll ham sliders in an airtight container and refrigerate. Alternatively, you can keep the sandwiches in the pan you baked them in and tightly cover the pan with foil. I do not recommend freezing. This recipe requires minimal cooking, so freezing isn't necessary, plus the cold temperature will alter the texture.

How to Reheat

Hawaiian roll sliders can be reheated in the microwave in 15-second intervals or until the cheese melts. If you have more time, reheat them in the oven. If using the oven, set it to 300 degrees Fahrenheit, then reheat for 7-10 minutes or until warm. You can pop them on a baking sheet to reheat or reheat them in the pan they were cooked in.

Hawaiian Roll Ham Sliders

Hawaiian Roll Ham Sliders

Yield: 12 Sliders
Prep Time: 10 minutes
Cook Time: 25 minutes
Total Time: 35 minutes

Looking for an easy appetizer? These Garlic Butter Hawaiian roll ham sliders are loaded with ham, two types of cheese, and finished with garlicky herb butter.

Ingredients

  • 1 (12-count) package Hawaiian sweet rolls
  • 12 ounces deli ham, thinly sliced
  • 8 ounces smoked provolone cheese, thinly sliced
  • 4 ounces freshly grated cheddar cheese
  • ½ cup unsalted butter
  • 1 tablespoon minced garlic
  • 2 teaspoons dried parsley
  • ¼ teaspoon dried oregano
  • ¼ teaspoon fine sea salt
  • ¼ teaspoon black pepper

Instructions

  1. Preheat the oven to 350 degrees Fahrenheit and line a 9x13-inch baking pan with parchment paper.
  2. Rather than pulling the sweet rolls apart, use a serrated knife to cut them horizontally to separate the tops and bottoms.
  3. Place the bottom half of the rolls in the baking pan. Top with half of the ham. Make sure that the layer of ham is even.
  4. Top with an even layer of cheese, followed by the remaining ham, then top with the attached sweet roll tops.
  5. Melt the butter in a saucepan over medium heat.
  6. Add the garlic and cook while occasionally stirring for 2-3 minutes or until the garlic softens.
  7. Remove from the heat and add the dried herbs, salt, and pepper. Stir to combine.
  8. Slowly pour the hot butter mixture over the sandwiches, cover the pan with foil, and pop into the oven.
  9. Cook for 15 minutes or until the cheese melts.
  10. Uncover and cook for 5-7 minutes or until golden brown on top.
  11. Slice to separate the sliders and serve warm.
Nutrition Information:
Yield: 12 Serving Size: 1
Amount Per Serving: Calories: 288Total Fat: 19gSaturated Fat: 11gTrans Fat: 0gUnsaturated Fat: 7gCholesterol: 57mgSodium: 797mgCarbohydrates: 14gFiber: 1gSugar: 1gProtein: 15g

This data was provided and calculated by Nutritionix.

© Monique McArthur
Cuisine: American / Category: Appetizers
Hawaiian Roll Ham Sliders

Try these party slider recipes next!

  • Shredded Buffalo Chicken Sliders
  • Korean Meatball Sliders
  • Hot Ham & Cheese Party Sandwiches

Healthy Poached Pears

May 22, 2023 by Kristy Bernardo Leave a Comment

Best Poached Pears Recipe

These healthy poached pears have a sweet cinnamon syrup that infuses the pears and makes them irresistible. Takes just 30 minutes for this delicious dessert!

These poached pear are so good and so simple, you're going to love them! This poached pear recipe uses grape juice instead of wine so they're kid-friendly too!

Pears are a great choice to make healthy desserts. I make this Fall Fruit Salad every fall and our family always looks forward to it. Sliced pears over yogurt with chopped nuts is one of my favorite fall breakfasts.

Healthy Poached Pears Recipe

Ingredients

  • White grape juice & Strawberry jam - Use sugar free strawberry jam and grape juice to make it even healthier.
  • Orange juice & Orange zest - A citrus element.
  • Cinnamon sticks, cloves & ginger - The flavor agents!
  • Pears - A firm pear variety works best for poaching. Bosc, Bartlett, Anjou, or Flemmish Beauty pears are all wonderful for poaching.

How to Poach Pears

To start making these healthy poached pears, gather the ingredients together (mise en place is a good habit to get into, no matter what the recipe is). My favorites are the cinnamon sticks and strawberry jam.

Then just place all the sauce ingredients into a saucepan that's big enough to hold all four pears (more on that in a second):

Place your pears into your saucepan:

It can be tricky fitting exactly four into your pan without having a lot of excess room. If that happens, I'll often just cut one in half to fit. You can also cut them all in half before poaching for an easier fit.

You want your sauce to go at least ¾ of the way up the sides of your pears (that's why the size of your pan is so important). Now you'll just simmer for about 10 minutes or until your pears are soft to your liking.

I like to serve my poached pears whole as in the photo above. You can slice them if you prefer, either way they're so pretty!

You can even add a mint sprig if you like. Add a scoop of vanilla ice cream or sweetened yogurt with chopped nuts.

Simple Poached Pears Recipe

Poached Pears Tips & Variations

  • Make it sweeter with sugar, maple syrup or honey.
  • Add warm spices like cloves, nutmeg, allspice, star anise, cardamom, etc.
  • Drizzle the poached pears with a sauce such as caramel sauce, chocolate sauce, raspberry sauce, crème anglaise, or a reduction of the poaching liquid.
  • Top with whipped cream or whipped coconut cream.
  • Sprinkle chopped toasted nuts, such as almonds, walnuts, or pistachios, over the poached pears.

Do pears need to be fully ripe before poaching?

You know how pears are never ripe enough the day you buy them at the store and you have to leave them on your counter for a few days before you can even take a bite? Poached pears work brilliantly with fruit that isn't quite there yet.

In fact, pears should still be slightly firm before poaching for the best results. The firmer they are, the longer they'll take to poach, but they're definitely worth the few extra minutes.

Do pears need to be peeled for poached pears?

Some recipes call for peeling the pears before poaching. Because this is a healthy poached pears recipe, I opted not to peel them. The skin has a lot of fiber and it gets very soft after poaching, so I highly suggest skipping the step of peeling.

Best Poached Pears Recipe

What To Serve With Poached Pears

Poached pears are a delicious dessert on their own, but they are also a nice complement to other dishes to enhance the flavors and presentation. Here are some ideas for what to serve with poached pears:

  • Vanilla ice cream
  • Yogurt or Greek yogurt
  • Oatmeal
  • Overnight oats
  • Pancake or waffle toppings (sliced up)
  • Biscuits or shortbread
  • Blue cheese, goat cheese, or gorgonzola cheese

How long do poached pears last in the fridge?

These healthy poached pears will last up to 5 days in the refrigerator. You can store them directly in the sweet sauce; they'll continue to soak up the flavor so they only taste better with time.

Best Poached Pears Recipe

Healthy Poached Pears

Yield: 4 servings
Prep Time: 5 minutes
Cook Time: 25 minutes
Total Time: 30 minutes

Try this easy dessert for healthy poached pears for a delicious dessert or snack. Serve alone or with ice cream.

Ingredients

  • 2 cups white grape juice
  • ¼ cup strawberry jam
  • ¼ cup orange juice
  • 2 teaspoon orange zest
  • 3 cinnamon sticks
  • 6 whole cloves
  • 1 teaspoon ground ginger
  • 4 medium pears

Instructions

  1. In a large pot, combine everything but the pears. Simmer over low heat for 10 minutes, stirring occasionally.
  2. Place the pears in the liquid. If the pears aren't covered by at least ¾, add water or more orange juice.
  3. Allow the pears to simmer until they're soft, about 10 minutes. Remove the pears and place them in individual serving dishes, then set them aside.
  4. Strain the poaching liquid, then return it to the pot and gently boil it until it's slightly thickened, about five minutes.
  5. Pour the sauce over the pears and serve immediately.
Nutrition Information:
Yield: 4 Serving Size: 1
Amount Per Serving: Calories: 246Total Fat: 1gSaturated Fat: 0gTrans Fat: 0gUnsaturated Fat: 0gCholesterol: 0mgSodium: 16mgCarbohydrates: 63gFiber: 7gSugar: 46gProtein: 1g

This data was provided and calculated by Nutritionix.

© Kristy Bernardo
Cuisine: American / Category: Lunch and Snacks
Healthy Poached Pears

Try these desserts next!

  • Coconut Banana Bread
  • Peach Pear Crisp
  • Easy S'Mores Pie
  • Pumpkin Pie Cake
  • Easy Air Fryer Desserts

Easy Macaroni Salad

May 22, 2023 by Monique McArthur Leave a Comment

Easy Macaroni Salad

With 5 simple ingredients, Macaroni Salad is an easy and inexpensive classic for potlucks, BBQs, or as an easy dish for lunch or dinner year-round.

Macaroni Salad

Why You'll Love This Macaroni Salad Recipe

Time allows the flavors to meld together, making macaroni salad recipe with mayo the perfect make ahead of time dish!

  • Mac salad is very easy to make and incredibly versatile.
  • Did we mention it's inexpensive and budget friendly?
  • There is a good chance all 5 pantry ingredients are on hand or easy to substitute.
  • This recipe comes together in under 30 minutes.
  • It's a meat free dish, but you can add in your favorite diced meat.
  • Macaroni salad is great for leftovers as it's ready to eat straight from the fridge.
  • Many call this a summer dish but we make this year-round.

Ingredients

With just 5 ingredients this macaroni salad with egg is incredibly easy to make.

  • Salad Macaroni Pasta: Salad macaroni are perfectly sized to match all the ingredients in this dish.
  • Hard Boiled Eggs: Cook all the way through and make ahead of time so that they are able to cool.
  • Celery: Chopped celery adds a delicious crunch and a nice variety of texture to the soft pasta.
  • Green Onion: The green onions add a punch of flavor to this pasta salad.
  • Mayonnaise: Use real mayonnaise or this quick and easy homemade mayonnaise recipe. You can also use a mayo substitute, if you prefer.

How to Make Macaroni Salad

(Scroll down to the bottom for the printable recipe card with exact measurements and recipe instructions.)

  1. Cook the Pasta: Cook the macaroni noodles according to package directions and rinse well with cold water to stop the cooking process.
  2. Assemble the Salad: Combine the macaroni noodles, mayonnaise, celery, green onion and eggs.
  3. Refrigerate: For best flavor, cover and refrigerate salad for at least 4 hours before serving, but preferably overnight.
  4. Taste Before Serving: The macaroni will absorb the mayonnaise as it chills in the fridge, so you may find it needs a little more mayonnaise. Possibly more salt and pepper.

Variations & Substitutions

We love this macaroni salad with egg as is but it's also a very flexible dish, and you can add or substitute all sorts of ingredients. The main thing to keep in mind is to make sure any add-ins are diced about the size of the pasta.

Here are some ideas for additions and substitutions for your macaroni salad:

  • Pasta Substitute: Use any short or similar sized pasta including macaroni noodles, ditalini, small shells, wagon wheels or elbow pasta.
  • Mayonnaise Substitute: For a lighter meal, substitute half of the mayonnaise for Greek yogurt.
  • Pimento Peppers: A jar of Pimentos is one of my favorite additions and plays very well with this salad.
  • Add Pickles: Sweet pickles, pickle relish, or dill pickles will all do the trick. Capers are a nice addition as well.
  • Paprika: Paprika adds a zest of flavor plus some color when dashed on top. Try regular, smoked, or sweet paprika with this salad.
  • Add More Vegetables: This salad works well with many vegetables including shredded carrots, red bell peppers, sweet bell peppers, red onions, dill pickles, corn, peas, olives, cauliflower, broccoli florets, or cherry tomatoes.
  • Add Herbs: Fresh parsley, chives, dried oregano, garlic powder, and dill all add a bit more flavor.
  • Add Protein: Try adding diced tuna (canned), chicken, baby shrimp, crab, diced ham, or chopped bacon or salami.
  • Add Vinegar: A tablespoon of vinegar will add more flavor, most kinds of vinegar will do, especially apple cider vinegar, white or red wine vinegar.
  • Get Cheesy: Mix in chopped or shredded cheddar.
  • Spice it Up: Add red pepper, hot sauce or jalapenos for some heat.
  • Make it Tangy: Stir in a little Dijon mustard for a tangier version of this salad.

Storage

Leftover macaroni salad can be stored in a refrigerator in an airtight container for up to 4 days. Macaroni salad does not freeze well so I don't recommend.

As previously mentioned, the macaroni will continue to absorb the mayonnaise and get drier as it sits in the refrigerator. Adding more mayonnaise will fix this. Be sure not let the salad sit at room temperature more than 2 hours.

How To Make Easy Macaroni Salad

Easy Macaroni Salad Recipe

Yield: 16
Prep Time: 15 minutes
Cook Time: 10 minutes
Additional Time: 4 hours
Total Time: 4 hours 25 minutes

This deli style macaroni pasta salad is made with eggs, fresh crunchy celery, mild green onions, and a creamy mayonnaise.

Ingredients

  • 16 oz (1lb) Salad Macaroni
  • 1 Cup of mayonnaise
  • 2 Hard boiled eggs cooked all the way through, diced or use egg slicer
  • 1 Cup celery
  • ½ cup green onion
  • Salt & pepper, to taste

Instructions

    1. Cook macaroni noodles according to package cooking directions.
    2. Drain and rinse with cold water to stop the cooking process.
    3. In a large bowl, combine macaroni noodles, celery, green onion and eggs. Stir until well-combined.
    4. Lightly mix and then add mayo and salt and pepper, to taste.
    5. Cover and refrigerate salad for at least 4 hours before serving, but preferably overnight.
Nutrition Information:
Yield: 16 Serving Size: 1
Amount Per Serving: Calories: 299Total Fat: 12gSaturated Fat: 2gTrans Fat: 0gUnsaturated Fat: 10gCholesterol: 41mgSodium: 125mgCarbohydrates: 38gFiber: 2gSugar: 1gProtein: 8g

This data was provided and calculated by Nutritionix.

© Monique McArthur
Cuisine: American / Category: Salads
Easy Macaroni Salad

What to Serve with Macaroni Salad

I love to serve it with:

  • Smoked Mac & Cheese
  • Smoked Cabbage
  • Grilled Artichokes
  • Shrimp & Sausage Boil
  • Hot Dogs
  • Ribs
  • Chicken Wings or Drumsticks

The Secret to Truly Easy Mashed Potatoes

May 22, 2023 by Kristy Bernardo Leave a Comment

a white bowl filled with easy mashed potatoes and garnished with fresh thyme leaves

Not all mashed potatoes are created equally. Read on to discover how to make easy mashed potatoes that are smooth and creamy, and will quite possibly be the best you've ever eaten!

I've made mashed potatoes just about every way imaginable, and this simple method is still my favorite. The secret is simple: overcooking the potatoes just a bit!

Instead of worrying about ricers, mashers, or mixers, the potatoes practically mash themselves once you add the butter and cream. They turn soft and fluffy, with a slightly rustic texture that feels homemade in the best way.

I like to use russet potatoes for their lightness, but Yukon Golds will make them extra creamy. Once the butter melts in, the smell alone will have everyone hovering near the stove!

a white bowl filled with easy mashed potatoes and garnished with fresh thyme leaves

These mashed potatoes are truly so easy to make that I make them at least once a week during the winter months. They're always on my holiday dinner table, too! I love to serve them with my prime rib recipe and green beans almondine. All three recipes are "fancy" yet very simple (even the prime rib!) and they make every holiday almost completely stress-free.

[feast_advanced_jump_to]

Ingredients

  • Russet potatoes: These make the fluffiest mashed potatoes, but Yukon Golds are great if you prefer a creamier texture.
  • Unsalted butter: I like to start with half a stick and add more as I mix until the potatoes taste rich and velvety.
  • Heavy cream: Warming the cream before adding it will help it to blend in easily and keeps the potatoes hot. You can substitute half-and-half or whole milk if you prefer.
  • Coarse salt: Potatoes need plenty of salt, so don't be shy. Taste as you go!
  • Freshly ground black pepper: Optional, and you only need a few turns of the grinder.
  • Fresh herbs (optional): Chopped parsley, chives, or thyme add a nice flavor and make a lovely garnish, especially for holidays or special dinners.

The Secret to Easy Mashed Potatoes

  1. Prep the potatoes: Peel the potatoes and cut them into chunks (about 1½ to 2 inches each and all approximately the same size so they cook evenly).
  2. Boil until very tender: Add the potatoes to a large pot and cover with cold water by about an inch. Add a generous pinch of salt. Bring to a boil, then lower to a steady simmer. Cook until the potatoes are fully tender and just starting to fall apart (about 25 to 30 minutes). They should look a little overdone; that's what makes them mash easily by hand.
  3. Drain and dry: Drain the potatoes in a colander, then return them to the warm pot. Let them sit uncovered for a few minutes, shaking occasionally, so any excess moisture steams off.
  4. Add the butter: Add the butter directly to the hot potatoes a tablespoon at a time. Use a wooden spoon or sturdy spatula to stir and break them apart as the butter melts. The heat from the potatoes helps the butter soak in and gives them a silky texture.
  5. Add the cream: Slowly pour in the warm cream a little at a time, stirring gently between additions until the potatoes reach your desired consistency. If you like them looser, add a bit more cream. For a fluffier texture, stop when they're just creamy enough.
  6. Season to taste: Stir in the salt and pepper, then taste and adjust. Potatoes can handle more salt than most people think! One of the single most important things to getting amazing mashed potatoes is getting the seasoning just right.
  7. Fluff and serve: Give them a final stir with a fork to lighten them up, then transfer them to a serving dish. Add an extra pat of butter on top and a sprinkle of herbs if you like. Serve immediately while they're still warm.

Equipment Needed

Here's a list of all the kitchen items you'll need. Getting everything ready (including your ingredients) before starting makes any recipe much simpler.

  • Large pot: You want one that's big enough to hold the potatoes with plenty of room for water to circulate while they cook.
  • Colander
  • Wooden spoon or a sturdy spatula
  • Measuring cups and spoons
  • Small saucepan or microwave-safe bowl: To warm the cream (cold cream will cool the potatoes which you definitely don't want).
  • Chef's knife and cutting board
  • Large mixing bowl or serving dish
  • Fork: For fluffing the potatoes right before serving.

Tips

  • Overcook the potatoes on purpose: Let the potatoes go a few minutes past fork-tender, when they're just starting to fall apart. That's the key to mashing them easily by hand without a ricer or mixer, and what makes these truly easy mashed potatoes!
  • Start with cold water: Adding potatoes to boiling water can cause the outsides to cook too fast and turn gluey before the insides are soft. Start with cold water and let them heat gradually.
  • Warm the cream: Pouring cold cream into hot potatoes can make them dense and cold.
  • Add the butter first, then the cream: Melting the butter into the hot potatoes before adding the cream gives them a silkier texture.
  • Taste as you go: Mashed potatoes need a lot of salt or they'll be flavorless. Keep tasting and seasoning until they're just right!
  • Fluff with a fork before serving: Once everything's mixed in, gently stir the mashed potatoes with a fork to give them a hand-whipped texture.
  • Keep them warm: If dinner isn't quite ready, loosely cover the pot and set it over very low heat for up to 30 minutes, stirring occasionally to prevent them from sticking to the bottom of the pot.

Variations

These easy mashed potatoes are great on their own, but here are some additions you can add to keep things interesting:

  • Roasted garlic
  • Blue cheese or gorgonzola and fresh chives
  • Goat cheese
  • Browned butter
  • Parmesan - use this either as a mix-in or sprinkle on the top and broil for a gorgeous browned top
  • Bacon and grated cheddar
  • Make buttermilk mashed potatoes simply by substituting regular milk with buttermilk
  • Horseradish (goes especially well with prime rib)
  • Swirl in a bit of mashed sweet potato for a gorgeous presentation and added flavor
  • Cream cheese mashed potatoes - bring it to room temperature then stir in cream cheese while the potatoes are piping hot
  • Sour cream (and chives!)
  • Caramelized onions - stir them in or use as a topping
  • Make a tex-mex version with chopped bell peppers, chopped poblano peppers, jalapeños, and a mexican-blend shredded cheese
  • Mashed cauliflower is a delicious substitute for mashed potatoes without the carbs

How Many Potatoes Will I Need?

When serving these easy mashed potatoes as a side dish, you'll want to plan on ⅓ to ½ pound potatoes per person. The recipe can easily be scaled up or down!

Number of GuestsMinimumMaximum
Potatoes for 2⅔ pound1 pound
Potatoes for 41 ⅓ pounds2 pounds
Potatoes for 62 pounds3 pounds
Potatoes for 82 ⅔ pounds4 pounds
Potatoes for 103 ⅓ pounds5 pounds
Potatoes for 124 pounds6 pounds

Russet potatoes vary in weight, here are their approximate weights by size:

  • Large russet potato weighs about 1 lb.
  • Medium russet potato weighs about ½ lb.
  • Small russet potato weighs about ⅓ lb.

Storage and Make-Ahead

  • Make-ahead: These easy mashed potatoes can be made up to a day in advance. Once finished, let them cool slightly, then transfer them to a covered dish or airtight container and refrigerate. Before serving, reheat them gently on the stovetop over low heat, adding a bit more cream or milk if they've thickened too much.
  • Keeping them warm: If you're serving them the same day, you can keep them warm for up to 30 minutes. Cover the pot and place it over the lowest heat setting, stirring occasionally to prevent sticking. A slow cooker set to "warm" also works well.
  • Refrigeration: Store any leftovers in an airtight container for up to 4 days. They reheat well and can even serve as the base for shepherd's pie or potato pancakes.
  • Freezing: Let the mashed potatoes cool completely, then portion them into freezer-safe containers or bags. Freeze for up to 2 months. To reheat, thaw overnight in the refrigerator, then warm over low heat with a bit of butter or cream.
  • Reheating tip: Avoid microwaving on high heat, as it can dry them out. Instead, use 50% power or reheat in a covered dish in the oven at 325°F until hot.

Frequently Asked Questions

Why do you overcook the potatoes on purpose?

Overcooking makes the potatoes so soft they practically mash themselves. It's an easy way to skip the ricer or mixer and still get creamy, delicious and EASY mashed potatoes.

Can I use Yukon Golds instead of russets?

Yukon Golds give a naturally buttery flavor and creamier texture, while russets make lighter, fluffier mashed potatoes. You can even use a mix of both.

Do I need to peel the potatoes?

Russets are best peeled, but if you're using Yukon Golds, you can leave the skins on for a more rustic version.

What if my mashed potatoes turn out too thick?

Just stir in a little more warm cream until you reach your desired consistency. Add a small amount at a time so you don't overdo it.

How can I make them extra rich?

Add more butter, or swap some of the cream for sour cream, cream cheese, or a spoonful of mascarpone.

Can I make these dairy-free?

Use olive oil or vegan butter instead of regular butter and a rich non-dairy milk (like cashew or oat milk).

What's the best way to reheat mashed potatoes?

Reheat slowly on the stovetop over low heat with a little more cream or milk, stirring often.

Can I make mashed potatoes ahead for Thanksgiving or Christmas?

Prepare them a day ahead, refrigerate, then reheat them slowly in a covered pot with a bit of butter and cream. They'll taste just as good as freshly made!

Pairings

Here are the dishes we love to serve with these easy mashed potatoes:

  • a slice of prime rib on a white plate with mashed potatoes and grilled asparagus, next to a small dish of horseradish sauce. the rest of the standing rib roast is in the background
    Perfect Standing Rib Roast + Garlic Mustard Wet Rub
  • a spiral sliced ham on a white plate with fresh orange wedges on a wood table
    How to Cook a Spiral Ham (plus a Ham Glaze recipe)
  • a white bowl filled with homemade creamed corn and topped with chopped parsley on a tan napkin on a wood table
    Homemade Creamed Corn Recipe (With or Without Cream)
  • Roasted Carrot Souffle Recipe
    Roasted Carrot Souffle
a white bowl filled with easy mashed potatoes and garnished with fresh thyme leaves

Easy Mashed Potatoes

Yield: 8-10 servings
Prep Time: 10 minutes
Cook Time: 30 minutes
Total Time: 40 minutes

There's no need for a ricer or mixer with this easy recipe. The secret is to slightly overcook the potatoes just until they're beginning to fall apart. Try it yourself and see how simple it is!

Ingredients

  • 4 pounds russet potatoes
  • ⅓-1/2 cup unsalted butter, softened to room temperature
  • 1 cup heavy cream, gently warmed
  • 1 teaspoon coarse salt (or more if needed)
  • ¼ teaspoon freshly ground black pepper
  • optional: chopped fresh herbs, for garnishing (parsley or thyme)

Instructions

      1. Peel and cut the potatoes into even 1½ to 2-inch chunks.
      2. Place the potatoes into a large pot and cover with cold water by about 1 inch. Bring to a boil, then reduce to a simmer and cook for 25–30 minutes, or until the potatoes are very tender and just starting to fall apart.
      3. Drain the potatoes well, then return them to the warm pot. Let them sit uncovered for 2–3 minutes to allow excess moisture to evaporate, shaking the pot occasionally.
      4. Add the butter, a tablespoon at a time, directly to the hot potatoes. Stir with a wooden spoon or spatula until the butter melts and coats the potatoes.
      5. Slowly pour in the warm cream, stirring gently between additions until the potatoes reach your desired consistency.
      6. Add salt and pepper to taste.
      7. Use a fork to lightly fluff the potatoes, then transfer to a serving dish. Top with extra butter and chopped herbs, if desired. Serve immediately.

Notes

You can make these the more common way by cooking them just until tender, then putting them through a potato ricer or using a hand mixer to blend in the butter and cream.

Nutrition Information:
Yield: 10 Serving Size: 1
Amount Per Serving: Calories: 393Total Fat: 24gSaturated Fat: 15gTrans Fat: 0gUnsaturated Fat: 8gCholesterol: 67mgSodium: 246mgCarbohydrates: 40gFiber: 4gSugar: 3gProtein: 6g

This data was provided and calculated by Nutritionix.

© Kristy Bernardo
Cuisine: American / Category: Sides
The Secret to Truly Easy Mashed Potatoes

Smoked Brisket Recipe

May 21, 2023 by Monique McArthur Leave a Comment

Smoked Brisket

Smoked Brisket is one of the easiest large cuts of meat to smoke. It takes time to achieve tender, juicy beef with bark and a smoke ring, but it is time well spent!

Smoked brisket is a staple of American barbecue for good reason. When done right, it's tender, flavorful, juicy, and a crowd-pleaser at any gathering. However, smoking a brisket can be intimidating. Fortunately, with the right recipe and know-how, it is easy to achieve mouthwatering results. For this recipe, I chose a brisket flat since this part of the brisket is easier to smoke than a whole packer (and much less time-consuming).

Best Smoked Brisket Recipe

Why You'll Love Smoked Brisket

  • Flavorful - You get tons of flavor from the dry rub, cut of beef, smoking wood, and cooking method. Basically, you have flavor coming at you in all directions, and wow, is it a treat!
  • Perfect for gatherings - Smoked brisket is ideal for entertaining. Although leftovers are equally outstanding, it is made to feed a crowd.
  • Simple ingredients - Chances are, you'll only need to go out and purchase the brisket and smoking wood. The remaining ingredients are pantry staples waiting to be used to make something delicious.
  • Bark - Smoked brisket is nothing without it! Bark is a combination of the spices from the dry rub and the proteins from the meat. During cooking, a chemical reaction occurs between the two resulting in a dark, intensely flavored crust forming over the beef.
  • Versatile - With smoked brisket comes a world of possibilities. Serve slices with a side dish, make sandwiches, try brisket grilled cheese, brisket nachos, brisket tacos, pizza, you name it.

Smoked Brisket Ingredients Notes

To make smoked brisket, you'll need the following:

  • Brisket: Choose a well-marbled brisket flat with dark red meat. The fat cap should be clear white and free of any discoloration. Discoloration indicates that it's been sitting on the shelf for a while. Lastly, brisket is labeled choice or prime at grocery stores and butcher shops. Go with prime when available. Choice ranges between 4-10% fat, while prime is 10-15% fat. When it comes to slow smokes, fat is vital, Franklin BBQ recommends about a ½ inch fat cap. It not only keeps the meat moist and tender, but the flavor it offers is phenomenal.
  • Seasonings: Use your own seasoning, store-bought, or this easy dry mix. I kept it simple with a combination of salt, pepper, chili powder, onion powder, garlic powder, and oregano. The real stand-out ingredient of the rub is the type of chili powder used. Feel free to use any you have on hand, but New Mexico chile powder has an undertone of dried cherries that works well here.  
  • Smoking wood: Although not technically an ingredient, smoking wood is essential for smoked brisket. Hickory, oak, apple and cherry are great options. Hickory imparts an intense wood fire flavor with some sweetness and is reminiscent of bacon. On the other hand, oak brings an earthy smokiness that isn't as intense as hickory but is more robust than fruit wood and burns longer. As for cherry, it's an excellent choice if you like subtly smoked meat with fruity undertones.
Raw Beef Brisket

Find the complete smoked beef brisket ingredients list with amounts in the recipe card below!

How to Make Smoked Brisket

  1. Prepare the brisket: Pat it dry to remove excess moisture, then trim any excess fat from the brisket, leaving a quarter-inch fat cap on top.
  2. Apply the rub: Combine the dry rub ingredients in a bowl and apply it all over the brisket.
  3. Leave it be: Transfer the seasoned brisket to a bowl or platter, cover, and leave it in the refrigerator for 8 hours. The rub not only adds flavor to the brisket but it promotes a better bark by drying out the surface of the beef.
  4. Prepare the smoker: Preheat the smoker to 250 degrees Fahrenheit and add the wood.
  5. Time to smoke: Transfer the brisket to the grates, close the lid and smoke for a few hours.
  6. Wrap it up: After some time, wrap the smoked brisket in butcher paper to speed up cook time and keep it moist as it cooks. The great thing about butcher paper is that although it covers the meat, the paper is breathable, thus allowing smoke through while not interfering with the formation of bark.
  7. Rest: Remove the smoked brisket from the grates and rest for 30 minutes. You never want to slice brisket immediately because all the juices will escape. Once rested, slice against the grain and serve.
Whole Smoked Brisket with bark

Variations, Substitutions, and Cooking Tips

Use a meat thermometer - A meat thermometer is a must-have tool when smoking brisket. It ensures the meat is cooked to the proper temperature and helps avoid overcooking. Other methods to check doneness, like the poke test, aren't very accurate.

Fat cap up - Place the brisket fat side up in the smoker to ensure the fat cap melts and bastes the meat as it cooks, resulting in a juicier brisket with more flavor. When it comes to the debate of fat-side up or fat-side down, there is no definitive right or wrong answer. Personally, I've experimented with both methods, and I find myself in the fat side up camp. If you're still uncertain, do your own research and weigh the advantages of cooking the brisket with the fat side up or down.

Customize the rub - There are many ways to make the rub all your own. Add sugar, use different spices, change the herbs, or keep it simple with salt and black pepper. Your smoked brisket will be delicious no matter what.

Time to Smoke Brisket Per Pound - Plan to smoke a brisket about 1 hour and 30 minutes per pound (lb) while following the smoking directions to temperature.

The Brisket Stall - Expect the the temperature of the meat to stop rising after about two to three hours, when it hits 150°F to 170°F. This is normal with a large piece of meat and will eventually continue to rise.

Best Brisket Internal Temperature - The ideal temperature to pull brisket is at 195°F - 205°F. Keep in mind the brisket will continue to rise in temperature about 10°F while resting. Another good indicator that the brisket is done is if you can slide a thermometer in with similar resistance as warm butter.

Rest the meat - Resting smoked brisket after cooking allows the juices to redistribute, resulting in tender, juicy slices.

Troubleshooting Bark Not Forming

If there is no bark on your brisket it is often caused by one of 6 reasons.

  • Rub: Not enough rub was applied which is crucial to forming the bark.
  • Moisture: Too much moisture will cause the bark to not form and will also wash away rub. Refrain from spritzing too often or too much.
  • Wrapping: Wrapping is called the Texas Crutch which speeds up the cooking process but also can trap moisture. As called for in this recipe, prior to wrapping, let the bark form by waiting for the brisket to achieve a minimum temperature of 160°F and a desired color and bark.
  • Low Heat: Too low of a temperature can prevent the bark from forming so cook at a higher temp. This recipe calls for 250°F which is more than enough to ensure a bark forms.
  • Smoke: The chemical reaction from the smoke aids in forming the bark. Not enough smoke or inconsistent smoke levels can result in the bark not forming.
  • Fat Cap: Too much fat can prevent the bark from forming so trim more fat off until there is about half inch fat cap prior to smoking the meat.
Smoked Brisket

Smoked Brisket Recipe

Yield: 8 Servings
Prep Time: 8 hours
Cook Time: 8 hours
Total Time: 16 hours

Brisket is one of the easiest large cuts of meat to smoke. It takes time to achieve tender, juicy beef with bark and a smoke ring, but it is time well spent!

Ingredients

  • 5-pound brisket flat
  • 2 ½ tablespoons kosher salt
  • 1 tablespoon black pepper
  • 2 teaspoons garlic powder
  • 2 teaspoons New Mexico chile powder
  • 2 teaspoons onion powder
  • 1 teaspoon dried oregano
  • *You'll also need Butcher Paper

Instructions

  1. Pat the beef dry with paper towels, trim excess fat with a sharp knife, leaving a ¼-inch fat cap intact, and remove the silver skin.
  2. Combine the seasonings in a bowl to make the rub, then apply the rub all over the brisket. Gently massage it into the meat.
  3. Pop the brisket into a bowl, cover, and refrigerate overnight.
  4. Set the brisket out for an hour before smoking to bring it to room temperature.
  5. Preheat your smoker or wood pellet grill to 250 degrees Fahrenheit. I recommend hickory, oak, or cherry for this cook, but you can use any you like. If using chips, soak them in water for an hour.
  6. Transfer the brisket to the grill fat side up, close the lid, and smoke for 3 hours or until the internal temperature reaches 160-165 degrees Fahrenheit.
  7. Remove the brisket from the grill.
  8. Wrap the brisket in butcher paper (or foil in a pinch) while keeping it fat-side up, then return the wrapped brisket to the grates to smoke for 5-6 hours or until the internal temperature reaches 195 degrees Fahrenheit.
  9. Remove the brisket from the grill, rest for 30 minutes, then slice against the grain and serve as desired.

Notes

Use your own seasoning, store-bought, or the dry mix seasoning provided.

The ideal temperature to pull brisket is at 195°F - 205°F. Keep in mind the brisket will continue to rise in temperature about 10°F while resting. Another good indicator that the brisket is done is if you can slide a thermometer in with similar resistance as warm butter.

Nutrition Information:
Yield: 8 Serving Size: 8
Amount Per Serving: Calories: 827Total Fat: 52gSaturated Fat: 21gTrans Fat: 0gUnsaturated Fat: 24gCholesterol: 301mgSodium: 1317mgCarbohydrates: 2gFiber: 0gSugar: 0gProtein: 82g

This data was provided and calculated by Nutritionix.

© Monique McArthur
Cuisine: American / Category: Dinner
Smoked Brisket Recipe

Try These Recipes Next!

  • Best Smoker Recipes
  • Smoked Queso Dip
  • Smoked Pork Chops
  • Smoked Mac and Cheese
  • Smoked Corn On The Cob
  • Smoked Cabbage with Chili Lime Butter

Grilled Asparagus with Lemon Zest

May 19, 2023 by Monique McArthur Leave a Comment

Grilled Asparagus

From garden to grill, enjoy the natural flavors of grilled asparagus! Get your daily dose of greens with this simple and flavorful side dish.

Grilled asparagus with lemon zest is a simple and delicious way to enjoy this versatile vegetable. Whether served as a side dish or used to create an incredible main, grilled asparagus is sure to please. The smoky charred flavor with its tender texture will have you hooked.

Grilled Asparagus with Lemon Zest

Why You'll Love Grilled Asparagus

  • Quick and easy - Asparagus spears are grilled and ready to go in 10 minutes or less.
  • Basic ingredients - Asparagus, salt, pepper, oil, lemon, and garlic are all you need. Don't you love an uncomplicated dish?
  • Healthy - Asparagus is a nutritious, low-calorie vegetable high in fiber, folate, and vitamins A, C, and K.
  • Versatile - There are endless ways to serve grilled asparagus. They are great alone, you can add the spears to a salad or pasta dish, soup, and much more.

Grilled Asparagus Ingredients Notes

To make grilled asparagus, you need:

  • Asparagus: Choose fresh asparagus with firm, bright green stalks that are plump. You also want to check that the tips are tightly closed. As for whether to choose thick or thin spears, the choice depends on your preference and cooking style. Some like thicker, heartier spears, whereas others enjoy thin, delicate ones. One thing to consider if you go thin is grill time since they cook faster.
  • Olive oil: Specifically, extra-virgin olive oil, coats the asparagus to help the seasonings stick and to prevent the asparagus from sticking to the grates. Since these are going over medium-high heat, stick with extra-virgin olive oil because it has a higher smoke point.
  • Salt and pepper: Without this duo, you will notice that something is missing. Asparagus are naturally bitter and earthy, but a touch of salt and pepper balances this.
  • Garlic: Adds a delicious layer of flavor to the asparagus.
  • Lemon zest: Gives a fresh, lemony flavor and aroma that complements the asparagus.
Grilling Asparagus

Find a complete ingredients list with amounts in the recipe card below!

How to Make Grilled Asparagus

  1. Prepare the asparagus: Rinse the asparagus and trim the ends. From there, use a vegetable peeler to expose the lighter part of each stem.
  2. Preheat the grill: Preheat your grill to medium-high heat. If you don't have a grill, use a grill pan.
  3. Coat the asparagus: In a small bowl, whisk together olive oil, salt, and pepper. Then, drizzle the asparagus with this mixture and toss to coat.
  4. Grill the asparagus: Place the asparagus on the grill and cook for 5-10 minutes until charred and tender. As the asparagus cooks, take a moment to sauté the garlic in the remaining oil, then stir in the lemon zest.
  5. A final touch (optional): Toss the grilled asparagus in the garlic and lemon mixture to add another layer of flavor.
  6. Serve: Transfer the asparagus to a serving platter and enjoy.

Variations, Substitutions, and Cooking Tips

Select asparagus spears that are the same thickness - Otherwise, they will not grill evenly.

Use a grill pan - If you don't have an outdoor grill, use a grill pan. When using a grill pan, give it time to reheat before placing the asparagus on the grates.

Try different seasonings - Experiment with herbs and spices, such as thyme, rosemary, or paprika, to switch up the flavor to suit your taste.

Use a marinade - Marinate the asparagus for a few hours before grilling for even more flavor. Balsamic, soy sauce, lemon juice, and a few crushed garlic cloves is a yummy combo.

Add parmesan cheese - Top grilled asparagus with freshly grated Parmesan cheese before serving for a cheesy twist. The cheese melts immediately on contact to form a delicious salty, nutty layer.

Use wood chips - Use a handful of wood chips to give the grilled asparagus a smokier flavor and aroma. Don't forget to soak them before use.

What To Serve With Grilled Asparagus

What to Serve with Grilled Asparagus

Grilled asparagus is a versatile dish that pairs well with many different foods. Some ideas to consider include the following:

  • Garlic chips: Oh my! The fried slivers of garlic are meant to garnish grilled asparagus.
  • Grilled meats: Serve asparagus alongside grilled chicken, steak, or fish.
  • Pasta: Toss grilled asparagus with pasta and a simple sauce for a quick meal.
  • Salad: Add grilled asparagus to a salad with mixed greens, tomatoes, and a balsamic vinaigrette dressing.
  • Rice (or quinoa): Serve grilled asparagus over a serving of rice or roughly chop it and incorporate it into a seasonal pilaf for a filling and nutritious meal.

Storage and Freezer Tips

The chance of leftovers is slim, but in the rare event, skip the freezer and store leftover grilled asparagus in the refrigerator. Wrap it in a foil pouch or store the grilled spears in an airtight container. I wouldn't suggest keeping them longer than 3 days.

How to Reheat

It is best to reheat grilled asparagus on the stovetop. Start by adding a little oil to a nonstick skillet and heat it over medium. Once the skillet is hot, add the asparagus and cook while occasionally moving the spears around for a few minutes.

Grilled Asparagus

Grilled Asparagus with Lemon Zest

Yield: 4 Servings
Prep Time: 5 minutes
Cook Time: 5 minutes
Total Time: 10 minutes

From garden to grill, enjoy the natural flavors of grilled asparagus! Get your daily dose of greens with this simple and flavorful side dish.

Ingredients

  • 1 pound fresh asparagus
  • 3 tablespoons extra-virgin olive oil, divided
  • ½ teaspoon fine sea salt
  • ¼ teaspoon black pepper
  • 2 garlic cloves, minced and crushed into a paste
  • Zest of half a lemon

Instructions

  1. Trim the tough ends off each asparagus spear and peel the bottom of each spear with a vegetable peeler to expose the lighter green part.
  2. Prepare a grill for medium-high heat cooking.
  3. Whisk 2 tablespoons of oil in a bowl with salt and black pepper.
  4. Drizzle the asparagus spears with the oil mixture and toss to coat.
  5. Transfer the asparagus to the grill and cook for 5-10 minutes, turning occasionally or until tender. The total time will depend on how thick the spears are.
  6. (optional) Meanwhile, heat the remaining oil in a small pan over medium-low heat. Add the garlic and cook while stirring for a few seconds, then transfer to a large bowl.
  7. (optional) Stir in the lemon zest, then add the grilled asparagus to the garlic and lemon mixture. Toss to coat.

Notes

Adding garlic and lemon is a nice twist on grilled asparagus but you can't go wrong with just olive oil, salt and pepper. Season how you prefer.

© Monique McArthur
Cuisine: American / Category: Sides
Grilled Asparagus with Lemon Zest

Try these recipes next!

  • Grilled Avocado
  • Grilled Artichokes
  • Grilled Eggplant
  • Grilled Teriyaki Chicken Wings
  • Grilled Trout with Fresh Herbs, Garlic & Lemon
  • « Previous Page
  • 1
  • …
  • 3
  • 4
  • 5
  • 6
  • 7
  • …
  • 18
  • Next Page »

Trending Recipes

  • a metal basket lined with parchment paper that's filled with air fryer flautas mexicanas and topped with pico de gallo, guacamole, and Cacique cheese. there are bowls of guacamole and fresh pico de gallo in the background.
    Air Fryer Flautas Mexicanas – Crispy in Minutes!
  • a closeup of a coconut smoothie bowl topped with fresh blueberries, granola, and goji berries
    Coconut Smoothie Bowl
  • top down view of two birria tacos on a wooden board next to a small bowl of consommé
    Authentic Birria Tacos Recipe (Step-by-Step with Consommé)
  • A stack of keto chocolate chip cookies next to a glass of milk
    Keto Chocolate Chip Cookies

Popular Spring Recipes

  • a white dish with scalloped edges, filled with an easy pea salad that's topped with chopped parsley on a wooden table
    Make-Ahead Easy Pea Salad for Parties
  • Fried Deviled Eggs on a white plate
    Fried Deviled Eggs with Sausage
  • Beet-Pickled Deviled Eggs Recipe
    Beet-Pickled Deviled Eggs
  • A keto salad on a white plate, made up with grilled romaine, sliced cherry tomatoes, thinly sliced avocado and halved lemon slices for a garnish.
    Keto Salad | Lemony Romaine and Avocado Salad

Footer

↑ back to top

  • Privacy Policy
  • About
  • Contact
  • Cookbooks

Copyright © 2026 The Wicked Noodle